Legend Tab
Contents
About the Legend Tab
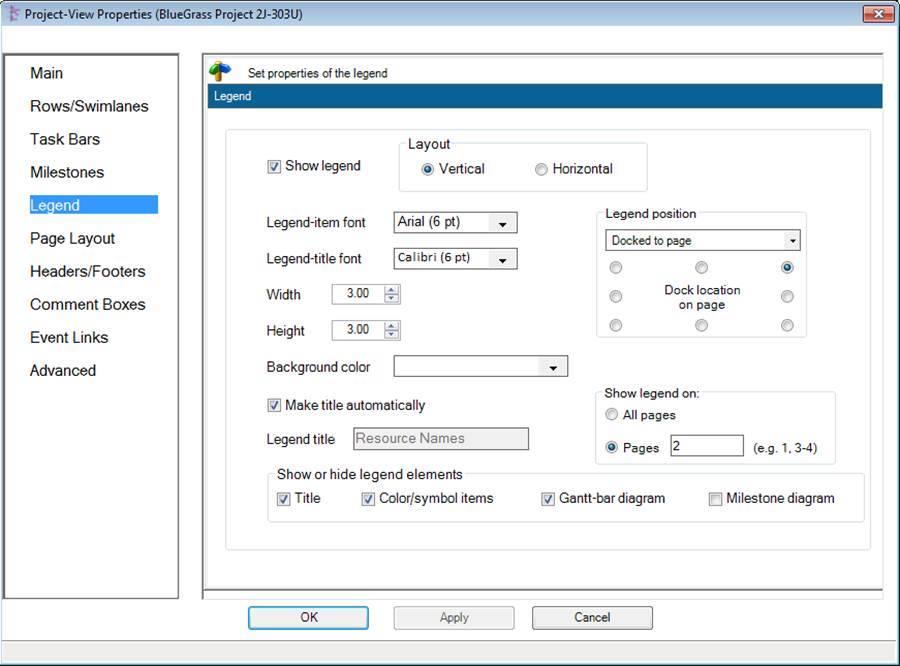
This tab page, shown below, lets you control the format, position, and contents of the legend that may appear on the project view. Additionally, within this tab are the controls for specifying where the legend will appear in multi-page outputs.
Basic Legend Properties:
1) Show legend: This checkbox allows you to shows or hides the legend. You may show the legend box as a horizontally oriented box as shown below. The default orientation for the legend box is vertical. In multi-page outputs this check box applies to all pages.

2) Legend-item font: This drop down button provides access to the “Font properties” form that allows you to set and change the font characteristics of legend item text. The “Font properties” form is standard throughout OnePager.
3) Legend-title font: This drop down button provides access to the “Font properties” form that allows you to set and change the font characteristics of the legend’s title.
4) Width and Height: The width and height controls for the legend is expressed in inches or centimeters depending on your selection in the template.
5) Background color: The legend’s background color is controlled by the drop down button which gives you access the standard “Color Chooser” form.
6) Make title automatically: This check box, when checked (the default setting), lets OnePager automatically generate the “Legend Title.”
- a) The automatic title is based on the name of the column from your Microsoft Project plan you selected for ”Gantt Bar/Milestone Fill Color” on the “Task Bars” and ”Milestone” tabs.
- b) The automatic title may also reflect your Microsoft Project plan columns used for color or shape in conditional formatting.
- c) When the check box is UNCHECKED, the “Legend title” window below is activated and you may enter the desired title for the legend that will appear.
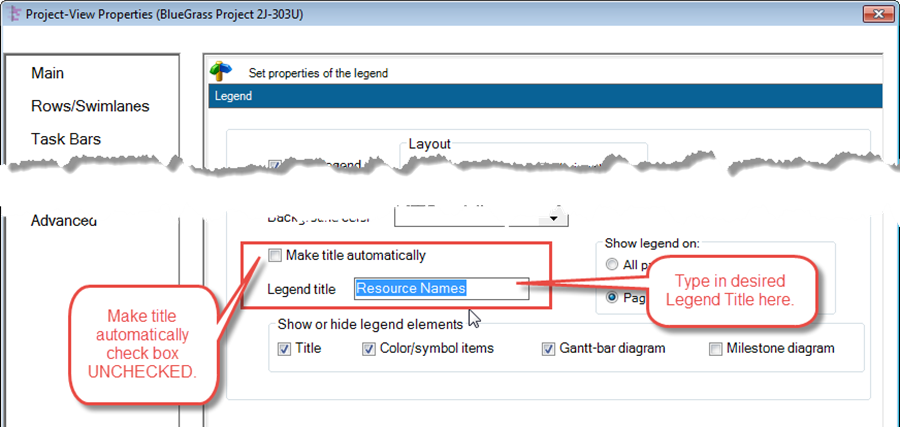
- d) Legend title: This text window allows you to type in a desired legend title when the “Make title automatically” check box is UNCHECKED as described above.
Positioning the Legend in the View and in the Document:
1) Legend Location Controls: The initial position of the legend is controlled by the template. There are eight (8) compass locations that can apply to either the graph or the page, yielding 16 docking positions in all. You can later drag the legend to any location on the screen.

- a) Since anchoring is preferred over free-floating, we designed OnePager so that if you drag the legend away from one of its docked locations, it becomes anchored to the same location as it was formerly docked to.
- b) You can always change the anchor location, but this convention leads to the best results when you drag the legend away from one of the fixed docking locations.
2) Legend Docking and Anchoring Options: There are four docking and anchoring options that control how the eight compass locations are interpreted. These options can be accessed from the drop down menu shown below:
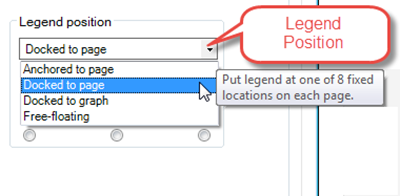
- a) Docked Defined: The term “docked” means that the legend will be placed in one of the sixteen (16) positions on the edges and corners of the graph (8) or on the edges and corners of the page (8). If you choose not to dock in one of these 16 locations, it is recommended that you anchor the legend to one of the eight edges or corners of the pages. See earlier discussion on docking and anchoring for the explanation. Anchoring has absolutely no effect on single-page views.
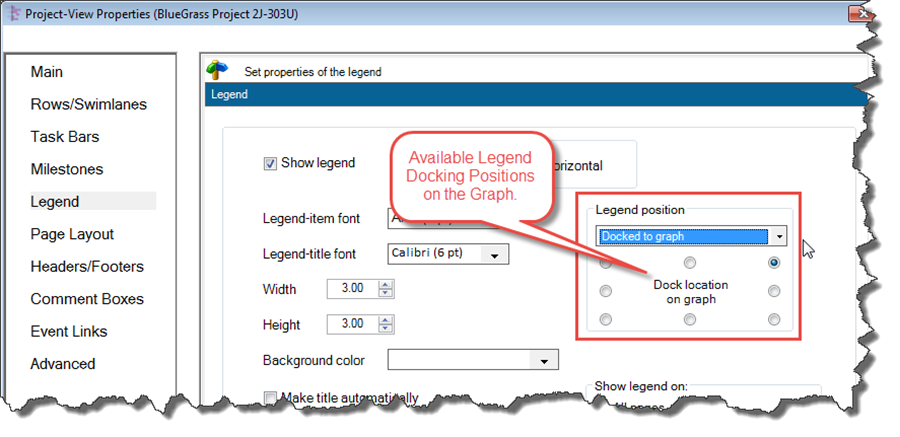
- b) Docked to graph: When this option is selected, OnePager will place the legend at one of the eight (8) compass points along the edges and corners of the graph area (the rectangular area containing tasks and milestones, which excludes row labels, swimlane labels, time axis labels, headers/footers, and title. The selection windows in the “Legend” tab of the “Project-View Properties” form looks like this:
Legends in Multi-Page Project Views
- c) In a multi-page project view, the legend will appear at the same location within the graph if you are displaying the legend on all pages.
- d) Docked to page: When this option is selected, OnePager will place the legend at one of the eight (8) compass points along the edges and corners of the page. The selection windows in the “Legend” tab of the “Project-View Properties” form looks like this:
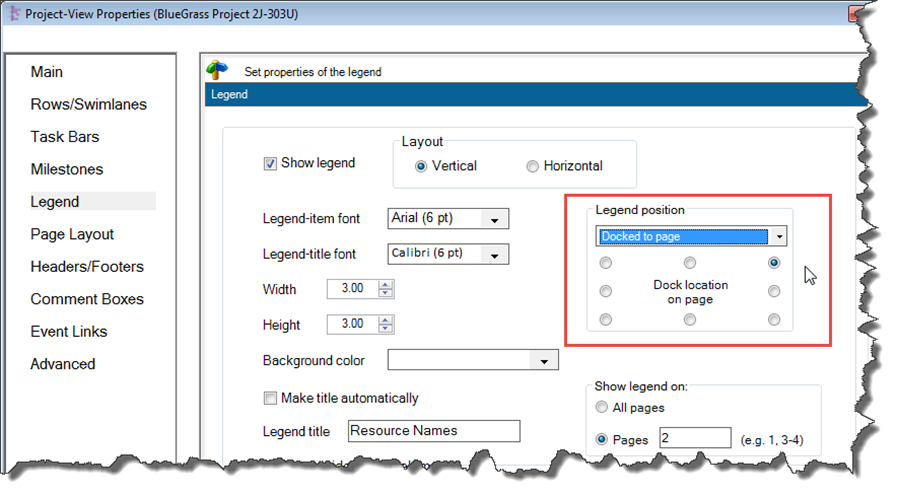
- e) Multi-Page: In a multi-page project view, the legend will appear at the same location on each page if you are displaying the legend on all pages. When you select individual pages upon which to display the legend, the legend will appear at the same compass point on all pages where the legend is to be displayed.
- f) Free-floating: In this option, the legend is the position where you dragged it, so it is no longer docked in one of the 16 fixed locations. This mode may result in unusual positions when the document is divided into multiple pages. In multi-page situations “anchored” to page is preferred over free-floating. The selection windows in the “Legend” tab of the “Project-View Properties” form looks like this:
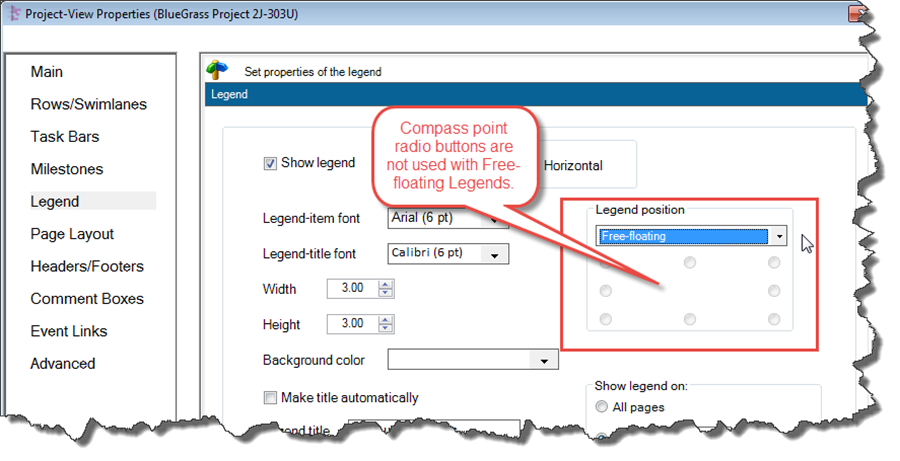
Not Recommended
- g) As noted above, the eight (8) radio buttons do not play a part in legend positioning in the “Free-floating” option so they are ghosted. Since there is currently no way for you to manually place the legend in a different undocked location on each output page, this option is not recommended.
- h) Anchored to page: In this option the legend is associated with one of the eight compass positions, but is placed as the same relative position on each page of the multi-page output. The selection windows in the “Legend” tab of the “Project-View Properties” form looks like this:
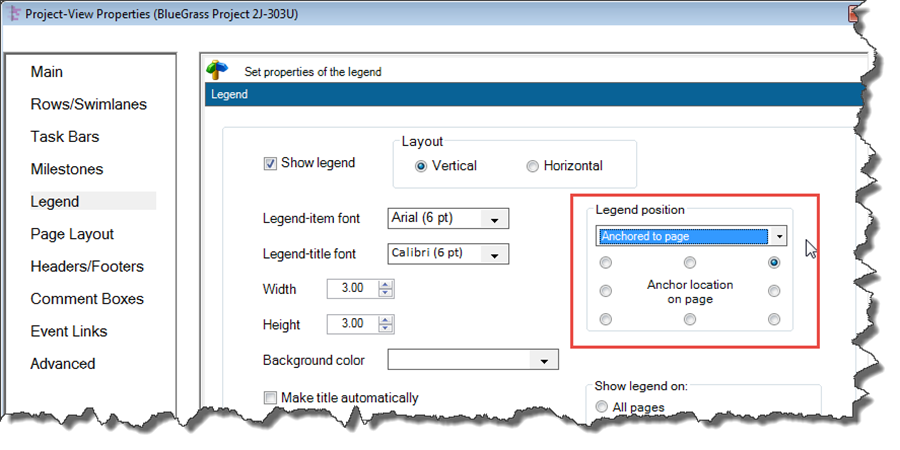
- i) Multi-Page: When doing a multi-page view after dragging the legend to a different location, it is recommended to anchor the legend at the same relative position relative to one of the eight (8) compass positions along the edges or corners of the page.
- j) Show Legend on Group: The “Show Legend on” group has the controls to tell OnePager on what pages to display the legend as shown below:
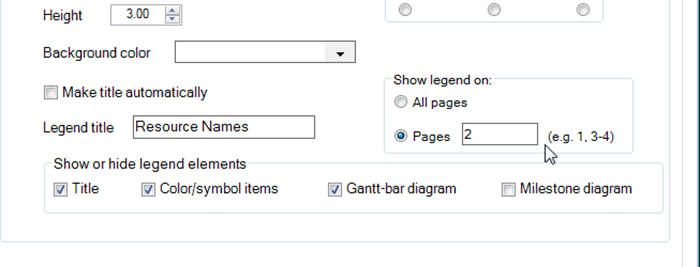
- k) For selecting specific pages for which you want the legend to appear, use the same page selection conventions as are used in Microsoft Project or Excel. If the “Pages” radio button is set ON but there is no information in the page number window, just type in the page using the format example shown at the right of the page number window.
- l) Show or hide legend elements: These check boxes allow you to control the elements of the Legend that will be displayed. The controls are shown below:

- m) Title: Checking this box will cause the Legend Title to be displayed in the Legend.
- n) Color/symbol items: Checking this box will cause the legend item text and their colors/symbols to be displayed.
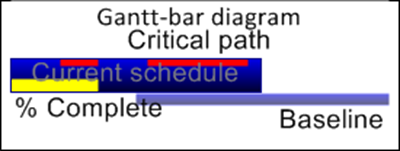
- o) Gantt-bar diagram: This command displays an explanatory diagram that shows how the Gantt bars are “decorated” to show baseline, percent complete, and critical path.
- p) Milestone diagram: This command displays an explanatory diagram shown below for milestones at the bottom of the legend, just as you can show such an explanation for Gantt bars.
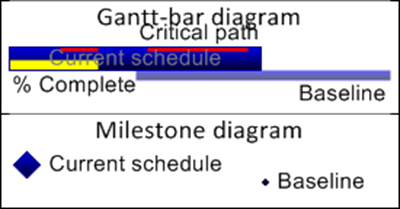
- i) The font sizes for the text elements in the combined diagrams above can be adjusted by right-clicking either of the diagrams, selecting the “Item font…” command, and adjusting the font size in the standard “Font properties” form that appears.
- ii) Whether the milestone diagram displays baselines or incomplete milestones depends upon whether these features are enabled. The example below shows the case in which baselines are turned ON (using the baseline checkboxes on the “Task Bars” and “Milestones” tab pages) but incomplete milestones are not distinguished from complete milestones.
Showing Incomplete Milestones
- q) If you want to configure OnePager to show incomplete milestones as unfilled symbols, you will need to navigate to the “Milestones” tab of the “Project-View Properties” form. There check the “% Complete” check box in the “Milestone Symbol Decorations” group and then select the “%Complete Properties” button which will show the “Set percent-complete properties” form given below:
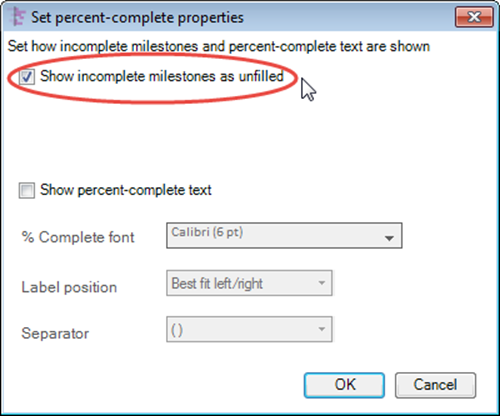
- Checking the check box shown above will direct OnePager on how to treat the display of incomplete milestones and will modify the Legend Diagram as shown below:
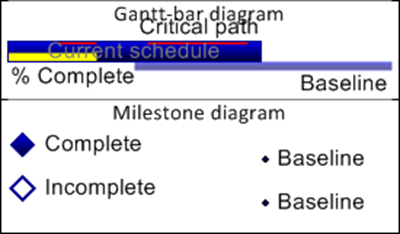
(21.1.7)