Making Multi-Project Graphs from Separate Microsoft Project Plans (OnePager Pro)
If you desire to build a multi-project project view without first creating a Microsoft Project Integrated Master Schedule, follow these steps:
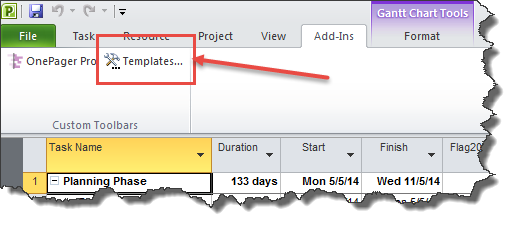
1) Click the “Template” button to bring up the “Template Properties” form:
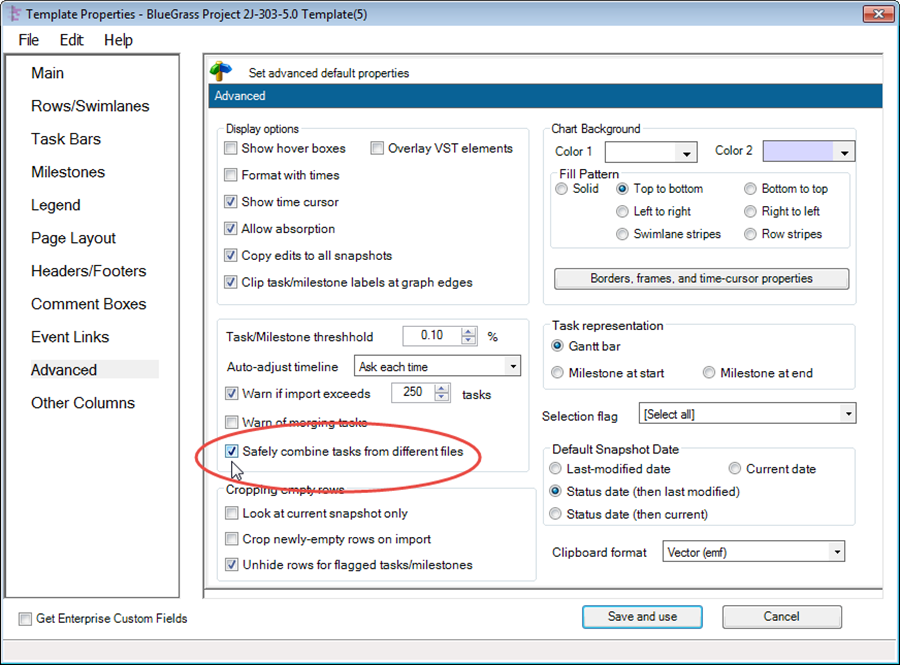
2) Go to the “Advanced” tab. The “Safely combine tasks from different files” box must be checked. This setting allows you to import multiple standalone Microsoft Project plans. If you do not check this box, OnePager may confuse tasks from one Microsoft Project plan with tasks from another plan when the tasks have the same UniqueID in Microsoft Project Professional.
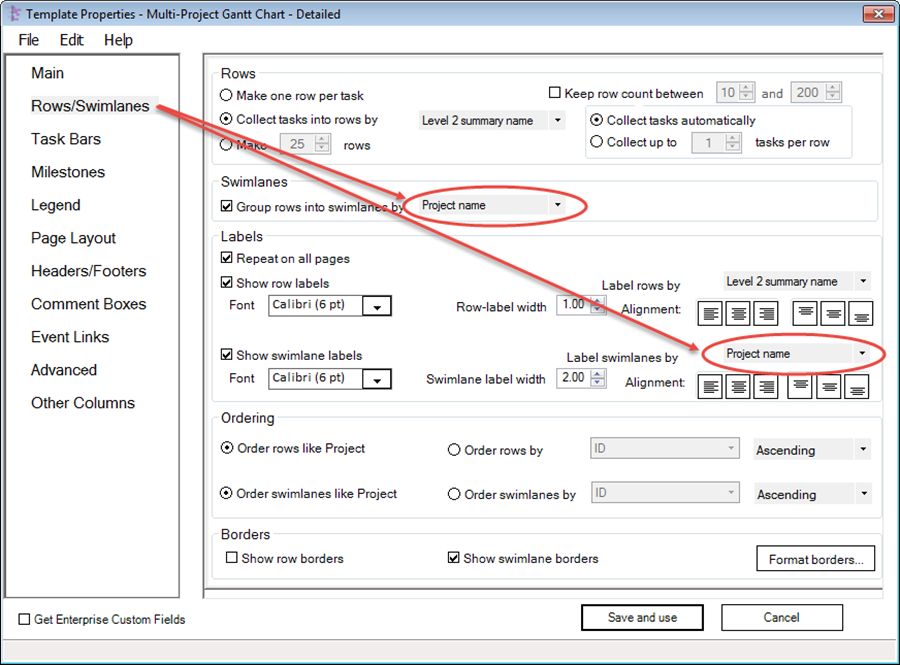
3) Go to the “Rows/Swimlanes” tab page is shown below. Ensure that you are grouping and labeling swimlanes by the “Project Name”, as shown below. Though this step is optional, it is strongly recommended.
4) Now click the “Save and use” or “Use” button to make this template the current template for the creation of this multi-project project view.
5) Launch Microsoft Project and load the first Microsoft Project plan, “IMS-SPEED-SUBPROJECT1”, which is shown below:
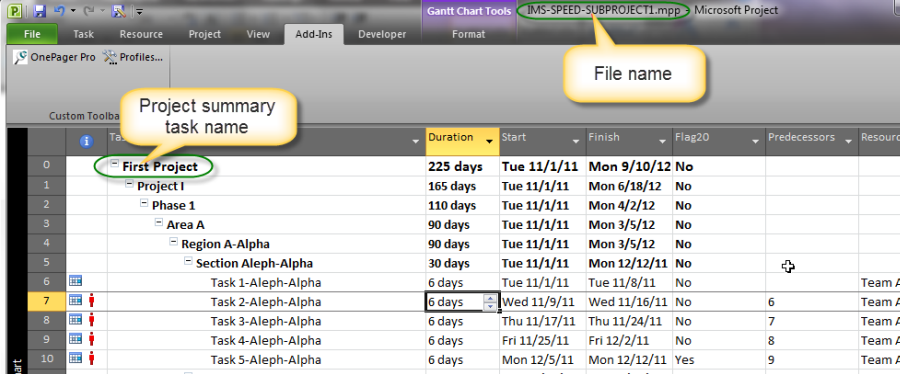
6) We mark some tasks with “Yes” in Flag20, launch OnePager Pro, and create a project view entitled “Multi-File” that is shown below:
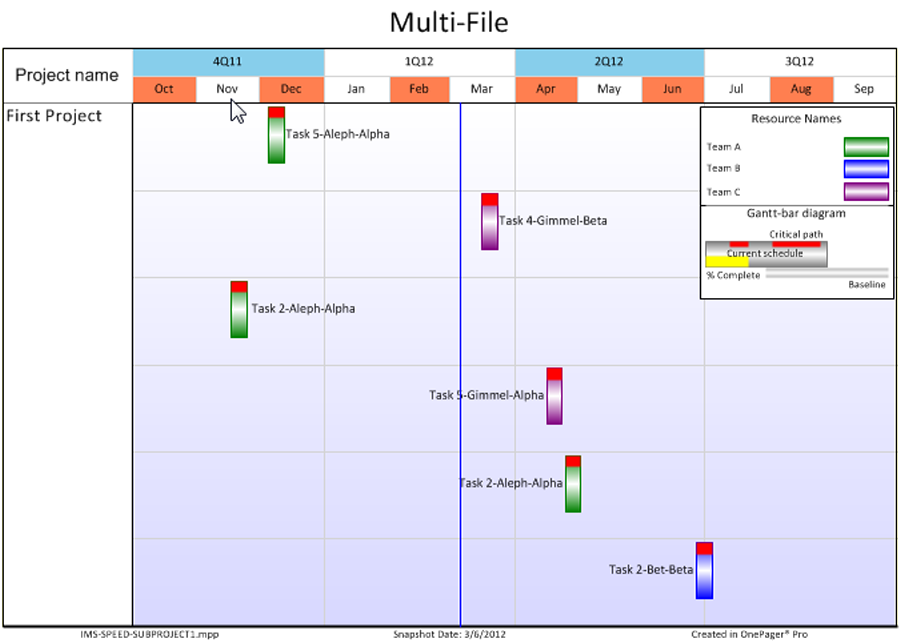
7) All six of the tasks are grouped into one large swimlane labeled “First Project”. Note that the Project file name in the graph is the label (name) of the project-summary task and not the name of the Microsoft Project plan. This is an important distinction that lets you build graphs regardless of the name.
8) We now open a second Microsoft Project plan called “IMS-SPEED-SUBPROJECT2” whose project-summary task is labeled “Second Project”:
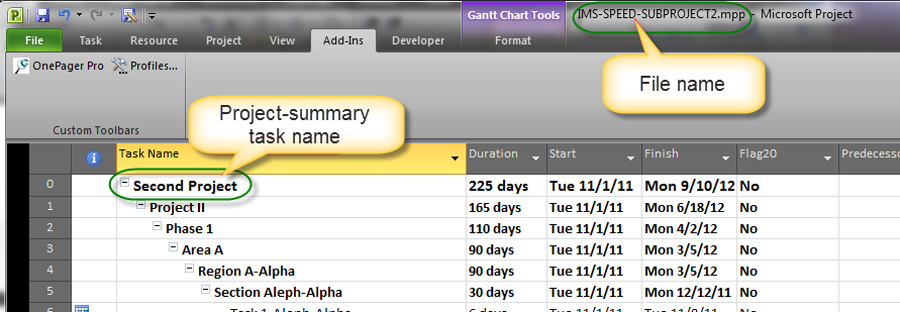
9) Launch OnePager Pro on this second Microsoft Project plan. Now instead of creating a new project view, indicate OnePager that you want to “UPDATE existing project view” called “Multi-File” that we created earlier. Make the following changes to the “OnePager choices” form that appears when you launched OnePager from Microsoft Project and select the “UPDATE” option on the “OnePager Pro Start” form as shown below:
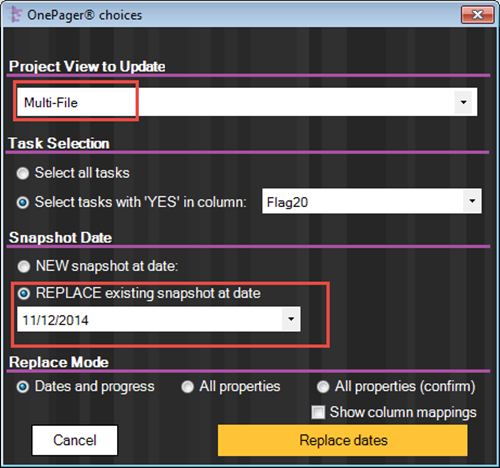
10) Make the choices “UPDATE” and “REPLACE” that are shown above and then click the large “Replace dates” button at the bottom. The updated project view now contains two projects as shown below:
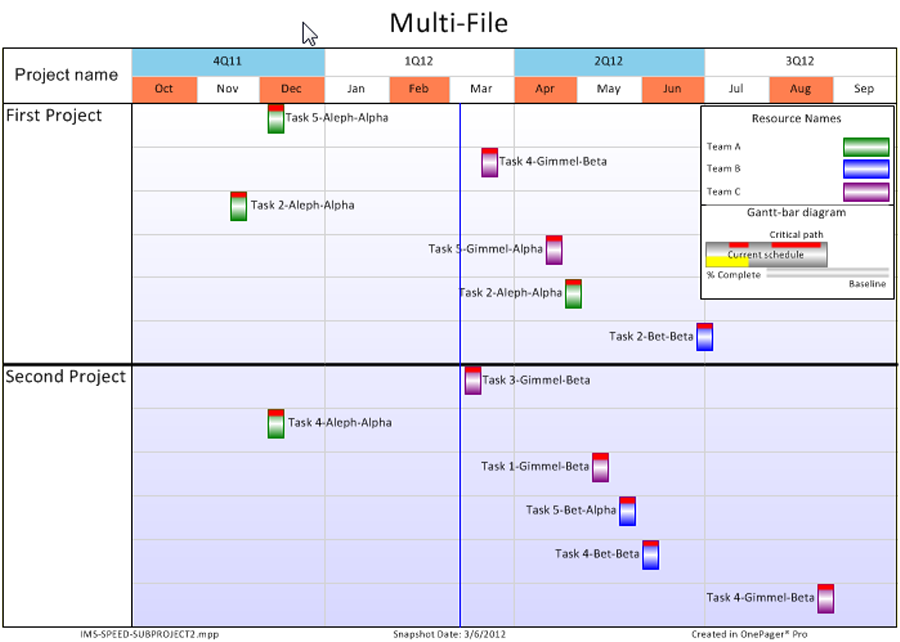
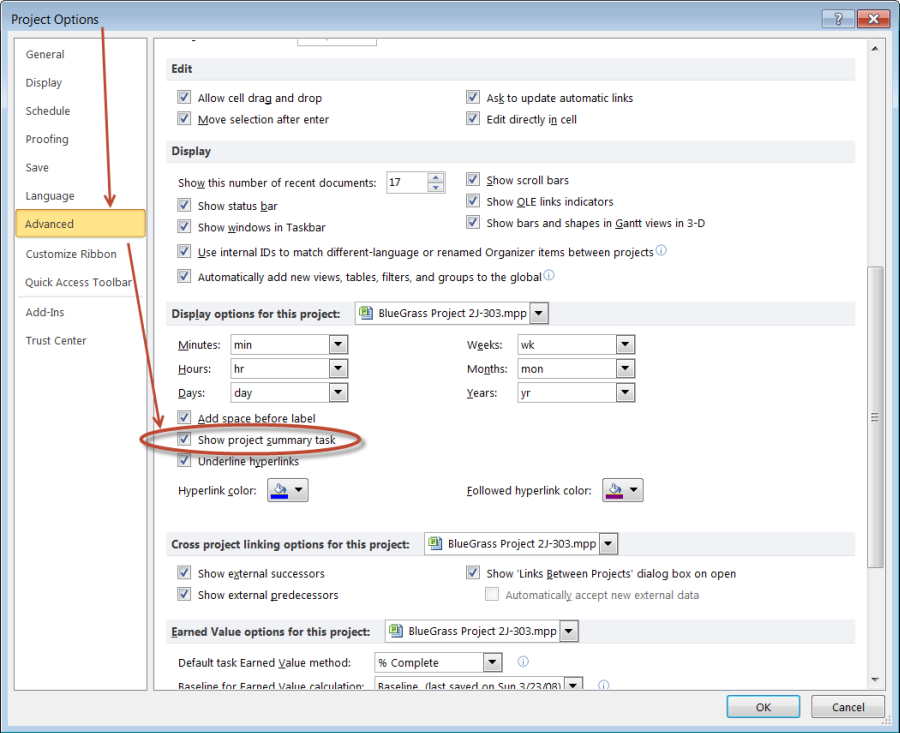
11) You can now merge other projects into the “Multi-File” project view. OnePager Pro always uses the label (name) of the project-summary task to identify each project in a multi-project situation. OnePager does not use the Microsoft Project plan name to identify projects. If you want to display the project summary task (Task 0) at the top of a project file, go to the “File” tab of Microsoft Project’s tool bar. Then navigate to “Options” tab and once there to the “Advanced” and check the checkbox that is shown below:
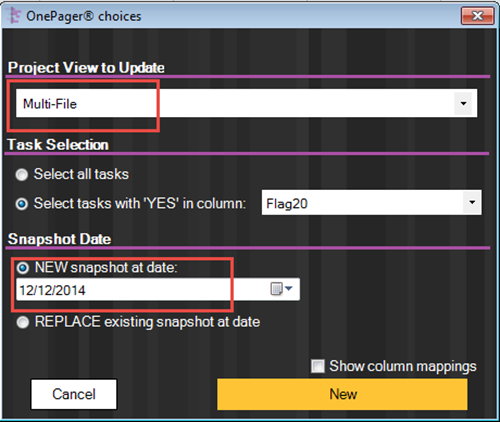
12) Once you merge all your projects into a single snapshot, you can now add a new snapshot to the “Multi-File” project view to show how tasks changed as the projects progresses. Be aware that you will need to insert the individual projects into the new snapshot one file at a time. That means you will need to choose UPDATE+NEW for the first file of the new snapshot. The “OnePager choices” form for this “UPDATE” and “NEW” action is shown below:
13) For updating the remaining files in the Multi-File snapshot you will need to choose “UPDATE” and “REPLACE” for all remaining files of the new snapshot.
(8.2)