Difference between revisions of "Adding a Row or Swimlane"
From OnePager Documentation
(→Add Above) |
(→Overview) |
||
| Line 6: | Line 6: | ||
1) Right click the row or swimlane '''label'''. | 1) Right click the row or swimlane '''label'''. | ||
| + | |||
| + | ==Add Row Example== | ||
2) The following context menu will appear: | 2) The following context menu will appear: | ||
Revision as of 17:10, 19 April 2016
Overview
OnePager enables you to manually add blank rows or swimlanes to the project view.
To add rows or swimlanes follow the steps below:
1) Right click the row or swimlane label.
Add Row Example
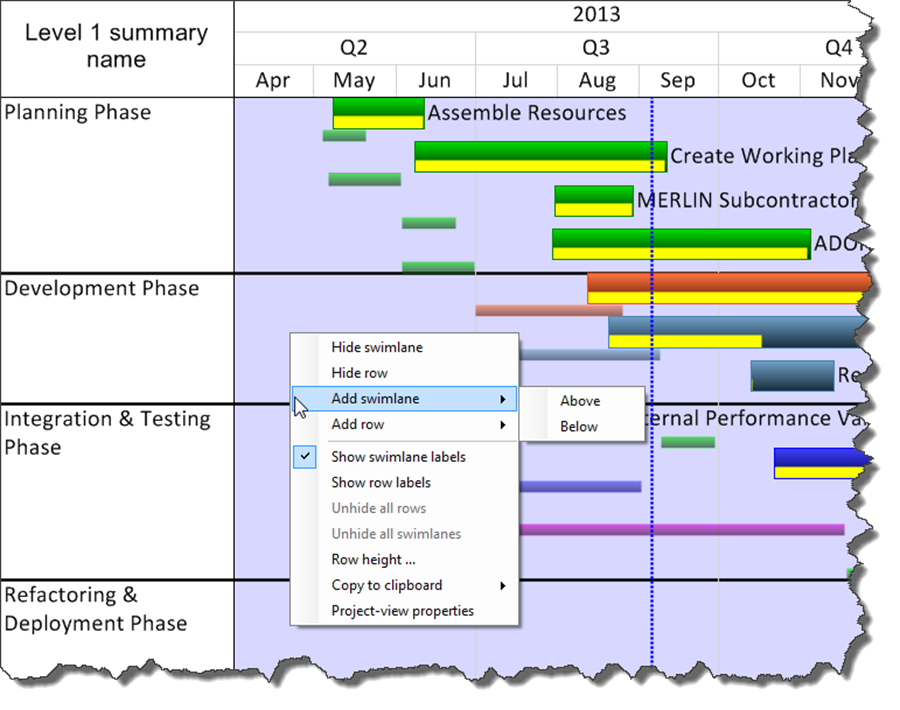
2) The following context menu will appear:

Add Above
- a) When the Add above command is selected, a blank row (or swimlane) will be added above the selected position.
Add Below
- b) When the Add below command is selected, a blank row (or swimlane) will be added below the selected position.
2) Right-click in empty space brings up the context menu shown below:

3) The “Add Above” and “Add Below” command have the same effects as described above.
(12.16)