Difference between revisions of "Creating a Countdown to Project End by Months on the Time Axis (OnePager Pro)"
(→Creating the Countdown Timer) |
m (Text replacement - ".png]]" to ".png|link=]]") |
||
| (One intermediate revision by one other user not shown) | |||
| Line 1: | Line 1: | ||
| − | ==About Creating a Countdown Timer== | + | ==About Creating a Countdown Timer for OnePager Pro== |
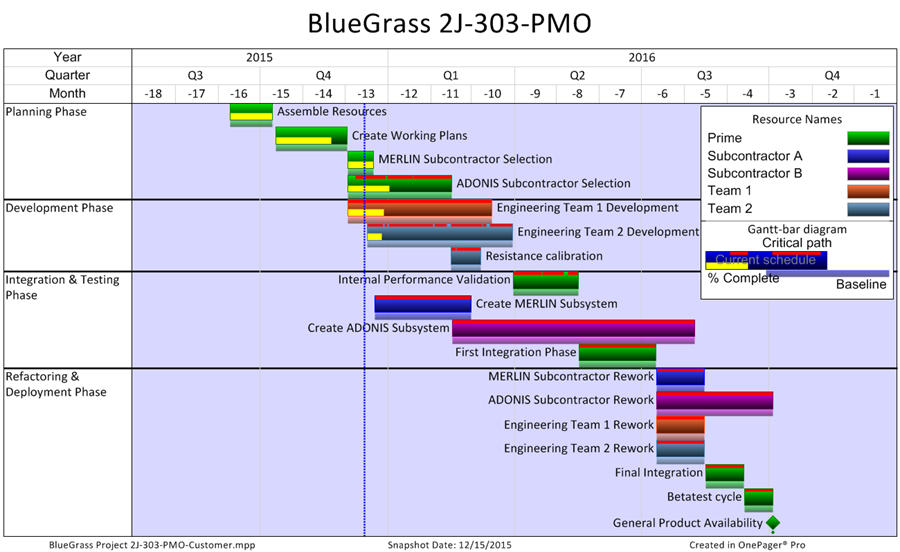
OnePager provides you with a feature that allows you to express a '''countdown timer''' by months on the '''time axis''' as shown below: | OnePager provides you with a feature that allows you to express a '''countdown timer''' by months on the '''time axis''' as shown below: | ||
| − | <center>[[File:P52-22_7-(1)-02112016.png]]</center> | + | <center>[[File:P52-22_7-(1)-02112016.png|link=]]</center> |
==Creating the Countdown Timer== | ==Creating the Countdown Timer== | ||
| Line 15: | Line 15: | ||
3) Click the '''Configure time axis''' button as shown below: | 3) Click the '''Configure time axis''' button as shown below: | ||
| − | <center>[[File:P52-22_7-(2)-02112016.png]]</center> | + | <center>[[File:P52-22_7-(2)-02112016.png|link=]]</center> |
4) This action brings up the '''Advanced time-axis features''' form. Now, click the '''Advanced''' tab to get to the tab shown below: | 4) This action brings up the '''Advanced time-axis features''' form. Now, click the '''Advanced''' tab to get to the tab shown below: | ||
| − | <center>[[File:P52-22_7-(3)-02112016.png]]</center> | + | <center>[[File:P52-22_7-(3)-02112016.png|link=]]</center> |
5) This feature can be employed using the '''Three levels''' and the '''Two levels''' options as shown above where it will be applied at the bottom level. Select either option and proceed to the next step. | 5) This feature can be employed using the '''Three levels''' and the '''Two levels''' options as shown above where it will be applied at the bottom level. Select either option and proceed to the next step. | ||
| Line 25: | Line 25: | ||
6) Go to the '''Project start date''' window and set the value equal to the '''Project end date''' as shown below: | 6) Go to the '''Project start date''' window and set the value equal to the '''Project end date''' as shown below: | ||
| − | <center>[[File:P52-22_7-(4)-02112016.png]]</center> | + | <center>[[File:P52-22_7-(4)-02112016.png|link=]]</center> |
7) Next, click to the '''Bottom level''' tab, and engage the dropdown menu for the '''Label format''' window. Select the '''1, 2, 3, 4 … (From Start)''' option. When you are finished, the form will look like this: | 7) Next, click to the '''Bottom level''' tab, and engage the dropdown menu for the '''Label format''' window. Select the '''1, 2, 3, 4 … (From Start)''' option. When you are finished, the form will look like this: | ||
| − | <center>[[File:P52-22_7-(5)-02112016.png]]</center> | + | <center>[[File:P52-22_7-(5)-02112016.png|link=]]</center> |
<center></center> | <center></center> | ||
| Line 35: | Line 35: | ||
8) Click '''OK''' on the '''Advanced time-axis features''' form and then click '''Apply''' and '''OK''' on the '''PVP''' form and the project view will look like this: | 8) Click '''OK''' on the '''Advanced time-axis features''' form and then click '''Apply''' and '''OK''' on the '''PVP''' form and the project view will look like this: | ||
| − | <center>[[File:P52-22_7-(6)-02112016.png]]</center> | + | <center>[[File:P52-22_7-(6)-02112016.png|link=]]</center> |
(22.7) | (22.7) | ||
Latest revision as of 19:27, 3 June 2024
About Creating a Countdown Timer for OnePager Pro
OnePager provides you with a feature that allows you to express a countdown timer by months on the time axis as shown below:

Creating the Countdown Timer
The countdown timer can be established for months by following the steps below:
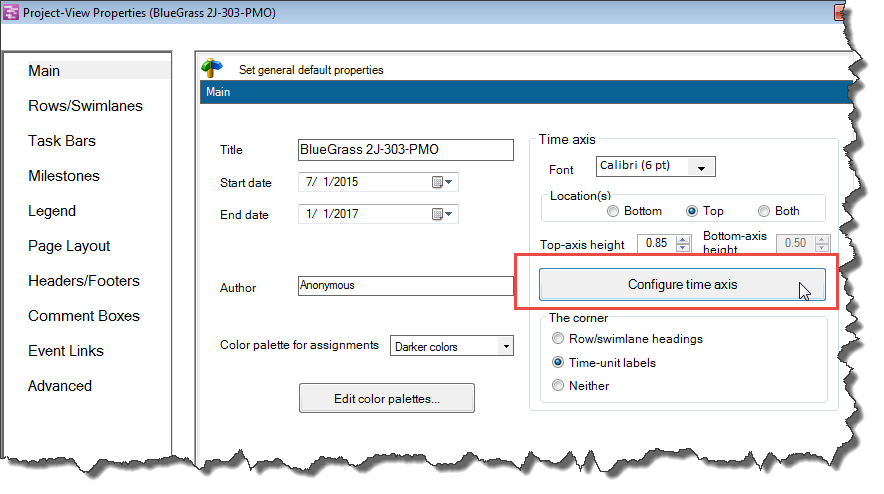
1) For an existing project view, go to the Project-View Properties (PVP) form by clicking the Project-View Properties button on the ribbon's Home tab.
2) This brings up the Main tab of the form.
3) Click the Configure time axis button as shown below:
4) This action brings up the Advanced time-axis features form. Now, click the Advanced tab to get to the tab shown below:
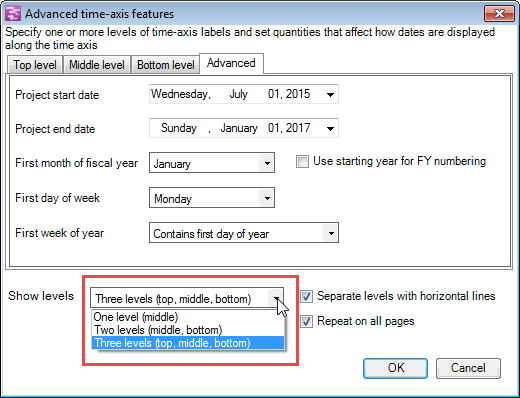
5) This feature can be employed using the Three levels and the Two levels options as shown above where it will be applied at the bottom level. Select either option and proceed to the next step.
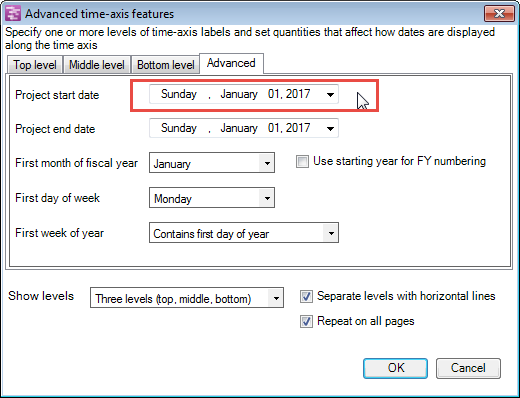
6) Go to the Project start date window and set the value equal to the Project end date as shown below:
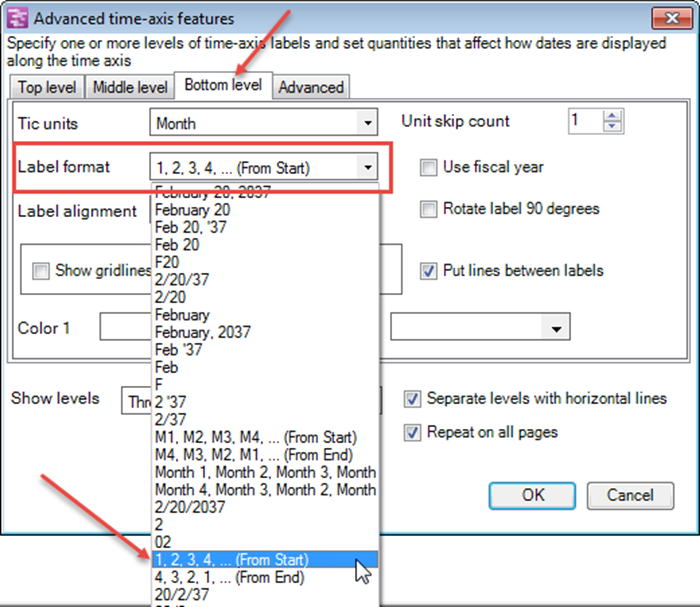
7) Next, click to the Bottom level tab, and engage the dropdown menu for the Label format window. Select the 1, 2, 3, 4 … (From Start) option. When you are finished, the form will look like this:
8) Click OK on the Advanced time-axis features form and then click Apply and OK on the PVP form and the project view will look like this:
(22.7)