Difference between revisions of "Adjusting Image Transparency"
From OnePager Documentation
| Line 1: | Line 1: | ||
| − | + | ==About Adjusting Image Transparency== | |
| − | 1) Right | + | When images are initially imported into OnePager, they are opaque. |
| + | |||
| + | However, their '''transparency''' can be adjusted to make them more like a watermark. | ||
| + | |||
| + | ==Image Transparency Adjustment== | ||
| + | |||
| + | 1) To do this, follow the steps below: | ||
| + | |||
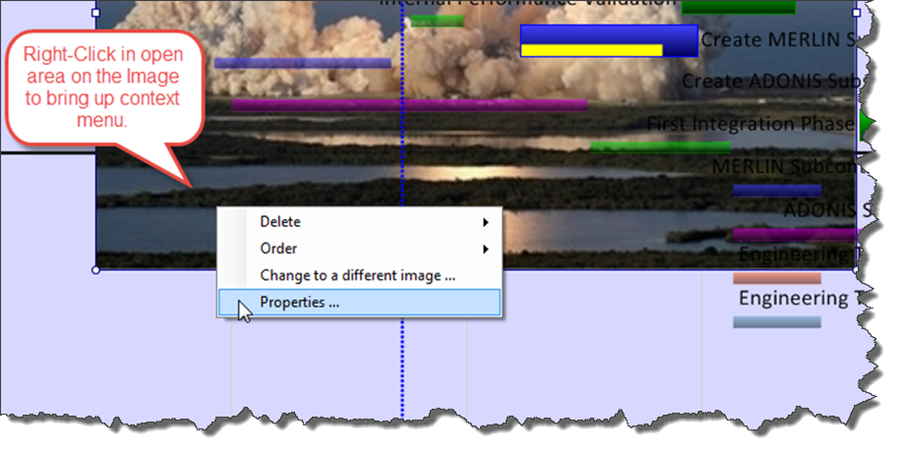
| + | 2)) Right click the image where there are no tasks/milestones, decorations, or adornments to show the context menu below. Then click the '''Properties …''' command. | ||
<center>[[File:P52-20_3-(1)-06042015.png]]</center> | <center>[[File:P52-20_3-(1)-06042015.png]]</center> | ||
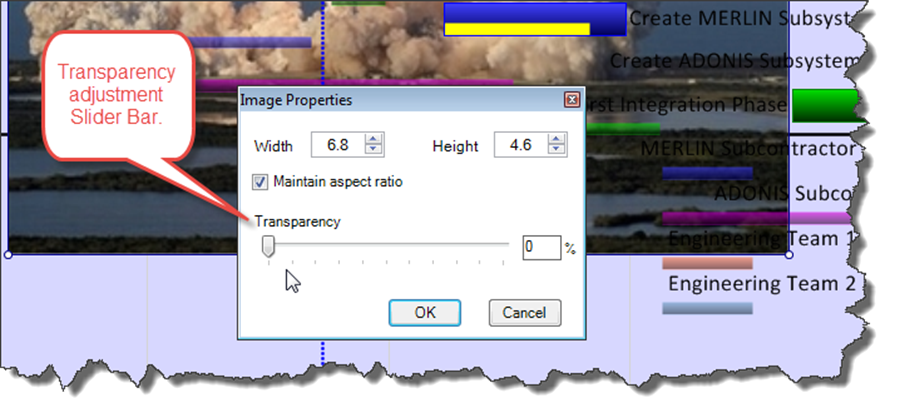
| − | + | 3) This action brings up the '''Image Properties''' form that lets you adjust transparency as shown below: | |
<center>[[File:P52-20_3-(2)-06042015.png]]</center> | <center>[[File:P52-20_3-(2)-06042015.png]]</center> | ||
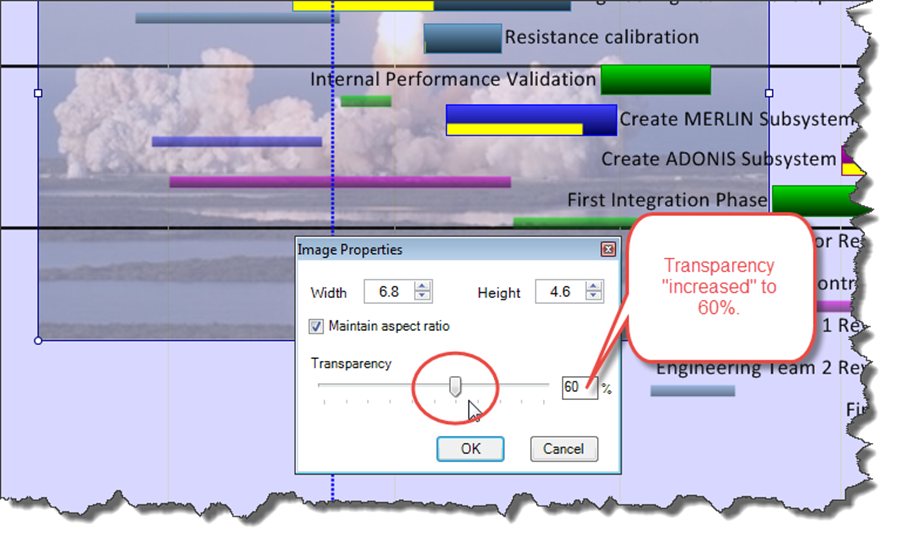
| − | + | 4) To '''increase''' the transparency, that is to be able to see task/milestones and other objects behind the image, increase the transparency by sliding the bar to the '''right''': | |
| − | + | ||
| − | + | ||
<center>[[File:P52-20_3-(3)-06042015.png]]</center> | <center>[[File:P52-20_3-(3)-06042015.png]]</center> | ||
| Line 18: | Line 24: | ||
[[Category:Version 5.2]] | [[Category:Version 5.2]] | ||
| + | [[Category:Version 5.3]] | ||
[[Category:Editing a Project View]] | [[Category:Editing a Project View]] | ||
[[Category:Backgrounds, Images, and Logos]] | [[Category:Backgrounds, Images, and Logos]] | ||
Revision as of 19:51, 19 April 2016
About Adjusting Image Transparency
When images are initially imported into OnePager, they are opaque.
However, their transparency can be adjusted to make them more like a watermark.
Image Transparency Adjustment
1) To do this, follow the steps below:
2)) Right click the image where there are no tasks/milestones, decorations, or adornments to show the context menu below. Then click the Properties … command.

3) This action brings up the Image Properties form that lets you adjust transparency as shown below:

4) To increase the transparency, that is to be able to see task/milestones and other objects behind the image, increase the transparency by sliding the bar to the right:

(20.3)