Difference between revisions of "Inserting Background Images for Version 6.1"
From OnePager Documentation
m (Text replacement - ".png]]" to ".png|link=]]") |
|||
| Line 7: | Line 7: | ||
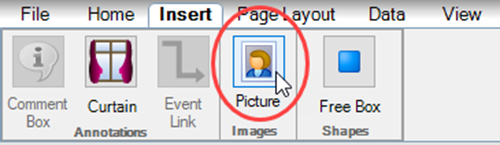
3) To insert an image, go to the OnePager ribbon’s '''Insert''' tab and click the '''Picture''' button: | 3) To insert an image, go to the OnePager ribbon’s '''Insert''' tab and click the '''Picture''' button: | ||
| − | <center>[[File:P61-20_1_1-61-(1)-11032017.png]]</center> | + | <center>[[File:P61-20_1_1-61-(1)-11032017.png|link=]]</center> |
<!--center>P61-20_1_1-61-(1)-11032017.png</center--> | <!--center>P61-20_1_1-61-(1)-11032017.png</center--> | ||
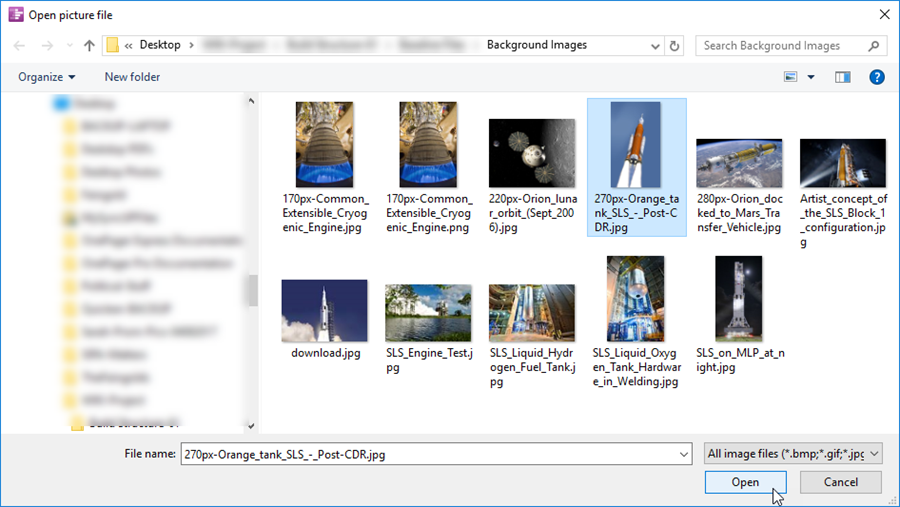
4) This accesses the '''Open pictures file''' form that lets you select an image to insert: | 4) This accesses the '''Open pictures file''' form that lets you select an image to insert: | ||
| − | <center>[[File:P61-20_1_1-61-(2)-11032017.png]]</center> | + | <center>[[File:P61-20_1_1-61-(2)-11032017.png|link=]]</center> |
<!--center>P61-20_1_1-61-(2)-11032017.png</center--> | <!--center>P61-20_1_1-61-(2)-11032017.png</center--> | ||
| Line 19: | Line 19: | ||
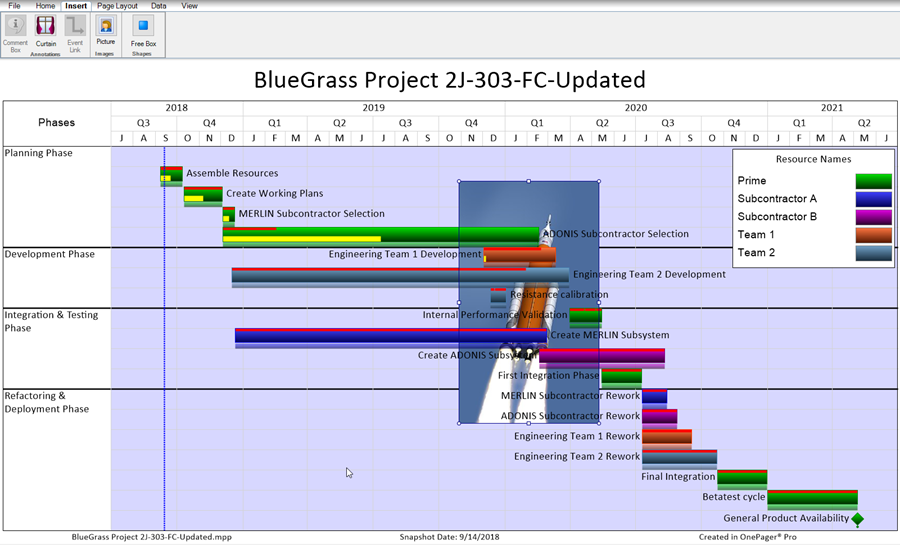
6) Selecting an image and clicking the '''Open''' button '''inserts''' the image into the center of the project view, as shown below: | 6) Selecting an image and clicking the '''Open''' button '''inserts''' the image into the center of the project view, as shown below: | ||
| − | <center>[[File:P61-20_1_1-61-(3)-11032017.png]]</center> | + | <center>[[File:P61-20_1_1-61-(3)-11032017.png|link=]]</center> |
<!--center>P61-20_1_1-61-(3)-11032017.png</center--> | <!--center>P61-20_1_1-61-(3)-11032017.png</center--> | ||
Latest revision as of 20:12, 24 February 2025
About Inserting Background Images
1) OnePager allows you to insert standard images into a project views and use them as backgrounds anywhere in the graph area.
2) Use the following steps to insert a background image:
3) To insert an image, go to the OnePager ribbon’s Insert tab and click the Picture button:
4) This accesses the Open pictures file form that lets you select an image to insert:
5) As an alternative, you can navigate to the folder where pictures you want to insert are stored.
6) Selecting an image and clicking the Open button inserts the image into the center of the project view, as shown below:
(20.1.1-61)