Difference between revisions of "Adjusting Image Transparency for Version 6.1"
(→Image Transparency Adjustment) |
(→Image Transparency Adjustment) |
||
| Line 16: | Line 16: | ||
2) This action brings up the '''Image Properties''' form that lets you adjust '''transparency''' as shown below: | 2) This action brings up the '''Image Properties''' form that lets you adjust '''transparency''' as shown below: | ||
| − | <center>[[File: | + | <center>[[File:P61-20_3-1-61-(2)-11032017.png]]</center> |
| + | <center>P61-20_3-1-61-(2)-11032017.png</center> | ||
3) To '''increase''' the '''transparency''', that is, to be able to see task/milestones and other objects behind the image, slide the '''Transparency''' bar to the '''right''': | 3) To '''increase''' the '''transparency''', that is, to be able to see task/milestones and other objects behind the image, slide the '''Transparency''' bar to the '''right''': | ||
Revision as of 15:53, 3 November 2017
About Adjusting Image Transparency
When images are initially imported into OnePager, they are opaque.
However, their transparency can be adjusted to make them more like a watermark.
To do this, follow the steps below:
Image Transparency Adjustment
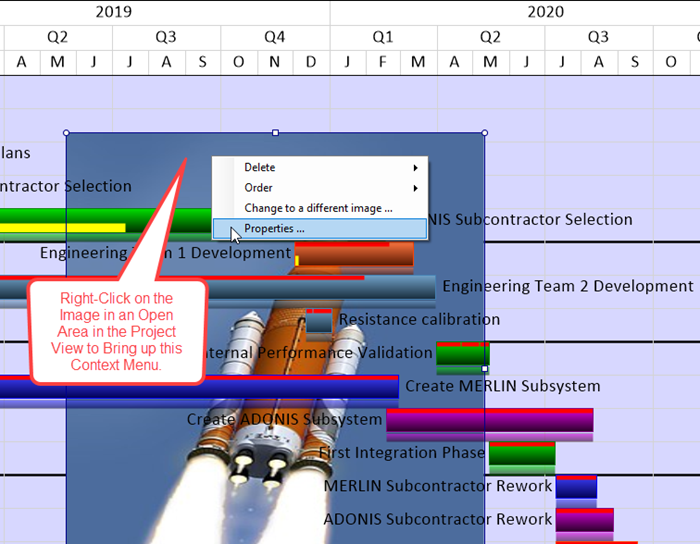
1) Right click the image where there are no tasks/milestones, decorations, or adornments to bring up the context menu shown below. Then click the Properties … command.

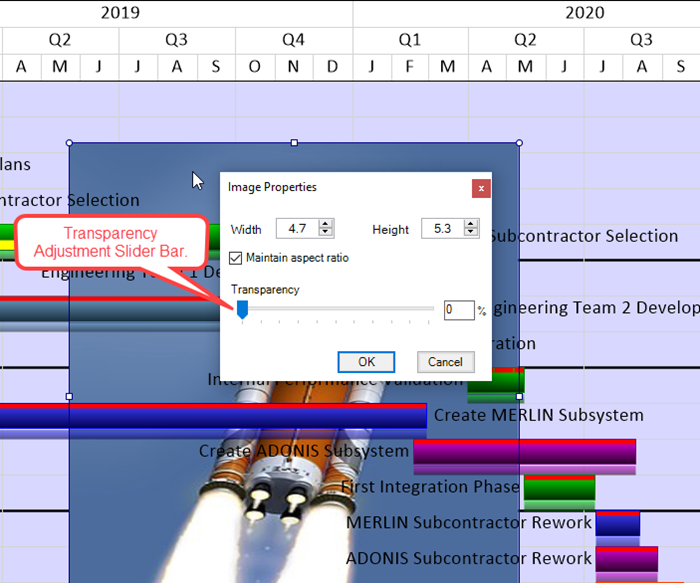
2) This action brings up the Image Properties form that lets you adjust transparency as shown below:

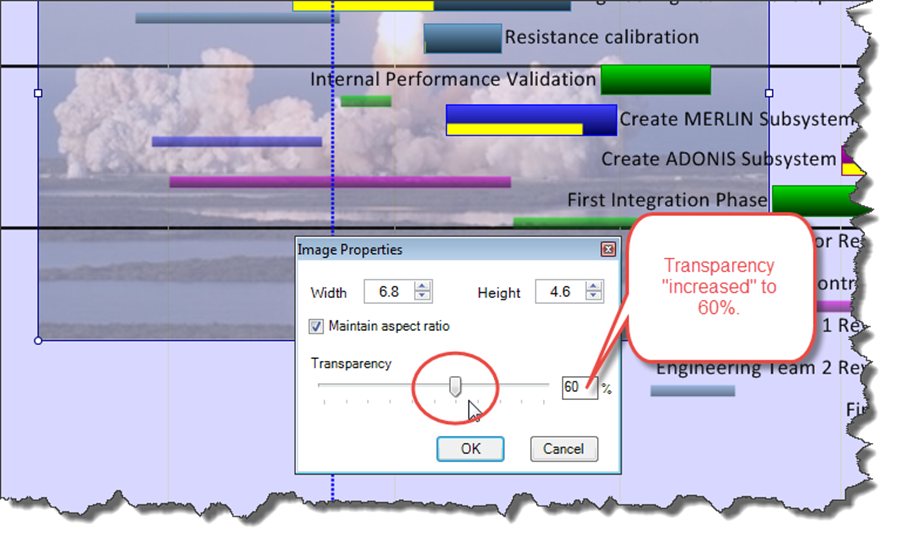
3) To increase the transparency, that is, to be able to see task/milestones and other objects behind the image, slide the Transparency bar to the right:

4) To decrease the transparency, that is, to be able to hide task/milestones and other objects behind the image, slide the Transparency bar to the left.
(20.3.1-61)