Difference between revisions of "Automatically Cropping Empty Rows for OnePager Pro for Version 6.1"
(→Auto Cropping Options) |
(→Auto Hiding Options) |
||
| Line 29: | Line 29: | ||
===Using the Home Tab Hide Rows Button on the OnePager Ribbon=== | ===Using the Home Tab Hide Rows Button on the OnePager Ribbon=== | ||
| − | 1) | + | 1) As demonstrated in the previous section clicking the '''Hide''' button accesses the '''Row hiding choices''' form. |
2) Use the checkboxes on the form to specify where you want OnePager to automatically '''hide rows''' and click '''OK''' as shown in the last illustration in the previous section. | 2) Use the checkboxes on the form to specify where you want OnePager to automatically '''hide rows''' and click '''OK''' as shown in the last illustration in the previous section. | ||
Revision as of 18:16, 29 November 2018
Contents
Automatically Hiding Empty Rows for OnePager Pro for Version 6.1 (P61-12.14.1-61-11292018)
Overview
1) When you are moving task/milestone to different rows and swimlanes, you can end up with unoccupied rows that you can hide if necessary.
2) OnePager has a convenient feature to do this quickly and easily: auto-hiding.
3) To use this feature, click the Hide button on the OnePager ribbon as shown below:

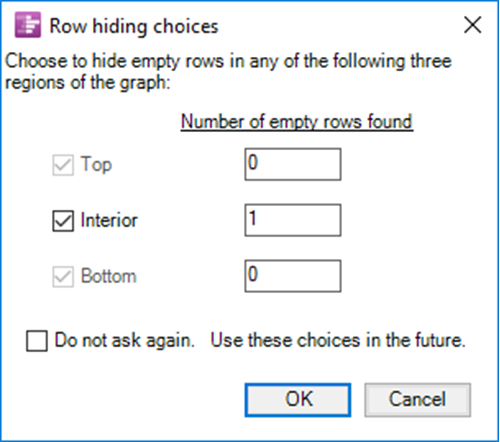
4) Clicking the Home tab's Hide button accesses the Row hiding choices form shown here:

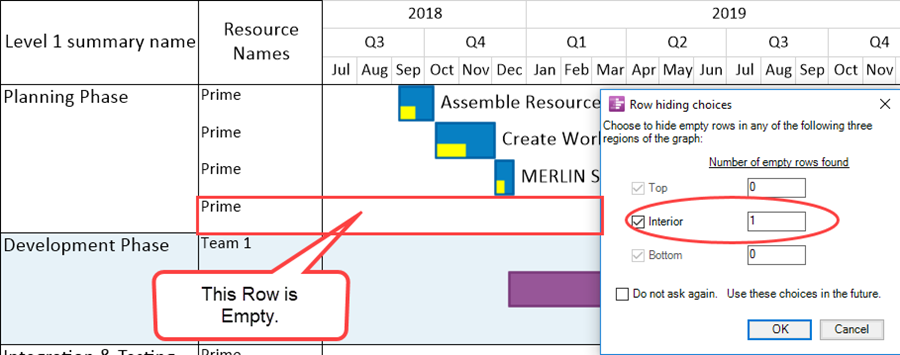
5) The Row hiding choices form shown above shows that one (1) Interior row is empty and can be hidden. The project view with the empty row looks like this with the Row hiding choices form shown:

Clicking the OK button on the form hides the empty row as discussed in the following sections.
Auto Hiding Options
Using the Home Tab Hide Rows Button on the OnePager Ribbon
1) As demonstrated in the previous section clicking the Hide button accesses the Row hiding choices form.
2) Use the checkboxes on the form to specify where you want OnePager to automatically hide rows and click OK as shown in the last illustration in the previous section.
3) Clicking the OK button hides the indicated row(s) as shown here:

Using the Template/PVP Advance Tab's Row Hiding Options Button
4) OnePager offers you a set of controls by which you can govern how automatic hiding functions are performed.
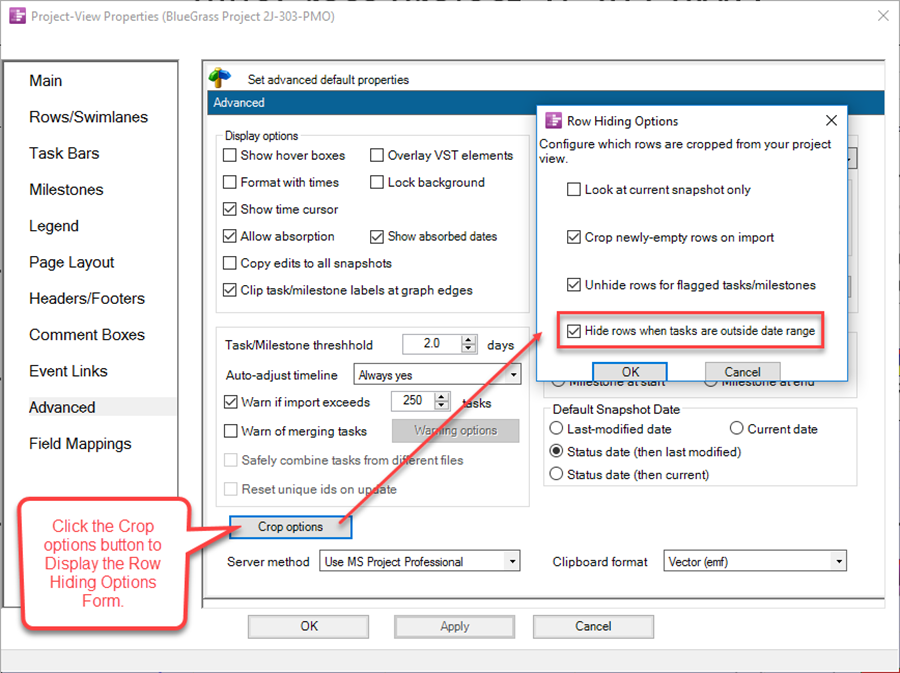
5) These controls are found both in the Template Properties and the Project-View Properties (PVP) forms at their respective Advanced tabs at the Row hiding options button shown below:

4) These controls have the following effects:
- a) Look at current snapshot only. When this checkbox is checked, OnePager will look only at the current snapshot to determine which rows are empty. When this checkbox is not checked, OnePager looks at all snapshots before deciding that a row is empty. In either case, please note that any rows that are hidden will be hidden in all snapshots.
- b) Crop newly-empty rows on import. When this checkbox is checked, OnePager will automatically crop any rows that become empty when you add or update a snapshot. This can happen when a task or milestone is present at some snapshots but is missing from the snapshot that you are currently updating. Bear in mind, however, that the hidden rows will now be hidden in all snapshots and not just in the snapshot you are updating.
- c) Unhide rows for flagged tasks/milestones. When this checkbox is checked, OnePager will automatically unhide tasks/milestones, rows, and swimlanes that were hidden in previous snapshots if any of the tasks/milestones are flagged for import on the current snapshot. This assures that in new snapshots you will see all previously hidden tasks/milestones and their previously hidden rows and swimlanes. If the checkbox is not checked, OnePager will continue to hide previously hidden rows and swimlanes as the new snapshot is created. The default setting for this feature is with the checkbox checked.
- d) Hide rows when dates are outside the date range. When this option is checked, clicking the Crop button will hide rows that appear empty because the task/milestones occupying those rows are outside the start-end dates for the project view (See Main Tab 21.1.1-61). When this option is checked, OnePager will know that you want rows where tasks/milestones are not within the start-end dates range of the project view to be cropped when you click the Crop button on the ribbon.
5) As with the Look at current snapshot only row cropping action, the row hiding does not occur until you click the Crop button on the Home ribbon tab.
Finding Hidden Rows
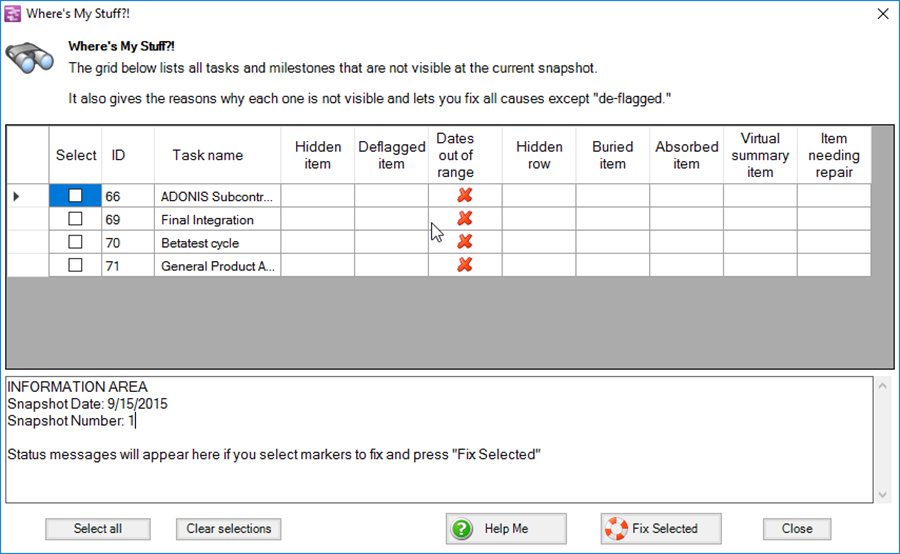
6) If rows are cropped, for any reason, they can be found by using the Where’s My Stuff?! feature accessed from the Show/Hide button on the Home ribbon. An example of a “Where’s My Stuff?!” form where out of range rows are hidden is shown below:

(12.14.1-61)