TEMPxx1
Creating a Multi-Project Chart from Smartsheet Report Imported as a Single Source Plan
Introduction
Smartsheet supports the creation of Smartsheet Reports of several kinds and in the context of OnePager we are focusing on the Smartsheet Reports created from one or more Smartsheet Gantt charts. The procedure for creating Smartsheet Reports of multiple Gantt charts is covered within the Smartsheet Application. In this section we'll use a Smartsheet Report made up of four (4) separate Smartsheet Gantt charts as described in the example that follows
Suppose you have multiple Smartsheet source plans that are related and you want to create a single chart from these Smartsheet source plans that are organized into a Smartsheet Report. The chart mujst show the important schedule items and will be updated as the project proceeds. Whenever chart updates are contemplated in the future OnePager requires that tasks being imported have unique task identifiers that OnePager can use to keep the updates aligned. Smartsheet source plans have unique task identifiers built in and the data are imported when OnePager imports the Smartsheet source plan. OnePager makes these unique task identifiers available in the OnePager Chart Editor as the SmartsheetTaskID field which is discussed later.
For more information on SmartsheetTaskID, please see the section in the article at: The SmartsheetTaskID Field 7.21.1-71
Making a Multi-Project Chart from a Smartsheet Report
To illustrate what is needed, let’s construct a Smartsheet Report from four (4) charts related to the BlueGrass Project Plan Smartsheet source pla as shown below:
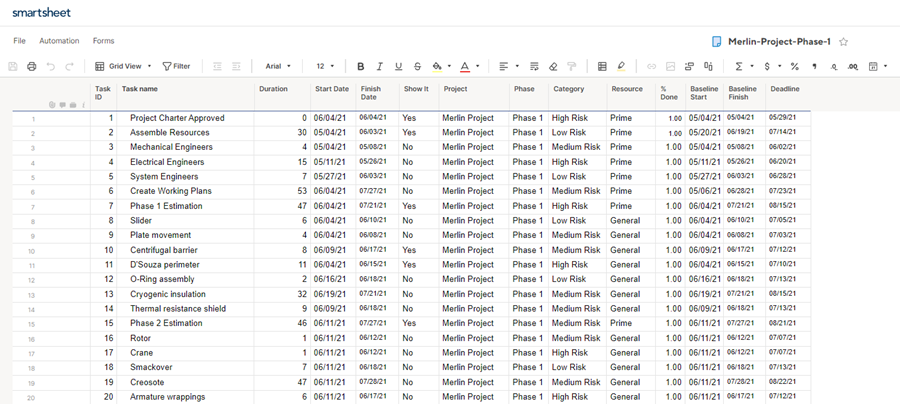
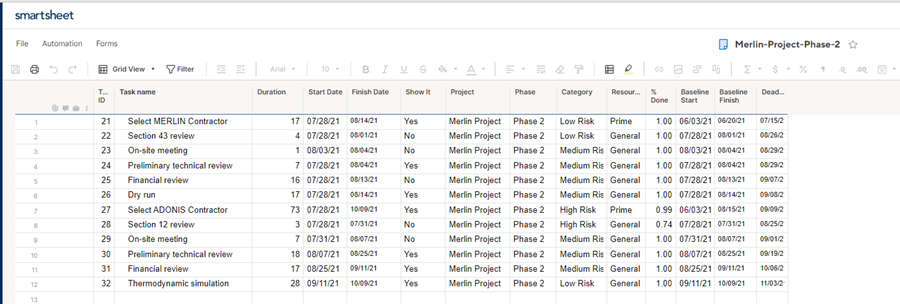
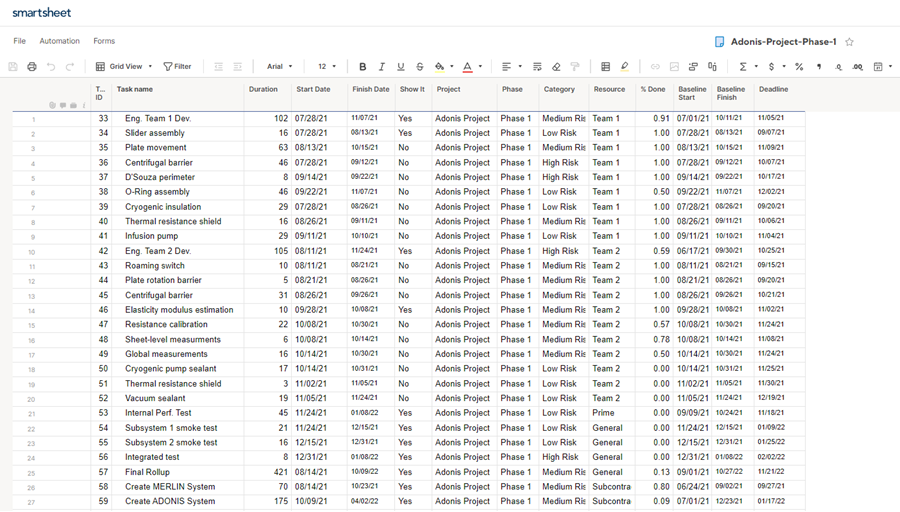

Using these four (4) Smartsheet files, create a Smartsheet Report named Report Project Ocean (Adonis & Merlin) and save it in your Smartsheet account.
Important Note
Each of the Smartsheet source plans above have unique SmartsheetTaskID fields with unique numbers generated by OnePager at source plan import. It is important throughout the use of these Smartsheet source plans that these assigned unique SmartsheetTaskID numbers remain with their respective tasks. Dates can change in the Smartsheet source plan's rows along with other updated information as the projects progress, but the SmartsheetTaskID number must remain associated with the task activity. Tasks can be deleted, but the deleted SmartsheetTaskID should not be reused for a later snapshot. OnePager can process out of sequence SmartsheetTaskID numbers.
Setting up the One Pager Template Properties Form for a Multi-Project Chart
The next step is to select and update an appropriate Template Properties form.
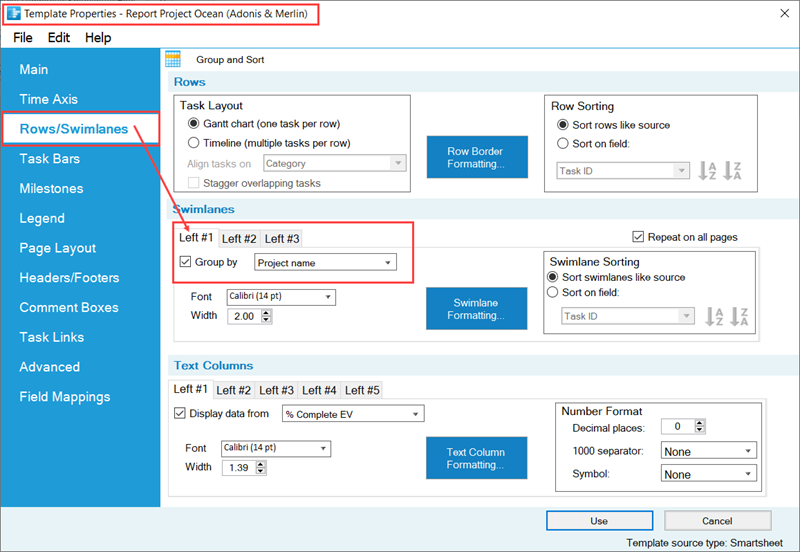
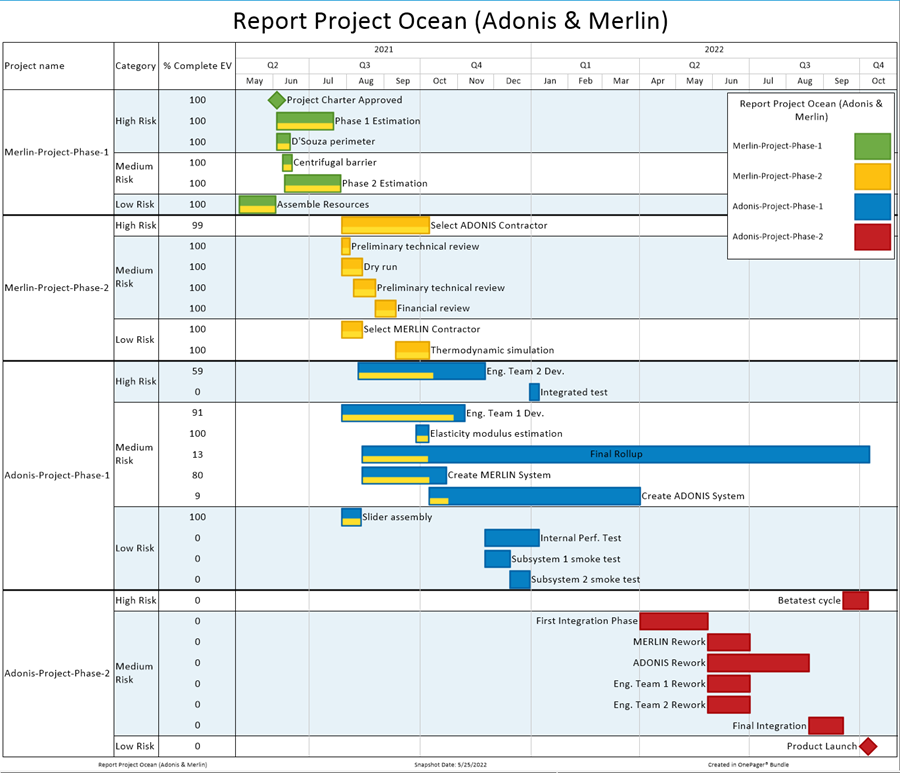
For this illustration we’ve selected the Multi-Project Gantt Chart – Detailed Template Properties form. Once the current Template Properties form is established as a multiple-project Template Properties form, go to the Rows/Swimlanes tab and make sure that the Group rows into swimlanes and Label swimlanes by windows are set to Project name for the Left#1 swimlane. Since we are plan to be interested in project risk, sure that the Group rows into swimlanes and Label swimlanes by windows are set to Category for the Left#2 swimlane. Also, for this illustration, make sure that Left#1 text columns are displayed and are set to show the % Complete EV column.
The Rows/Swimlanes tab in the Template Properties form looks like this:
When the steps above are completed and the Template Properties form is updated, click the Save and use button to make the modified Template Properties form the current Template.
Create a Multi-Project Chart from a Smartsheet Report
Next, launch OnePager Bundle. The OnePager Bundle Start form appears.
Click the NEW button which accesses the OnePager choices (OPC) form.
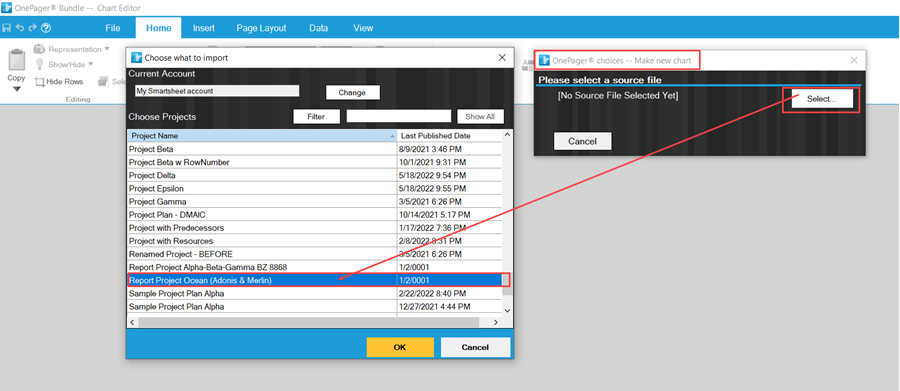
Then, click the Select button in the Select File(s) section of the OPC form and navigate to select the Report Project Ocean (Adonis & Merlin) as shown below:
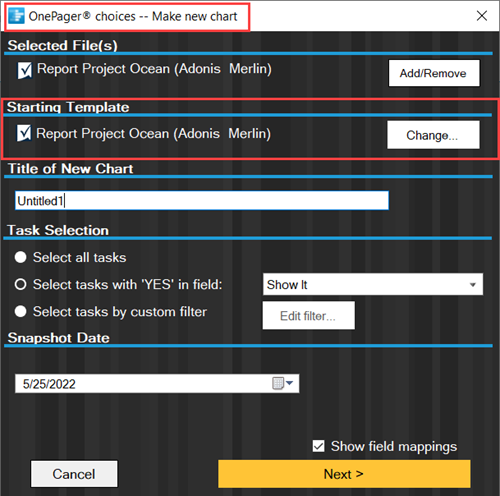
Next, use the Change button in the Starting Template section to make sure that your updated Template Properties form is selected as shown here:
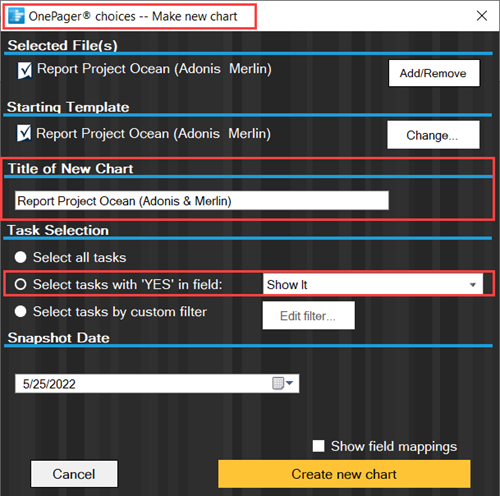
With this done, name the chart Report Project Ocean (Adonis & Merlin) and make sure that Show It is selected Task Selection section as shown here:
When these confirmations are complete, click the Create new chart button. The chart looks like this:
Once you created the chart from a Smartsheet Report the chart can be managed as a single snapshot. You can now add a new snapshot to the chart to show how tasks changed by updating the constituent project charts and updating your Smartsheet Report before accessing it to create a new snapshot.
Updating a Chart Created from a Smartsheet Report
Eventually you want to update your Smartsheet Report based chart by either adding a snapshot or replacing a snapshot with updated data. To perform either the add or the replace snapshot, the processes described in these two referenced article references that follow can be used.
| REPLACING a Snapshot via Pull Operation 7.14.1-71 |
| ADDING a Snapshot via Pull Operation 7.15.1-71 |
The key to making updated Smartsheet Report created charts involving multiple Smartsheet source plan is the proper management of the Smartsheet data at the Smartsheet file level. Recall that the smartsheet files contains the source plan(s) that are to be used to either create or update a Smartsheet Report based chart.