Difference between revisions of "Editing Row or Swimlane Labels"
From OnePager Documentation
m (Text replacement - ".png]]" to ".png|link=]]") |
|||
| Line 5: | Line 5: | ||
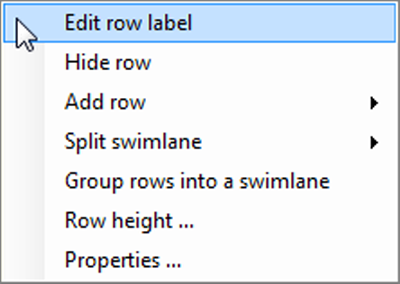
1) Right clicking a row or swimlane '''label''' will bring up the following '''context menu''': | 1) Right clicking a row or swimlane '''label''' will bring up the following '''context menu''': | ||
| − | <center>[[File:P52-10_3-(1)-06022015.png]]</center> | + | <center>[[File:P52-10_3-(1)-06022015.png|link=]]</center> |
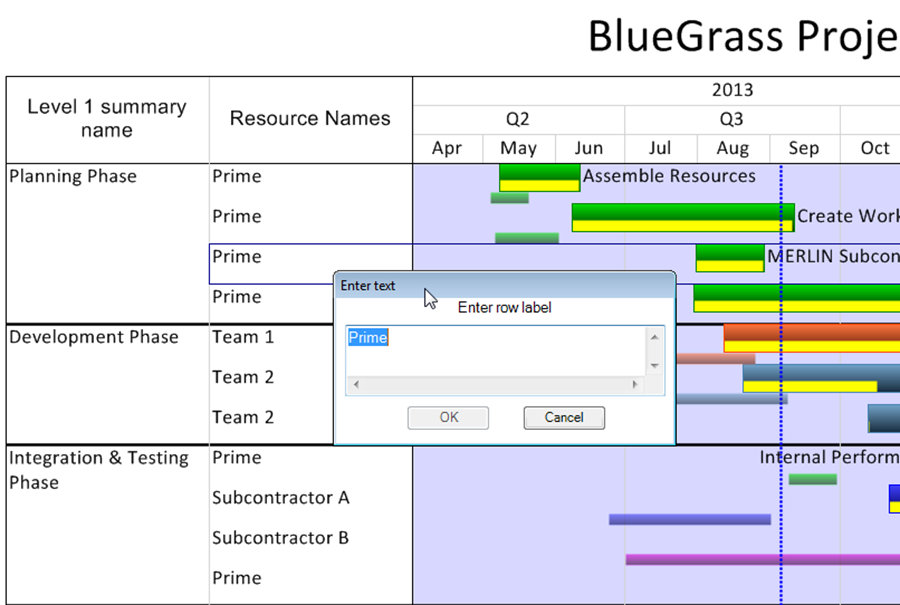
2) Choose the '''Edit row label''' or '''Edit swimlane label''' command depending on whether you are editing a row or a swimlane. The '''Enter text''' form (shown below) will appear in which the '''label text''' can be added, changed, or deleted. | 2) Choose the '''Edit row label''' or '''Edit swimlane label''' command depending on whether you are editing a row or a swimlane. The '''Enter text''' form (shown below) will appear in which the '''label text''' can be added, changed, or deleted. | ||
| − | <center>[[File:P52-10_3-(2)-06022015.png]]</center> | + | <center>[[File:P52-10_3-(2)-06022015.png|link=]]</center> |
(12.3) | (12.3) | ||
Latest revision as of 23:07, 7 May 2024
By default, row and swimlane labels are generated automatically based on data in the Microsoft Project or Microsoft Excel plan. However, they can be edited manually.
Use the following two step procedure:
1) Right clicking a row or swimlane label will bring up the following context menu:
2) Choose the Edit row label or Edit swimlane label command depending on whether you are editing a row or a swimlane. The Enter text form (shown below) will appear in which the label text can be added, changed, or deleted.
(12.3)