Difference between revisions of "Managing Automatic Updates for OnePager Live"
(→Accessing the Automatic Schedule Update Controls) |
|||
| Line 14: | Line 14: | ||
<center>[[File:LE-0_03_0_3_1-OPL-(2)-07292016.png]]</center> | <center>[[File:LE-0_03_0_3_1-OPL-(2)-07292016.png]]</center> | ||
| + | |||
| + | ==Schedule New Update== | ||
| + | |||
| + | 3) To introduce a new update to the system, click the '''Schedule New Update''' button and fill in the information requested on the page shown below: | ||
| + | |||
| + | <center>[[File:LE-0_03_0_3_1-OPL-(3)-07292016.png]]</center> | ||
| + | |||
| + | 4) | ||
Revision as of 20:43, 29 July 2016
Automatic Schedule Updates - Overview
OnePager Live offers you a new feature whereby you can make your normal periodic status updates to your Microsoft Project or Microsoft Excel plan and, on a regularly scheduled basis, OnePager Live will automatically update the designated project views and post these updates in the cloud where you designate. Once established and scheduled, OnePager Live will simplify your periodic status update process and enhance your schedule update communications to stakeholders. In addition, to establishing periodic status updates within OnePager Live, you are provided with the controls necessary to change the schedule and add components to the update process as your project requires.
This article provides you with the detailed information necessary for you to set up and maintain automatic project view updates with OnePager Live.
Accessing the Automatic Schedule Update Controls
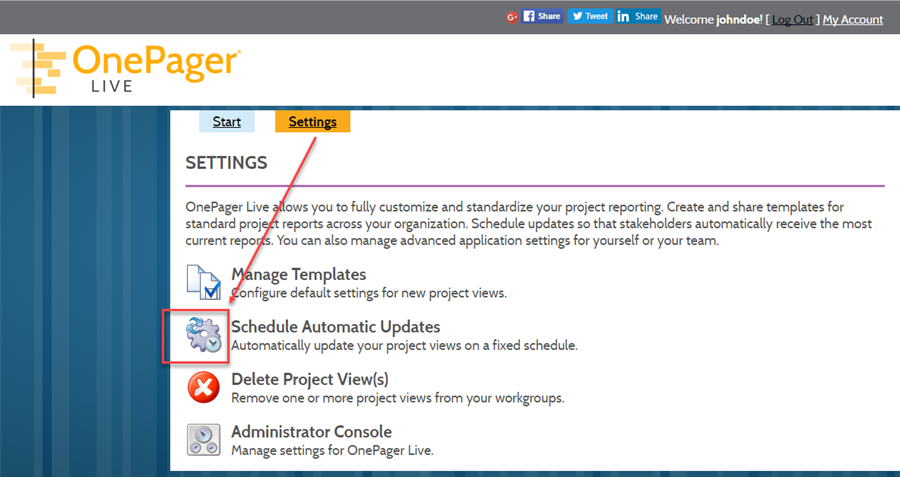
1) After logging in to OnePager Live, select the Settings button at the top of the OnePager Live Home (Getting Started) page. This will bring up the Settings page as shown below where you may then click the Schedule Automatic Update button:

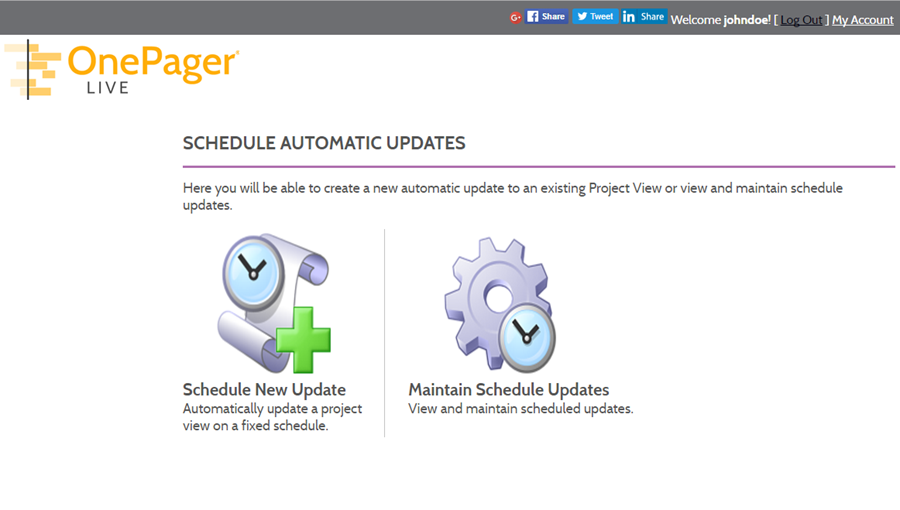
2) After clicking the Schedule Automatic Update you may choose between the two options shown and further discussed below:

Schedule New Update
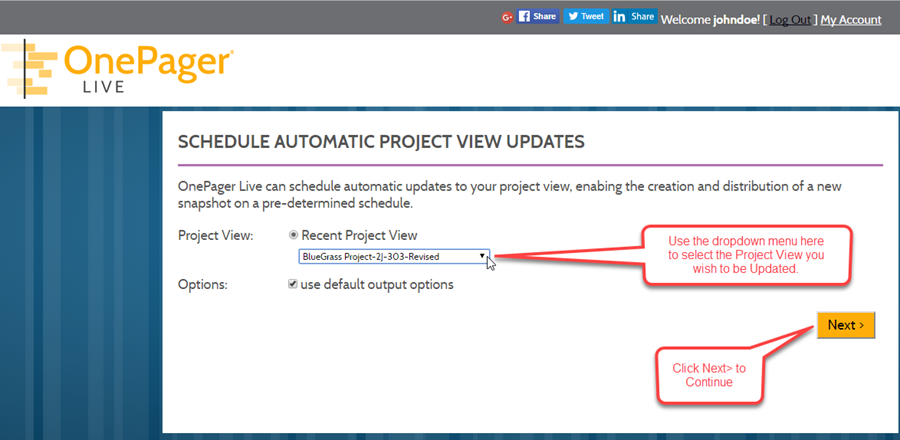
3) To introduce a new update to the system, click the Schedule New Update button and fill in the information requested on the page shown below:

4)