Difference between revisions of "Moving Swimlanes for Version 6.0"
From OnePager Documentation
| Line 8: | Line 8: | ||
<center>[[File:P60-12_10_1-60-(1)_11212016.png]]</center> | <center>[[File:P60-12_10_1-60-(1)_11212016.png]]</center> | ||
| − | <center>P60-12_10_1-60-(1)_11212016.png</center> | + | <!--<center>P60-12_10_1-60-(1)_11212016.png</center>--> |
4) When the mouse left click button is released the selected '''swimlane''' is repositioned to the desired location as shown here: | 4) When the mouse left click button is released the selected '''swimlane''' is repositioned to the desired location as shown here: | ||
<center>[[File:P60-12_10_1-60-(2)_11212016.png]]</center> | <center>[[File:P60-12_10_1-60-(2)_11212016.png]]</center> | ||
| − | <center>P60-12_10_1-60-(2)_11212016.png</center> | + | <!--<center>P60-12_10_1-60-(2)_11212016.png</center>--> |
(12.10.1-60) | (12.10.1-60) | ||
Revision as of 20:37, 5 April 2017
Just like rows, swimlanes (and the rows and all text columns within them), can be manually repositioned in the project view.
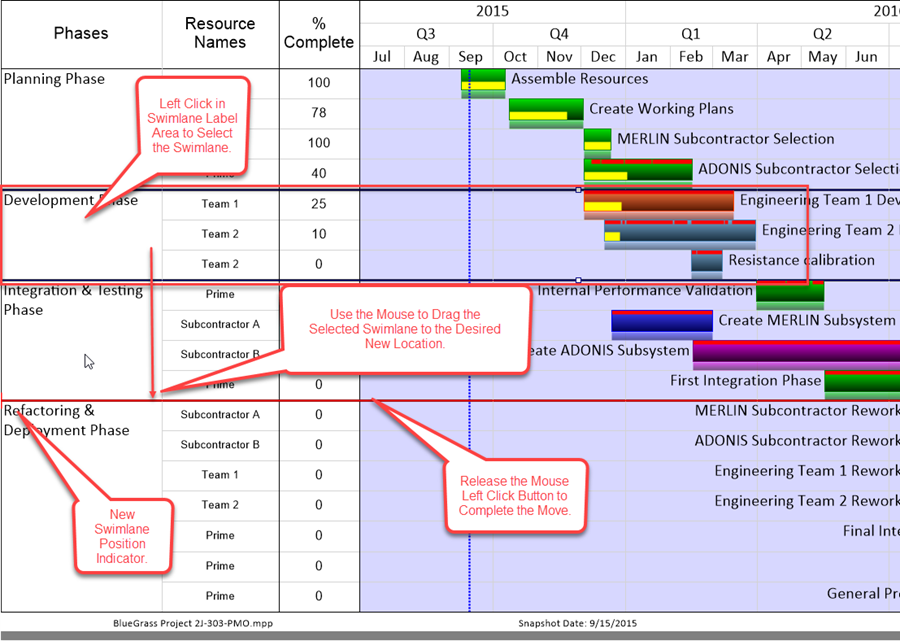
1) To move a swimlane, select the swimlane with a left click the swimlane label.
2) Then drag the swimlane with the mouse in the swimlane label up or down in the project view to reposition it.
3) The red line highlight that appears indicates the new position of the swimlane once the mouse button is released as shown below:

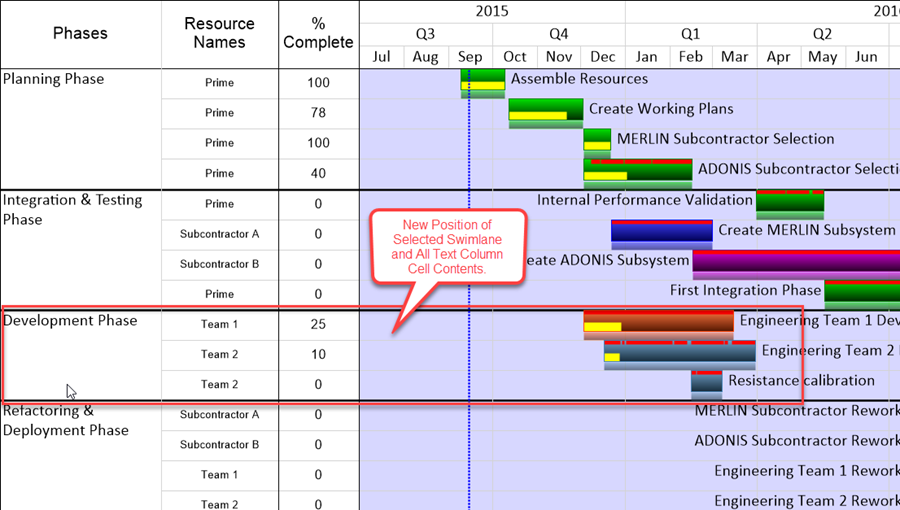
4) When the mouse left click button is released the selected swimlane is repositioned to the desired location as shown here:

(12.10.1-60)