Difference between revisions of "Moving Swimlanes for Version 7.0"
From OnePager Documentation
(Created page with "==Moving Swimlanes== 1) Just like rows, swimlanes (and the rows and all '''text columns''' within them), can be manually re-positioned in the project view. 2) To move a swi...") |
|||
| Line 1: | Line 1: | ||
==Moving Swimlanes== | ==Moving Swimlanes== | ||
| − | 1) Just like rows, swimlanes (and the rows and all '''text columns''' within them), can be manually re-positioned in the | + | 1) Just like rows, swimlanes (and the rows and all '''text columns''' within them), can be manually re-positioned in the chart. |
2) To move a swimlane, select the swimlane with a left click the swimlane '''label'''. | 2) To move a swimlane, select the swimlane with a left click the swimlane '''label'''. | ||
| − | 3) Then drag the swimlane with the mouse in the '''swimlane label''' up or down in the | + | 3) Then drag the swimlane with the mouse in the '''swimlane label''' up or down in the chart to re-position it. |
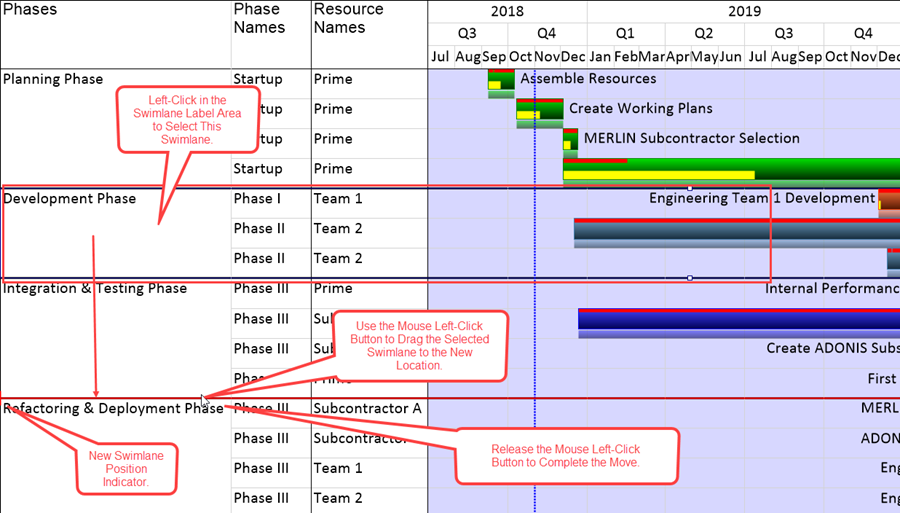
4) The red line highlight that appears indicates the new position of the swimlane once the mouse button is released as shown below: | 4) The red line highlight that appears indicates the new position of the swimlane once the mouse button is released as shown below: | ||
| Line 20: | Line 20: | ||
[[Category:Version 7.0]] | [[Category:Version 7.0]] | ||
| − | [[Category: | + | [[Category:Charts]] |
[[Category:Templates]] | [[Category:Templates]] | ||
| − | [[Category: | + | [[Category:Chart Properties Form]] |
| − | [[Category:Editing | + | [[Category:Editing the Chart]] |
[[Category:Rows and Swimlanes]] | [[Category:Rows and Swimlanes]] | ||
[[Category:Swimlanes]] | [[Category:Swimlanes]] | ||
Revision as of 17:53, 25 February 2019
Moving Swimlanes
1) Just like rows, swimlanes (and the rows and all text columns within them), can be manually re-positioned in the chart.
2) To move a swimlane, select the swimlane with a left click the swimlane label.
3) Then drag the swimlane with the mouse in the swimlane label up or down in the chart to re-position it.
4) The red line highlight that appears indicates the new position of the swimlane once the mouse button is released as shown below:

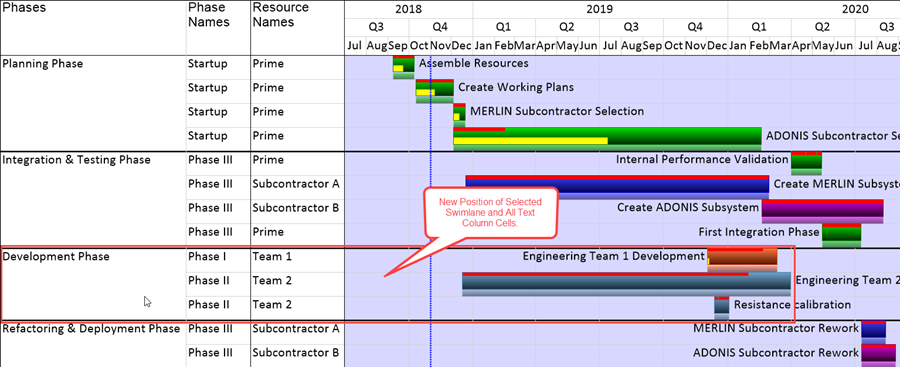
5) When the mouse left click button is released the selected swimlane is re-positioned to the desired location as shown here:

(12.10.1-70)