OnePager's Ribbon Tool Bar File Page for Version 7.2
Contents
Overview
Illustrations used or referenced in this article are from OnePager Pro using data from Microsoft Project but the features, function, controls, and manual edits apply equally to other OnePager editions that import from data sources like Microsoft Excel, Oracle Primavera P6, Smartsheet, Planisware Enterprise, Project for the Web, Asana, and Wrike.
OnePager's Ribbon Tool Bar File Page
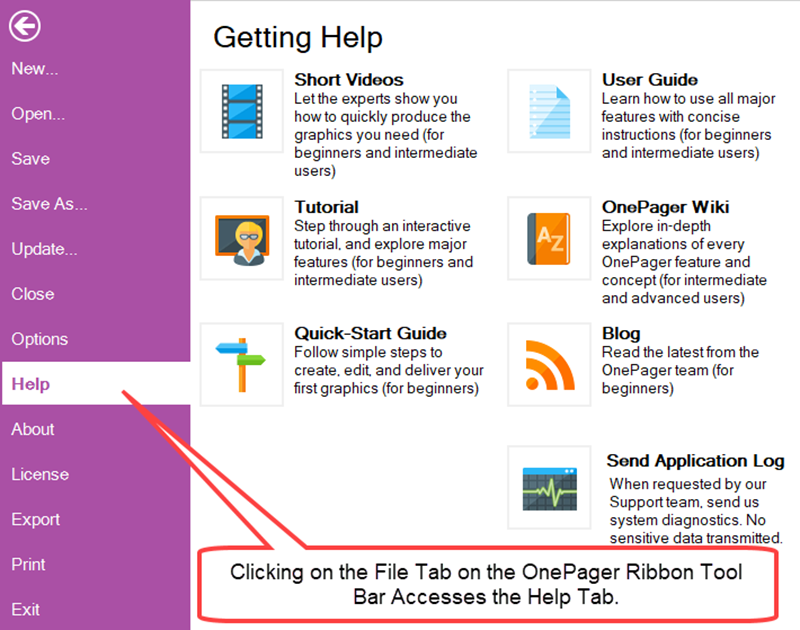
Clicking the File tab on the OnePager Ribbon Tool Bar takes you away from the Chart Editor and to the File page with its thirteen (13) tabs as shown below at the Help tab:
All File Page tabs are discussed in detail below.
File Page – New… Tab
Clicking the New… tab on the File page accesses the abbreviated OnePager choices form with the Please select a source file sub-section as shown below:

This action takes you back to the OnePager Home Ribbon Tool Bar tab where you can use the abbreviated OnePager choices form to load a different source plan or plans and thereby create a new chart from it.
File Page – Open… Tab
Clicking the Open… tab on the File page accesses a dropdown list with the most recent chart file names created. These chart file names are .tam files and selecting one of them launches another OnePager Chart Editor that displays the selected .tam file. This is illustrated below:
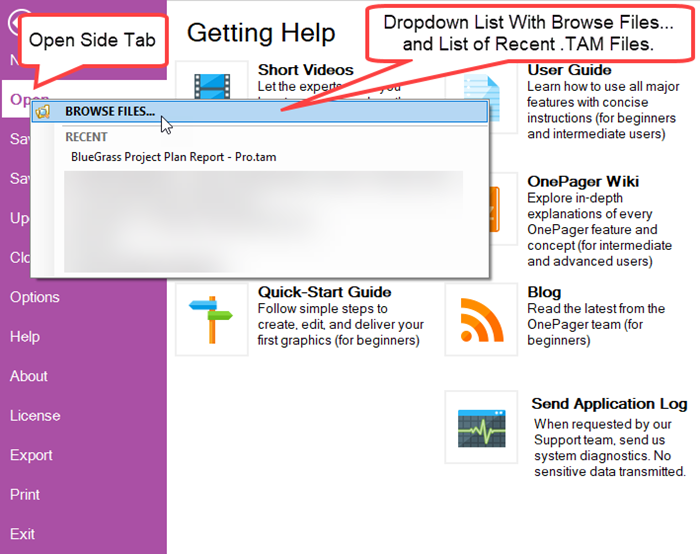
Clicking on the RECENT .tam file shown above accesses another instance of the Chart Editor from which you have access to the previously prepared chart for editing or other purposes as shown below:
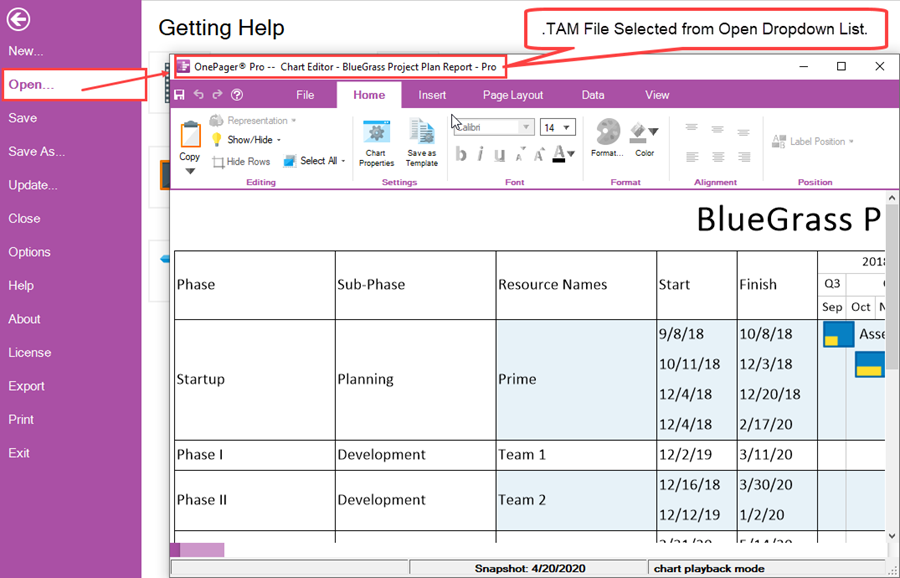
Note that the Get Help options remain visible after the Open tab is accessed.
The Open tab remains disabled until the newly opened .tam file is closed and you return to the original Chart Editor.
File Page – Save Tab
You can use the Save tab to save the current chart. Clicking the Save tab immediately takes you back to the OnePager Home Ribbon Tool Bar tab which is the Chart Editor and displays the Save as Chart (TAM) file form with the chart name inserted in the File name: window as shown below:
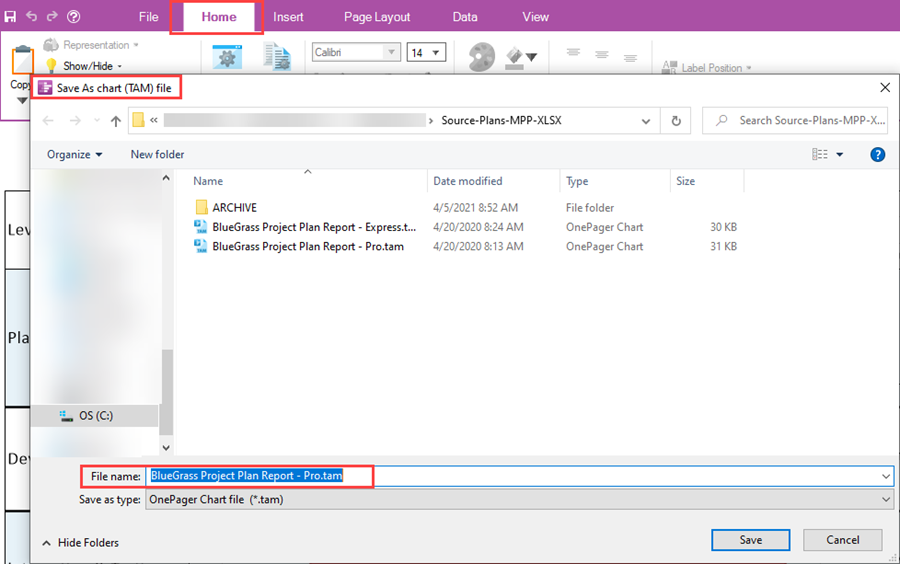
This form accesses the last location or folder where OnePager .tam files were last saved. At this point you can change the name of the file or the folder location where the file should be saved. Clicking the Save button saves the .tam file in the desired location and returns you to the Chart Editor at the OnePager Home Ribbon Tool Bar tab.
File Page – Save As… Tab
You can use the Save As… tab to save the current chart in a folder of your selection. Clicking the Save As… tab immediately accesses the Save as chart form shown below. The initial folder location is determined by the settings on the Options tab discussed in a subsequent sub-section below. For clarity, the Save as chart form is shown with the Options tab’s content in the background:

The intent above is to show that the initial folder accessed in the Save as chart form is determined by the setting in the Chart window shown above. At this point you can change the name of the file or the location where the .tam file should be saved. Clicking the Save button saves the .tam file in the desired location and returns you to original page where you clicked the Save As… tab.
AutoSave Checkbox
The AutoSave checkbox shown above turns the AutoSave feature ON and OFF. For more information on the AutoSave feature, please see the article at the link below:
| Automatic Saving of Charts Feature 26.0.1-72 |
File Page – Update… Tab
You can use the Update… tab to perform an update of the current chart. Clicking the Update… tab accesses the update configuration of the OnePager choices form shown below where you can use the controls to perform an update of your current chart either to add a new snapshot or replace an existing snapshot:
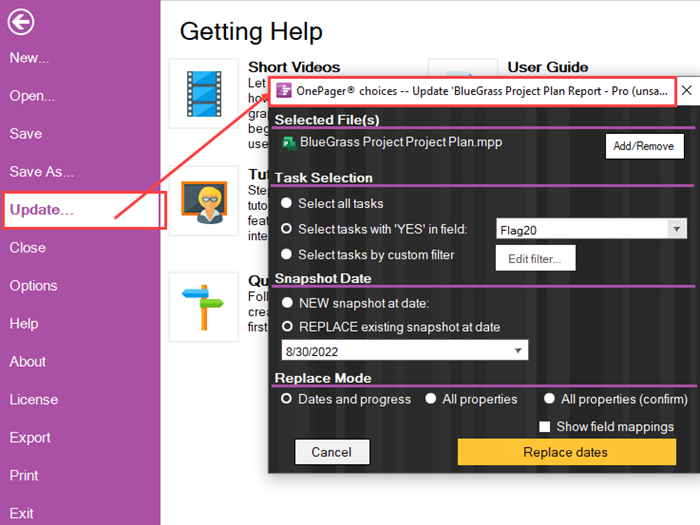
After performing the update, OnePager returns you to the OnePager Home Ribbon Tool Bar tab and the Chart Editor where the updated chart is displayed.
File Page – Close Tab
You can close the current chart in the Chart Editor by clicking the Close tab. Clicking the Close tab immediately displays a OnePager message form as shown below:
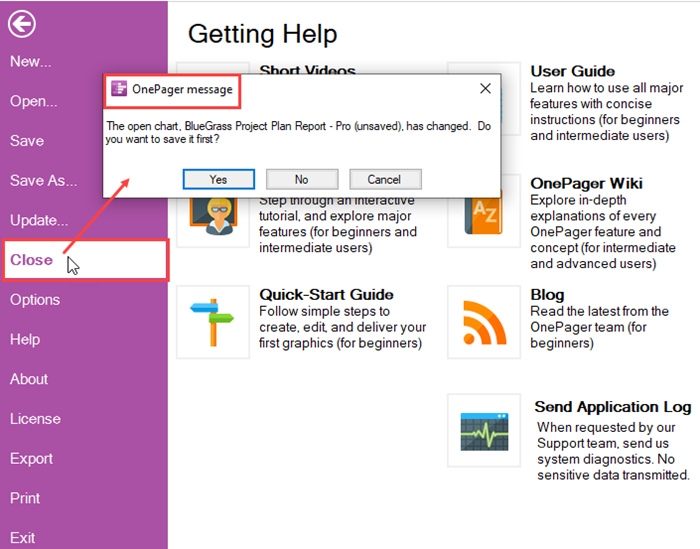
From the OnePager message form you have the option to click Yes, No, or Cancel.
- Clicking the Cancel button closes the OnePager message form and no further action by OnePager is taken.
- Clicking the No button also closes the OnePager message form and no further action is taken.
- When you click the Yes button in the OnePager Message form, OnePager access the Save As chart (TAM) file form as shown below:
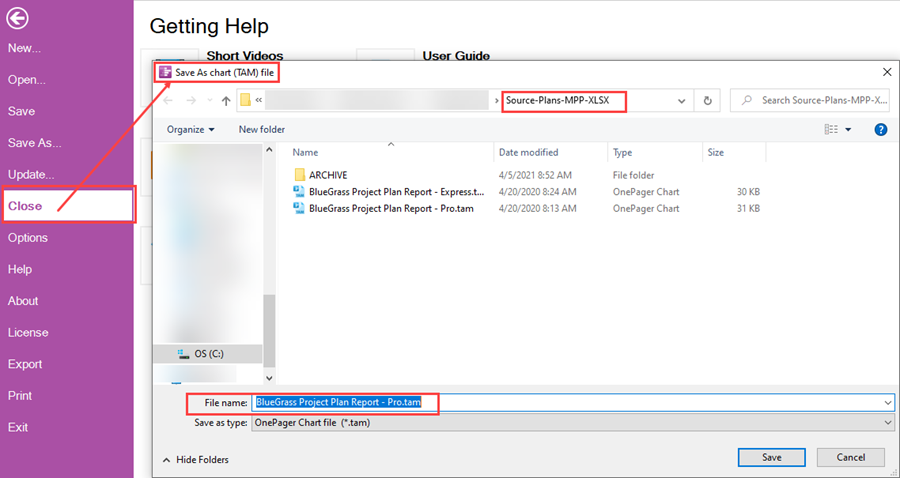
At this point you can change the name of the .tam file or the location where the .tam file is saved. Clicking the Save button on the form saves the .tam file in the desired location and returns you to original page where you clicked the Close tab. The action also closes the chart in the Chart Editor. When you return to the OnePager Home Ribbon Tool Bar tab, the Chart Editor screen looks like this minimized:
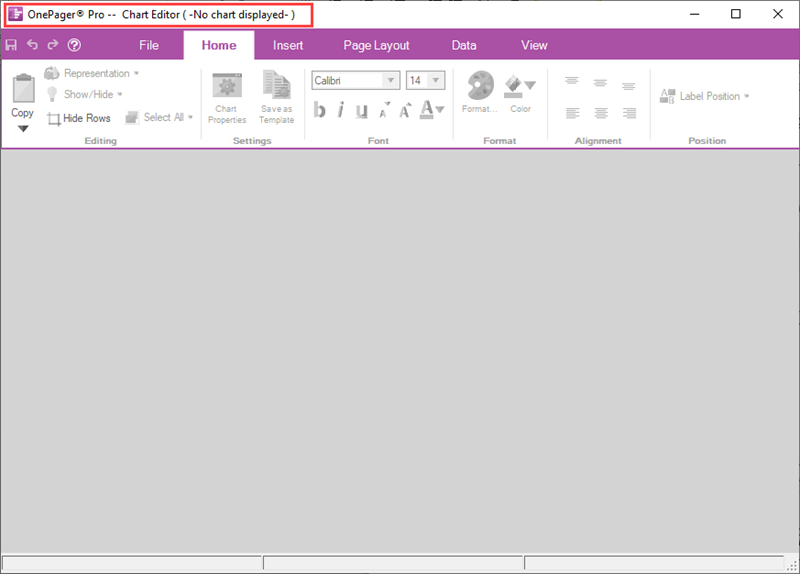
At this point you have the option to exit OnePager or to access another OnePager chart.
File Page – Options Tab
The Options Tab has three (3) purposes.
- First, it provides information on where OnePager stores and retrieves charts (i.e., .TAM files) and where OnePager stores and retrieves Template Properties forms, Color palettes, and Milestone symbols.
- Second, the Options tab provides the capability for you to change the locations of the four (4) elements previously described.
- And, third, the Template… button provides a way to access the current Template Properties form for the purpose of editing it or changing to a different Template Properties form. The Options tab is shown below:
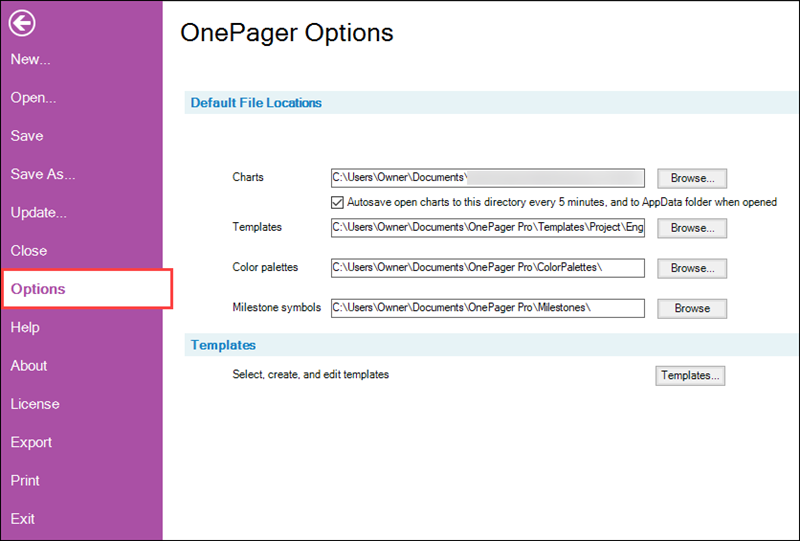
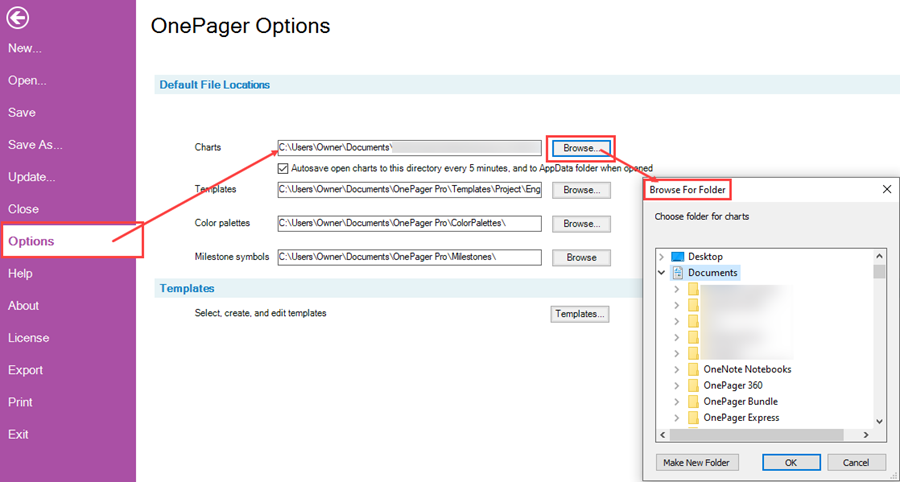
Clicking any of the four (4) Browse… buttons accesses the Browse for folder form where you can change where you access your .TAM files, Templates Properties forms, Color palettes, or Milestone symbols as shown below:
The Templates… button can be clicked to access the current Template Properties form for the purpose of making edits, creating a new Template Properties form, or changing to a different Template Properties form as shown here:
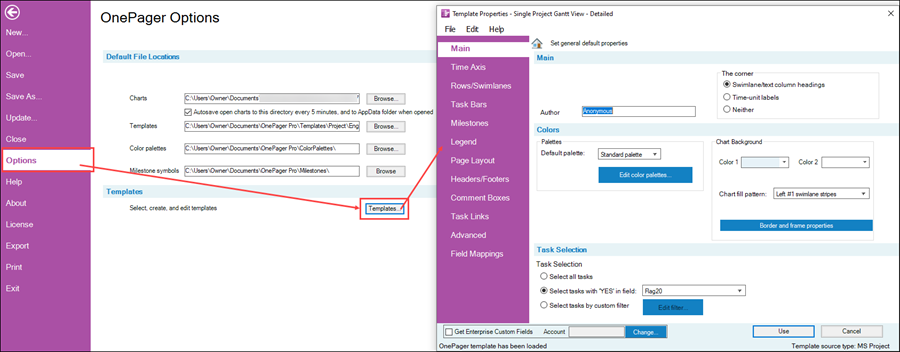
If OnePager already has a chart showing on the Chart Editor, changes made to the current Template Properties form have no impact on the chart. However, if the current Template Properties form is edited or change and saved, that edit or change Template Properties form may have an impact on the current chart if the chart is updated in the same session of the Chart Editor.
File Page – Help Tab
The Help Tab is the default tab OnePager presents when the OnePager Ribbon File Tool Bar tab is clicked. The Help tab has seven (7) buttons that provide access to different kinds of help tool available in OnePager as shown below:
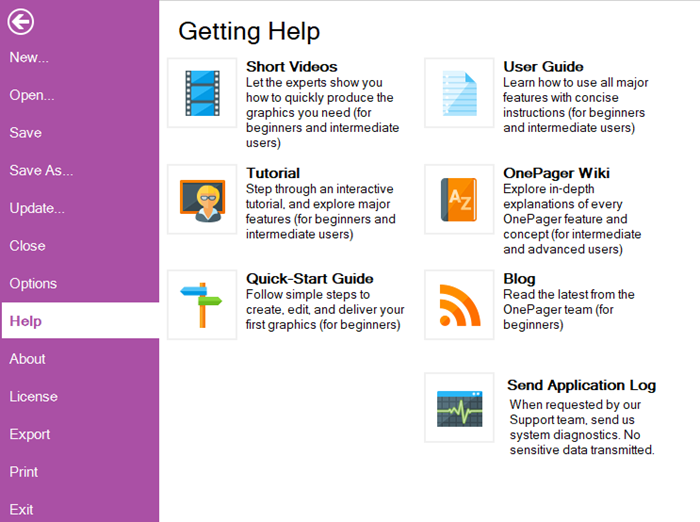
Each of these buttons is discussed below:
Show Videos Button
Clicking the Short Videos button launches a browser and takes you to the OnePager.com Video Tutorials page at:
| OnePager Video Tutorials |
The Show Video page has a list of available OnePager Videos you can use to introduce yourself to the features, functions, and capabilities of OnePager at the Basic, Intermediate, or Advanced levels.
Tutorial Button
Clicking the Tutorial button accesses OnePager’s built in Tutorial form which provides you access to the Tutorial for the specific product edition you are working with as shown below:
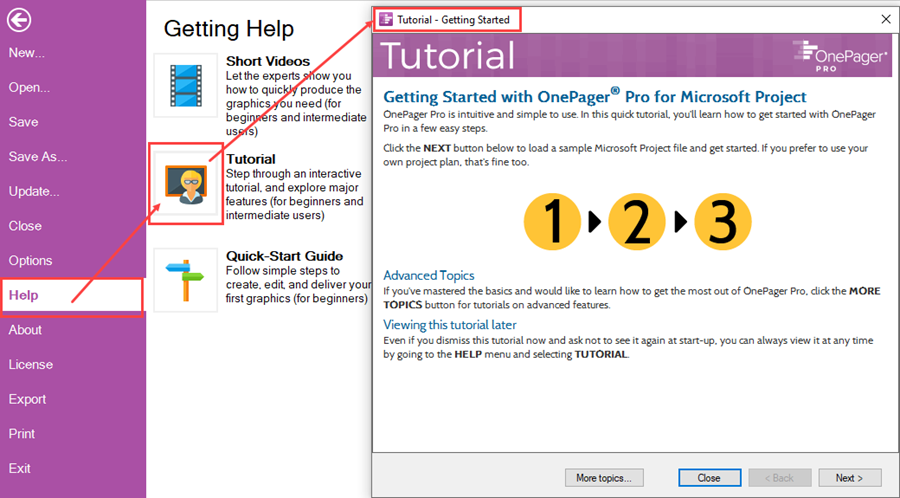
With the Tutorial form accessed, you can click on the Next > button to start the tutorial.
Quick Start Guide Button
Clicking the Quick Start Guide button launches an embedded browser PDF Reader with a short OnePager Quick Start Guide that is provided when you installed your edition of OnePager as shown below:
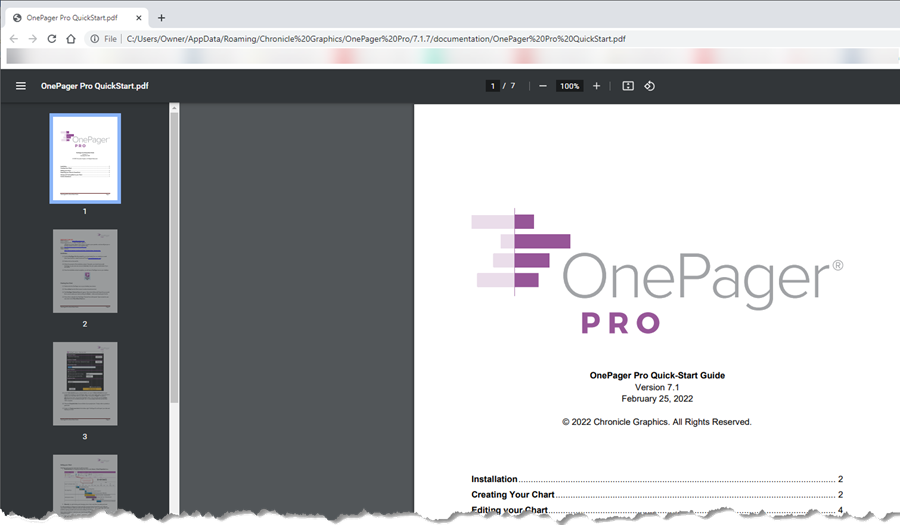
The OnePager Quick Start Guide document is typically sufficient to help you operate OnePager and create your first chart.
User Guide Button
Clicking the User Guide button launches an embedded browser PDF Reader with the longer OnePager User Guide that is provided when you installed your edition of OnePager as shown below:
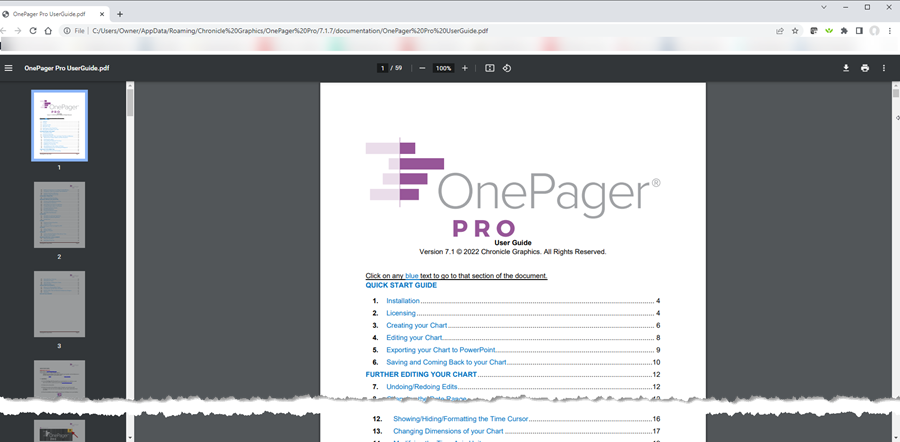
The OnePager User Guide document is a more detailed version of the OnePager Quick Start Guide document containing more detailed descriptions of available OnePager features, functions, and capabilities.
Wiki Button
Clicking the OnePager Wiki button launches a browser and takes you to the OnePager.com Wiki Title page at:
| OnePager Wiki |
The OnePager Wiki contains in depth detailed information on the use of all available versions and editions of OnePager. The Main Page of the OnePager Wiki looks like this:
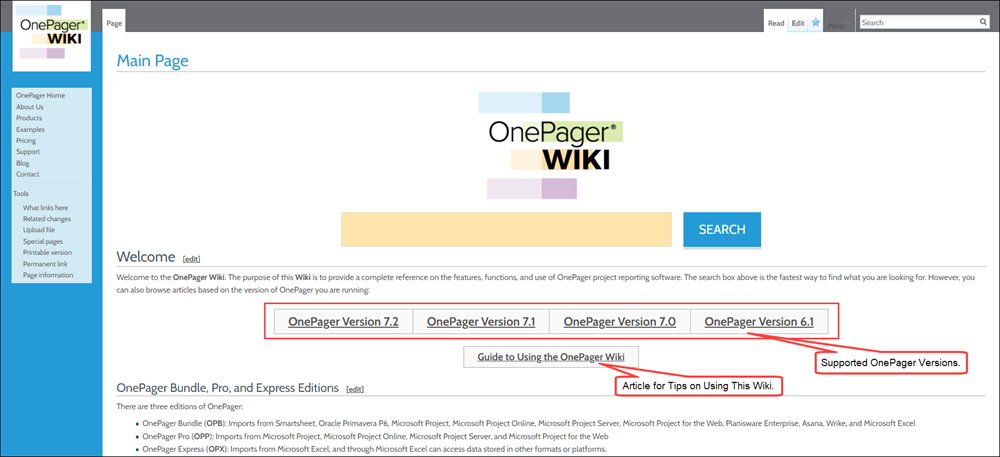
The OnePager Wiki provides in depth detailed information on using OnePager to its fullest capabilities back to Version Release 6.0. The Wiki contains detailed documentation for all supported source plan inputs to OnePager including Microsoft Project, Microsoft Project Online, Microsoft Project Server, Microsoft Excel, Smartsheet, Oracle Primavera P6., Project for the Web, Planisware Enterprise, Asana, and Wrike. The OnePager Wiki Main Page also has a button that provides access to an an article titled Guide to Using the OnePager Wiki which is recommended reading.
Blog Button
Clicking the Blog button launches a browser and takes you to the OnePager.com Blog page at:
| OnePager Blog |
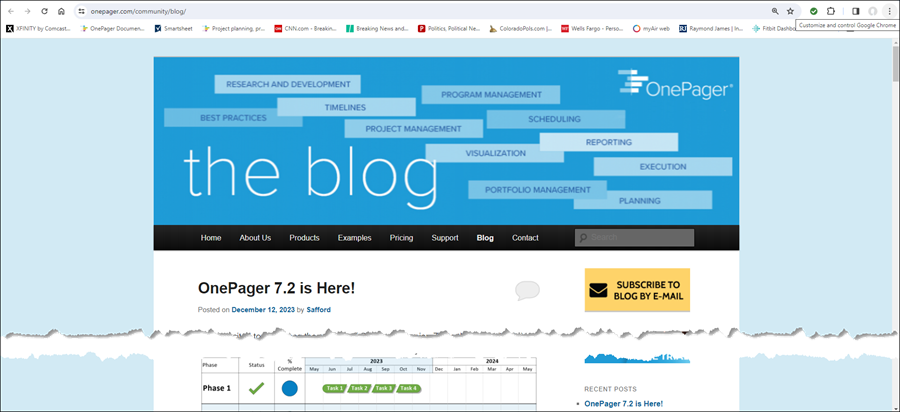
The OnePager Blog contains informative articles on topics of interest to OnePager users including tips and tricks for getting the most out of OnePager to support your schedule conversations. The OnePager Bog Page looks like this:
