Using Enterprise Custom Fields from Microsoft Project for Version 5.3 (OnePager Pro)
Contents
- 1 Using Enterprise Custom Fields from Microsoft Project for Version 5.3 (OnePager Pro) (P53-24_3_1-02112016)
Using Enterprise Custom Fields from Microsoft Project for Version 5.3 (OnePager Pro) (P53-24_3_1-02112016)
OnePager Pro offers access to Microsoft Project Server’s Enterprise Custom Fields (ECF) so that you can use these fields to determine swimlanes, colors, flagging of tasks, and other properties.
Logging-in to Your Microsoft Project Server Account from Microsoft Project Professional
You can always log-in to your Microsoft Project Server account from Microsoft Project. Once you are logged-in to your account you can following the steps below from the point where OnePager Pro is launched and you access the OnePager Pro “Template Properties” form.
Logging-in to Your Microsoft Project Server Account through the OnePager Pro Add-in
Logging-in to your Microsoft Project Server Account can also be done from the OnePager Pro Add-in application.
1) Launch Microsoft Project Professional and load the Microsoft Project plan desired.
2) Click the “Template” button on the Microsoft Project “Add-in” tab which brings up the OnePager Pro “Template Properties” form shown below:
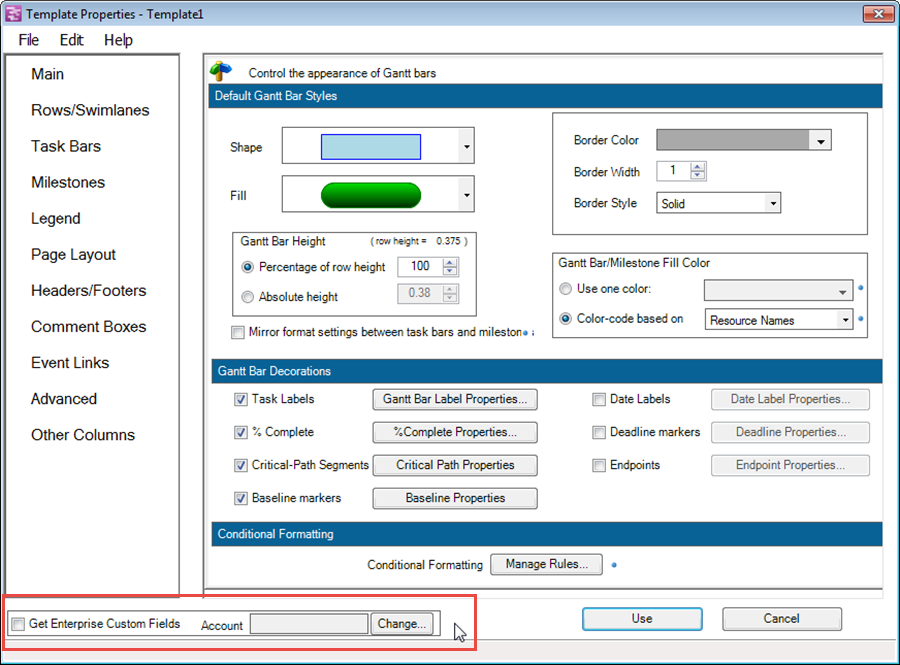
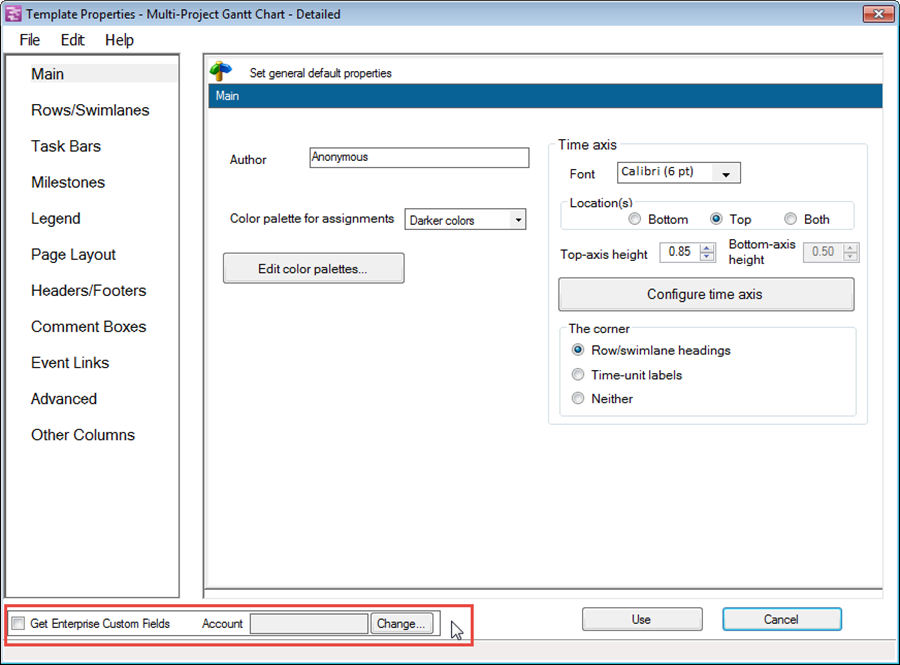
3) The bottom of the form above contains the “Get Enterprise Custom Fields” check box and a window used in conjunction with the “Change” button that allows you to access and manage your Microsoft Project Server Accounts.
4) This method does not apply when using the OnePager Pro desktop application.
Accessing Your Microsoft Project Server’s Enterprise Custom Fields
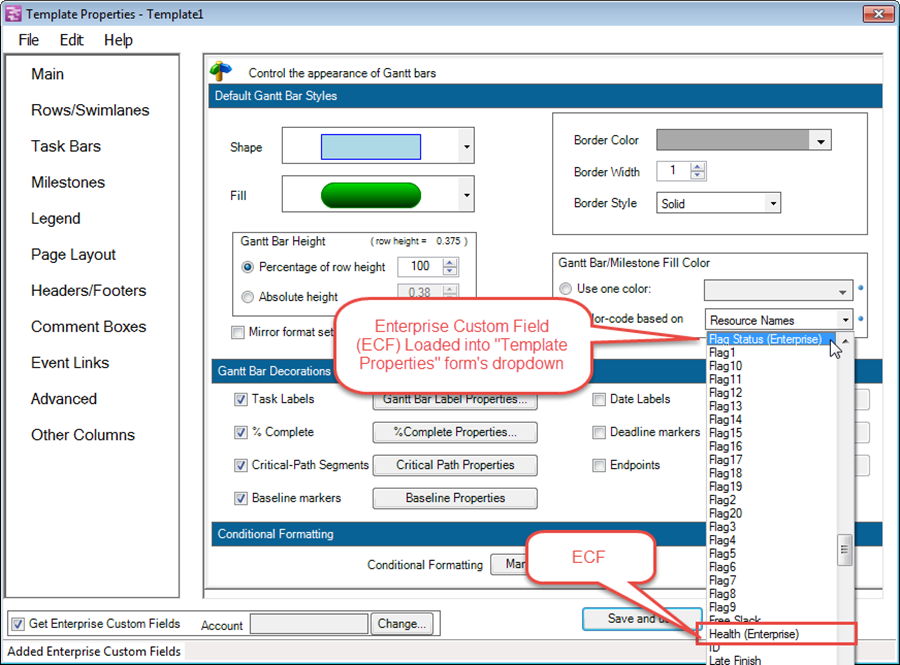
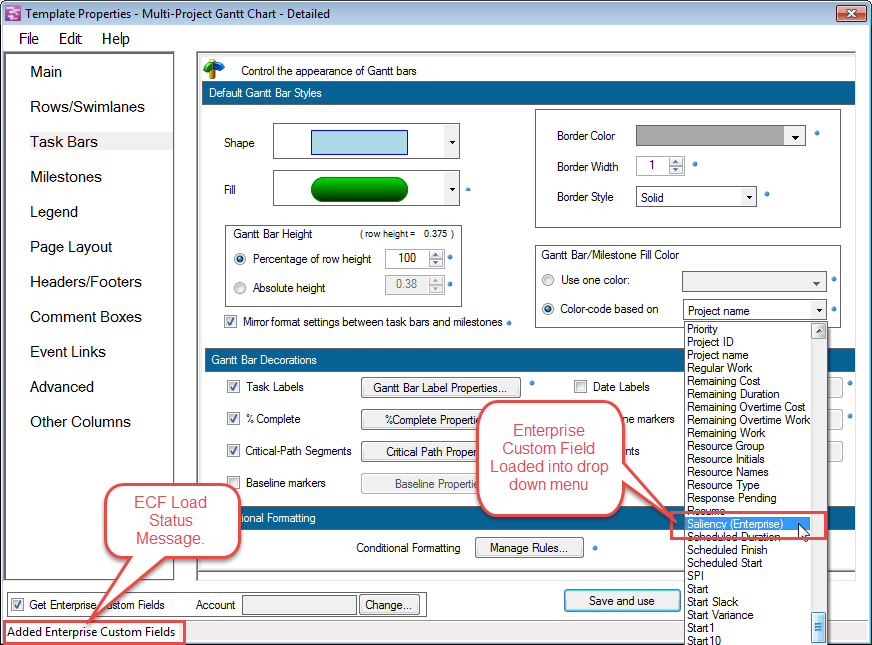
5) When you CHECK the “Get Enterprise Custom Fields” check box, OnePager will check to see if OnePager is already logged-in to Project Server. If so, the Enterprise Custom Fields will be loaded into the “Template Properties” form’s dropdown list of fields as shown below:
6) If OnePager is not already logged-in, it attempts to log-in using the URL for whatever Microsoft Project Server account Microsoft Project is connected to.
- a) If OnePager finds that Windows has stored default credentials for Microsoft Project to log-in to Microsoft Project Server, OnePager will attempt to use these without prompting you and without ever actually knowing the username and password.
- b) If successful, OnePager will create a OnePager log-in account with just the URL but with no username and password.
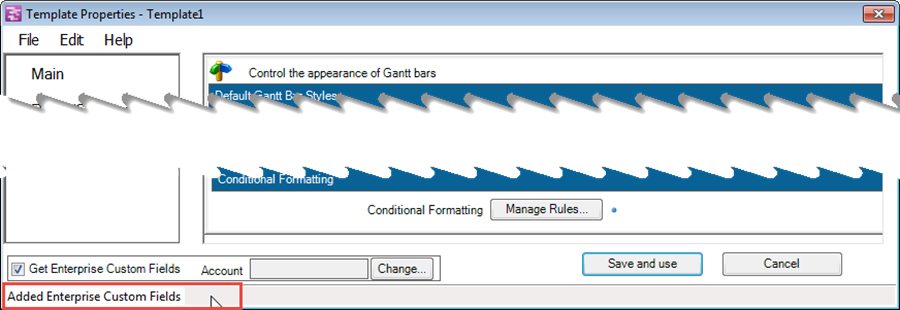
7) Once OnePager connects to Microsoft Project Server, it retrieves the ECF and displays a success message “Added Enterprise Custom Fields” as shown here:
8) The ECF data are now loaded into the dropdown lists of fields as shown above.
9) You may now select the ECF for various purposes such as for controlling rows/swimlane organization, selection of task/milestone colors, or Other Column selections on the “Advanced” tab.
10) You may now click the “Save and use” button, which makes the template with the ECF data the current template. It now may be used to create NEW project views.
11) When a new project view is created using the desired Enterprise Custom you may open the project view, access the “Project-View Properties” form, and make changes to the row/swimlane organization as described above by selecting the desired ECF now available. Note: Other ECF’s will not be available to you unless you ALREADY included them in some mapping in the original template.
12) A similar approach using the OnePager Pro Add-in application may be used to UPDATE a project view build with ECF’s. Note: You are limited at UPDATE time to the ECF’s that were put into the project view from the original template.
Suspending the Use of Enterprise Custom Fields
13) To suspend the use of Enterprise Custom Fields UNCHECK the “Get Enterprise Custom Fields” check box and click “Save and use”.
14) This action will remove the ECF’s from the “Template Properties” forms so that creating and updating project views can take place with these templates without the ECF’s.
Logging-in to Your Microsoft Project Server Account through the OnePager Pro Desktop
Logging-in to your Microsoft Project Server Account can also be done from the OnePager Pro Desktop application.
1) Launch OnePager Pro from the desktop icon.
2) The log-in is performed in the “Template Properties” form. You can access the form for the OnePager Pro Desktop application by clicking the “File” tab and then clicking the “Options” tab. This will bring up the “OnePager Options” page where you’ll find the “Template” button in the lower right of the page. Click the button which will bring up the “Template Properties” form shown below:
Accessing Your Microsoft Project Server’s Enterprise Custom Fields
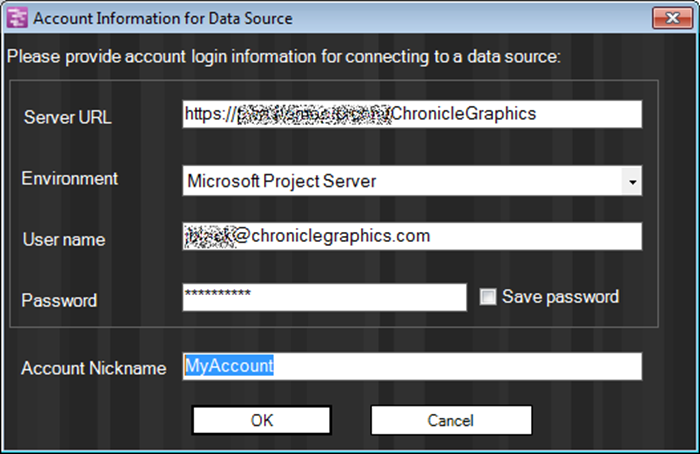
3) Now, CHECK the “Get Enterprise Custom Fields” check box and OnePager Pro will bring up the log-in form shown below:
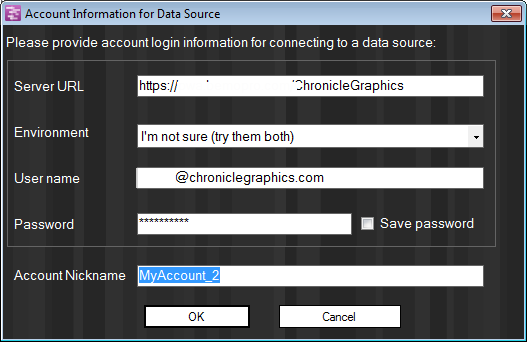
4) Once you enter your credentials, click the “OK” button to attempt to connect. The OnePager Pro Desktop application will log you into your account and download your ECF information into the “Template Properties” form’s drop down menus as shown below:
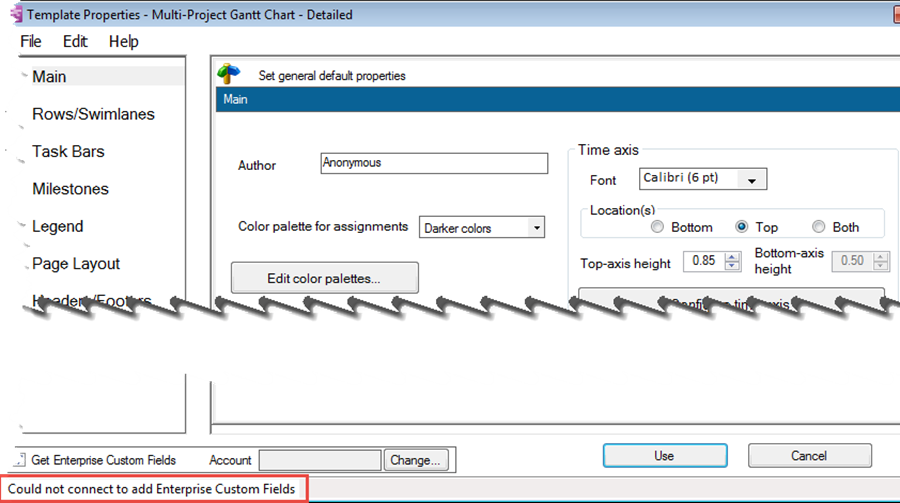
5) When the OnePager Pro Desktop application is launched and running Microsoft Project is not running so it is not possible to connect to your Microsoft Project Server account through Microsoft Project. If the OnePager Pro Desktop application is not able to connect to the server you’ve requested a message will appear at the bottom of the “Template Properties” form as shown below:
6) Once you are logged-in to your Microsoft Project Server account through the OnePager Pro Desktop application all features and functions with respect to ECF perform as if you were using the OnePager Pro Add-in application
(24.3.1-53)