Using Rows and Swimlanes
Contents
About Rows and Swimlanes
The purpose of this section is to introduce OnePager’s rows and swimlane management features. To help illustrate this approach we will repeat the “Rows & Swimlanes” tab from the “Project-View Properties” form below:
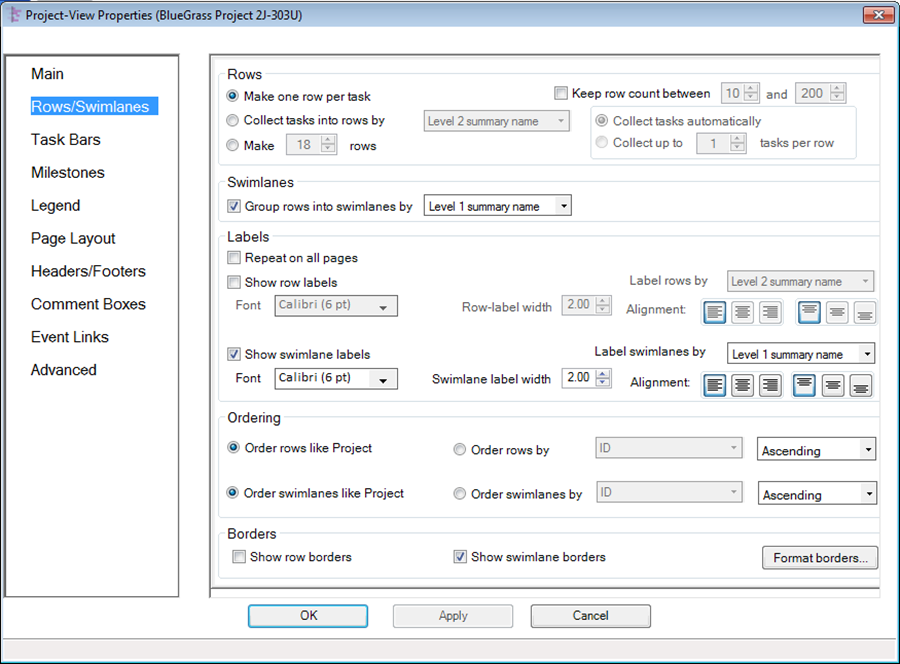
As the “Rows/Swimlanes” tab above illustrates, there is a stepwise approach to constructing an informative and useful Gantt chart. The general philosophy is for you to create or modify the project view, by making the following determinations:
1) Determine how tasks will be collected into rows.
2) Determine how rows will be grouped into swimlanes keeping in mind that steps 1 and 2 are related.
3) Determine how row are ordered in swimlanes and how swimlane are ordered.
4) Determine how row and swimlane gridlines will be labeled.
5) Determine how row and swimlane borders will be depicted.
The discussion which follows is divided into five sub-sections, one each for the decision steps listed above.
Step 1 – Collect Tasks into Rows
Collecting tasks into rows is the first step, although the most common situation is to make one task per row. Once completed, you have additional controls over row and swimlane manipulation with respect to grouping, ordering, and labeling. Tasks may be “Collected” into rows by various techniques over which you have control:
1) Make one task per row: As the button name suggests, OnePager will place each task in an individual row. Note that no collection occurs in this case. When this command is selected, you have the following optional choice to make:
- a) Checking the “Keep row count between X and Y” check box: When this box is checked, OnePager will take the total task count and assign them to rows such that the resulting row count is between your stated minimum and maximum.
- b) Un-checking the “Keep row count between X and Y” check box: When this box is un-checked, OnePager will create as many rows as there are tasks/milestones imported from the Microsoft Project plan.
2) Collect task into rows by “source column name”: OnePager will examine the selected Microsoft Project plan column for each encountered task and “collect” them into as many unique rows as there are unique terms. When this command is selected, you have the following choices to select from:
- a) Collect tasks automatically: OnePager will put tasks into rows such that there is no overlapping of task in the row with respect to start and finish dates.
- b) Collect up to “____designated number” of tasks per row: OnePager will “collect” the imported task from your Microsoft Project plan into rows such that the number of task per row is less than or equal to the designated number of tasks per row. Collected tasks may overlap within the created rows.
- c) Make “user designated number” or rows: OnePager will create your designated number of rows and “collect” the imported tasks into that number of rows only. Collected tasks may overlap within the created rows and are not collected by means of a Microsoft Project plan column.
After task collection into rows is determined, you may determine how rows should be grouped into swimlanes. If the control is not checked, OnePager will ignore the grouping step and will make one swimlane containing all rows.
Step 2 – Group Rows into Swimlanes
If you check the box specifying that rows are to be grouped into swimlanes, OnePager will use the designated Microsoft Project plan column to control row grouping.
Since rows may contain multiple tasks, each with unique data from the Microsoft Project plan column controlling grouping, OnePager must first determine the number of swimlanes and then place the rows in their proper swimlane. Please consider the following example.
OnePager first looks at all the data from the Microsoft Project plan and determines the number of unique values present which determine the number of swimlanes to be generated. You do not have control explicitly over the number of swimlanes that can be generated. If there is more than one task in a row and the tasks have different data, OnePager will use the “majority rule” to compute the value for each row. For example, suppose your designated Microsoft Project plan column contains the values “Red” and “Green”. Suppose further that:
- Row1 contains two “Red” tasks and one “Green” task,
- Row2 contains one “Red” task and two “Green” tasks,
- Row3 contains one “Red” task
- Row4 contains two “Red” tasks.
In this situation, two swimlanes will be generated. One of these is the “Red” swimlane and the other is the “Green” swimlane. Row2 will belong to the “Green” swimlane and the other three rows will belong to the “Red” swimlane.
At the completion of this step, OnePager will perform the ordering of rows within swimlanes and ordering swimlanes as described in the next sub-section.
Step 3 – Order Swimlanes and/or Order Rows in Swimlanes
Order Rows in Swimlanes: You have two options when controlling how rows will be ordered within swimlanes:
1) Order rows like Microsoft Project: Selecting this ordering technique uses the sequence from top to bottom provided by the Microsoft Project plan. If several tasks are collected into the same row, OnePager will first sort them into their natural Microsoft Project order and then will choose the first task in the list to represent the entire row. If you choose descending order, OnePager will use the last task in the list.
2) Order rows by “user selected Microsoft Project plan column”: You may choose to order rows under the control of data in a designated Microsoft Project plan column and further choose either ascending or descending order. It should be pointed out that your Microsoft Project plan column used to order rows may be the same as your Microsoft Project plan column used to collect tasks into rows or a different Microsoft Project plan column. As discussed in the bullet above, OnePager chooses the first (last) value from list of values within each row when rows consist of tasks with differing data.
Order Swimlanes: At this point, tasks are assigned to rows and rows to swimlanes. OnePager now uses the data from your Microsoft Project plan column to order the swimlane within the project view. You have two options when controlling how swimlanes will be ordered:
1) Order swimlanes like Microsoft Project: Selecting this ordering technique establishes the sequence from top to bottom provided by your Microsoft Project plan. Since the various tasks comprising a swimlane will have different natural-occurrence orders in your Microsoft Project plan, OnePager first will perform the analysis at the task level within each swimlane to determine the swimlane ordering value to assign to the swimlane. In other words, OnePager will first sort the set of tasks comprising all the rows in the swimlane into their natural order and then will choose the first task in the list to represent the entire swimlane. (If you specified descending order, OnePager will choose the last task in the list to represent the entire swimlane.)
2) Order swimlanes by “Microsoft Project plan column”: You may choose to order swimlanes under the control of data in a specified Microsoft Project plan. As discussed in the bullet above, OnePager chooses the first (last) value from the list of values with each swimlane when swimlanes consist of rows that consist of tasks with differing data in the designated “Sort swimlanes by” column.
3) At the completion of the ordering rows and swimlanes steps, you may choose to show row and swimlane labels as described below.
Step 4 – Label Rows and Swimlanes
'Labeling Rows: If you check the “Show row labels” check box, you must designate a Microsoft Project plan column to be used for OnePager to select the appropriate row label. Since tasks may be “collected” into rows using your designated Microsoft Project plan column, there is a need to resolve conflicts when rows consist of tasks with differing data in the designated “Collect tasks into rows by” column. If there is more than one task in a row and these tasks have different values from your designated Microsoft Project plan column, OnePager will display the label that occurs most frequently or the label that comes from the first task in the natural order of your Microsoft Project plan for tasks with the same frequency of occurrence of label data.
Labeling Swimlanes: If you check the “Show swimlane labels” check box, you must designate a Microsoft Project plan column to be used for OnePager to select the appropriate swimlane label. Since tasks may be “collected” into rows using your Microsoft Project plan column and the rows grouped into swimlanes using another Microsoft Project plan column, there is a need to resolve conflicts when swimlanes consist of tasks with differing data in the designated “Label swimlanes by” Microsoft Project plan column. If there is more than one task in a swimlane and these tasks have different values from your designated Microsoft Project plan column, OnePager will display the swimlane label that occurs most frequently or the label that comes from the first task in the natural order of your Microsoft Project plan for tasks with the same frequency of occurrence of label data.
Finally, you may cause row and swimlane labels to be repeated on all output pages if the multi-page feature is being used.
After completing the selection of optional labels for rows and swimlanes, you have the further option to control format of gridlines that OnePager will place between rows and swimlanes as detailed in the discussion of Step 5 below.
Step 5 – Format Borders and Backgrounds
As the final step in preparing your rows and swimlanes presentation, you may choose to turn on the row and swimlane borders feature. This feature allows you to exercise control of borders around rows, around swimlanes, the inner frame of the project view, and the outer frame of the project view.
Format Borders Button:
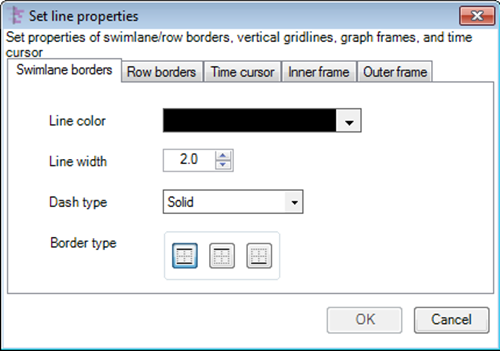
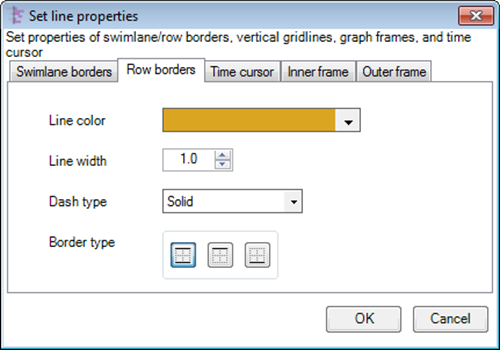
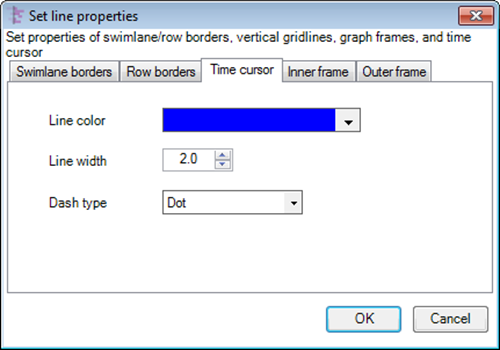
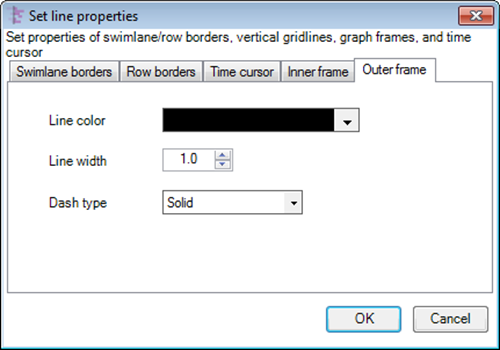
When the “Format Borders” button is clicked a form consisting of five tabs is presented that allows you to control gridline color, width, and dash type. The tabs are shown below and apply to:
- Swimlane borders
- Row borders
- Time cursor borders
- Inter frame borders
- Outer frame borders
Border commands for color, width, and dash type are as consistent as possible with those found in Microsoft Excel.
Swimlane borders, Row borders, Time cursors, Inner Frame and Outer Frame Common Controls: By clicking the “Format borders…” button in the “Project-View Properties” form “Rows and Swimlanes” tab you can configure borders for rows, swimlanes, and the other elements as shown below.
- a) Line color: This drop-down list provides a color palette from which the line color for the border can be selected.
- b) Line width: The line width for all borders is in units of font points.
- c) Dash type: There are five (5) “line or dash” types available for borders.
- d) Border type: There are three border types available.
- e) The four controls mentioned above are consistently used for three (3) of the five borders tabs.
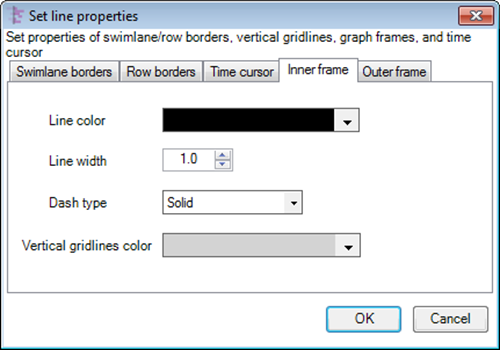
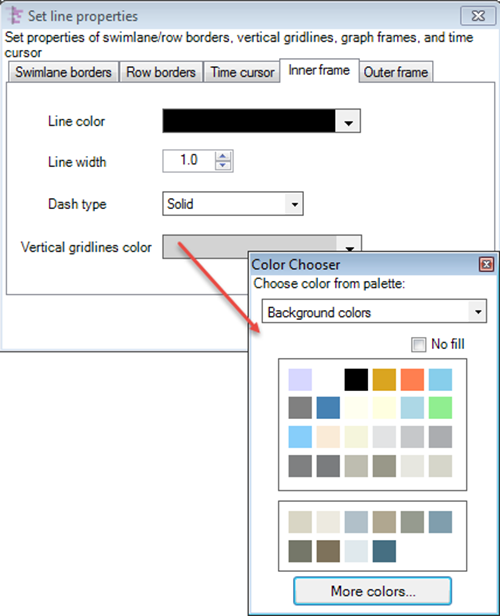
Vertical Gridlines Color: The “Inner frame” tab has an additional control for the color of the vertical gridlines. Vertical gridlines are shown to place time separations on the graph. Typically vertical gridlines are used to place separation between years or other major time boundries. The “Inner frame” tab below shows this control.
Example of Vertical Gridlines: The following segment of a project view illustrates the use of vertical gridlines:
