Administering Individual User Accounts for OnePager Live (Portal) (Articles for Admin)
Contents
Administering Individual User Accounts
0.03.1.2-OPL
Administering individual user accounts, that is, making changes to existing user accounts is done by accessing the Administrator Console as described in this article: Creating A New Account for OnePager Live 0.03.0.4-OPL. Once the Administrator Console is available, we recommend you use the User List tab at the top of the page to find the user whose profile you may wish to change or delete. The sections below describe tabs available on the Administrator Console page.
User's List
1) As stated above, we recommend starting with the User's List tab to locate the specific user you want to work with. The User's List looks like this:
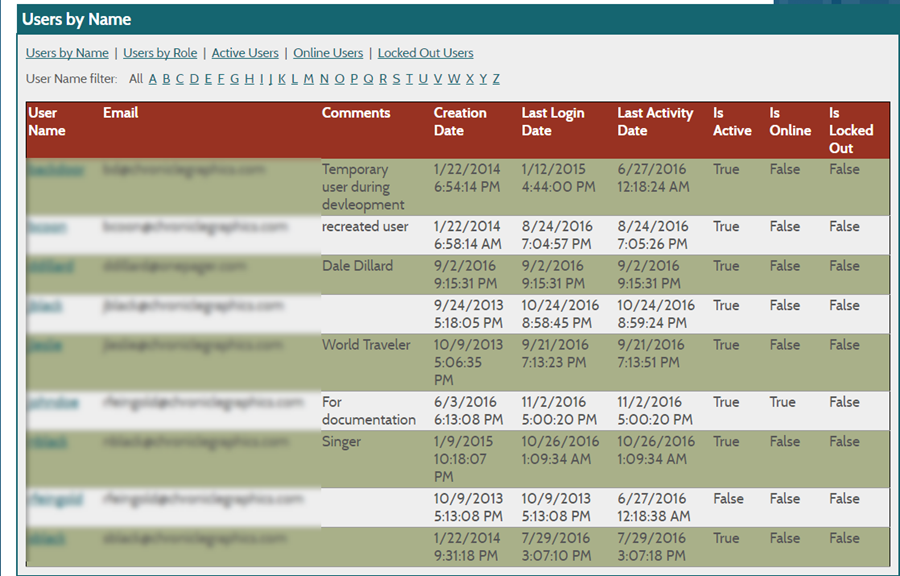
2) The User's List may be sorted in a number of ways by clicking on the any of the sub-tabs shown below. In addition, you may select an alphabetical group by clicking on an individual letter also shown in the sub-tab below:

3) Once you have located the specific user you wish to work on, you can access that user's account information by simply clicking on the User Name field in the User's List form as shown here:
4) When you click on the desired User Name, OnePager Live will display the selected user's account information as shown below:
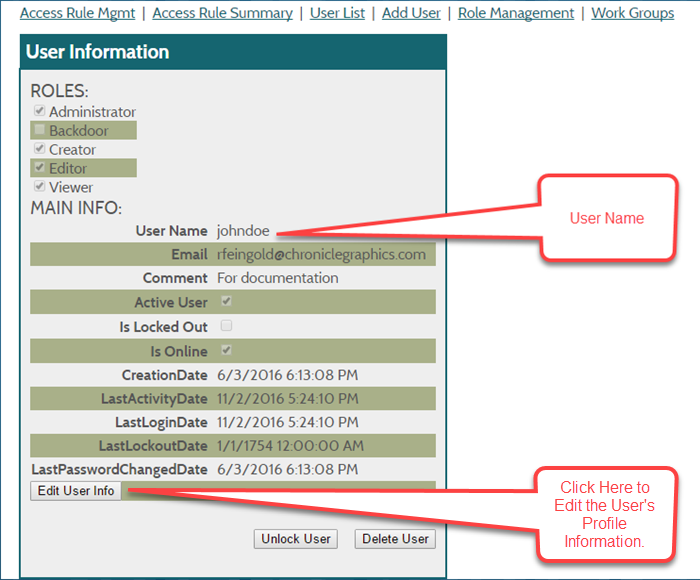
5) Clicking the Edit User Info button will allow you access to all editable fields in the user's profile. Upon completion of the edit, you can update the edited information to OnePager Live by clicking the Update button as shown below:
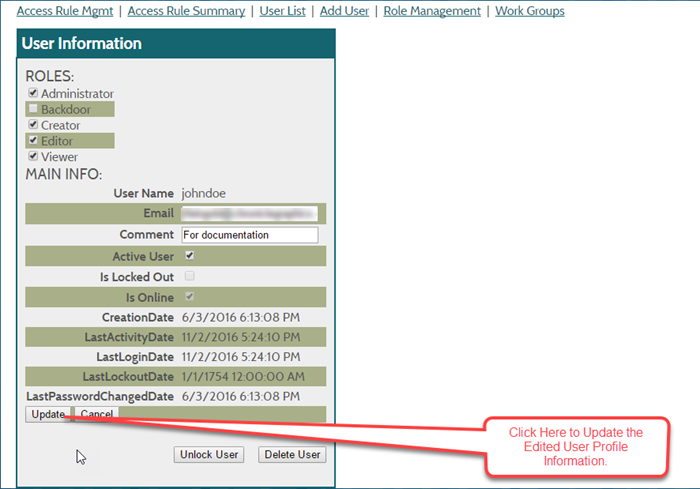
6) OnePager Live will indicate that the update was successful by displaying the message shown here:

7) You may continue the process of editing from the User's List until all desired entries are finished.
Add User
8) How to add a user is explained in the article titled: Creating A New Account for OnePager Live 0.03.0.4-OPL and is not repeated here.
Role Management
9) OnePager Live defines a set of roles when the system is installed. These roles are explained in the article titled: Creating A New Account for OnePager Live 0.03.0.4-OPL and is not repeated here
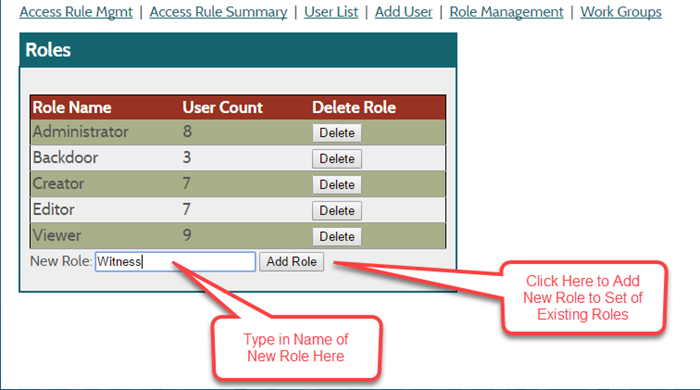
10) On occasion you may want to add a role with properties that are not included in OnePager Live's distributed set of roles. To do this, go to the Administrator Console page as described earlier and click on the Role Management tab.
11) This action will bring up the Roles page as shown below where you may enter the name of the new role in the New Role window shown below. Once entered, you can add the new role by clicking the Add Role button shown"
The capabilities to change/modify role profiles in under development and not available as of 11/2/2016.
Access Rule Summary
This sub-section, which involves security matters, will undergo considerable change and is not expanded as of 11/2/2016.
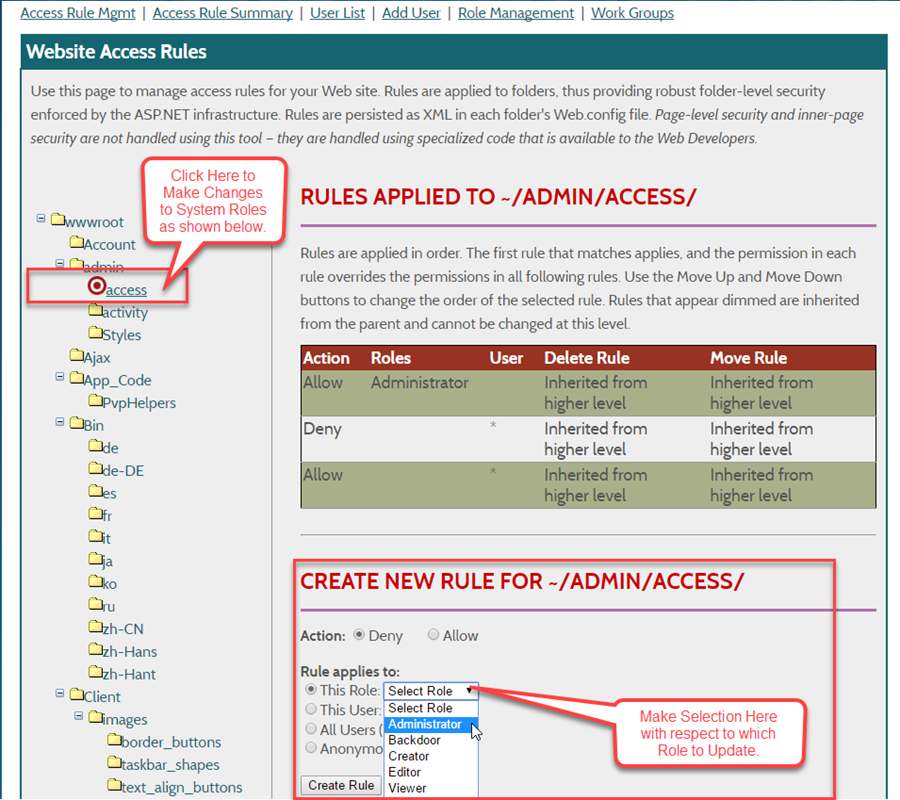
Access Rule Management
This sub-section, which involves security matters, will undergo considerable change and is not expanded as of 11/2/2016.
(0.03.1.2-OPL)