Basic Manual and Global Editing of Multi-Page Output
Contents
- 1 About Manual Editing of Multi-Page Outputs
- 2 Using the Page Layout Tab’s Document Fitting Settings to Manually Change Page Breaks
- 3 Global Editing of Page Layout with the Project-View Properties (PVP) Form
- 4 Multi-Page Controls on the Print Tab of the File Tab
- 5 Global Editing of Page Layout with the Templates Properties Form
About Manual Editing of Multi-Page Outputs
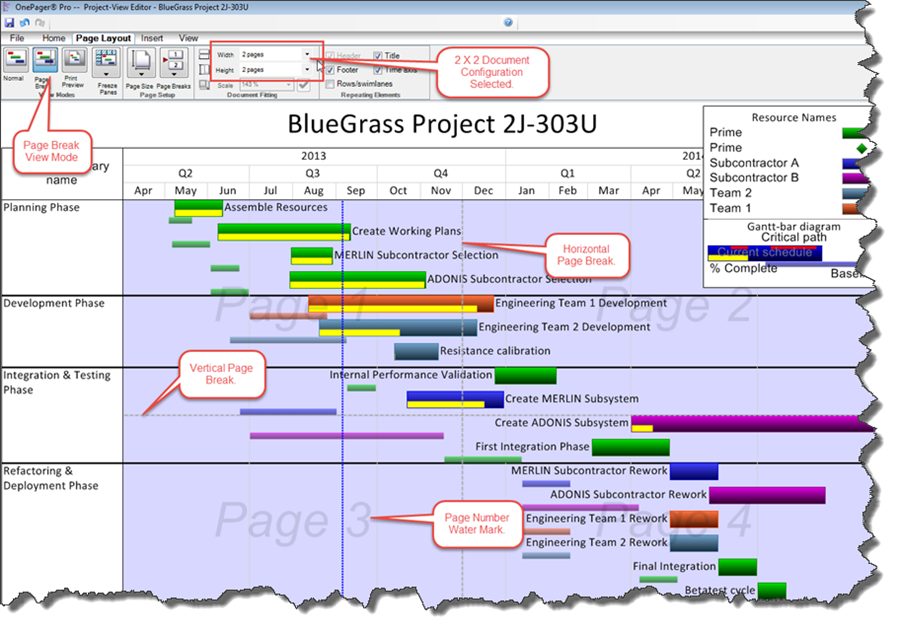
1) You have several page break manipulation controls in the Page Break view mode. Automatic page breaks recommended by OnePager are selectable and can be dragged to new locations.
2) Below shows a page breaks inserted by OnePager:
- a) You may select, drag, and drop an automatic vertical or horizontal page break.
- b) By right clicking in open space where you desire to place a page break, OnePager will display the context menu below to let you insert a horizontal or vertical manual page break:
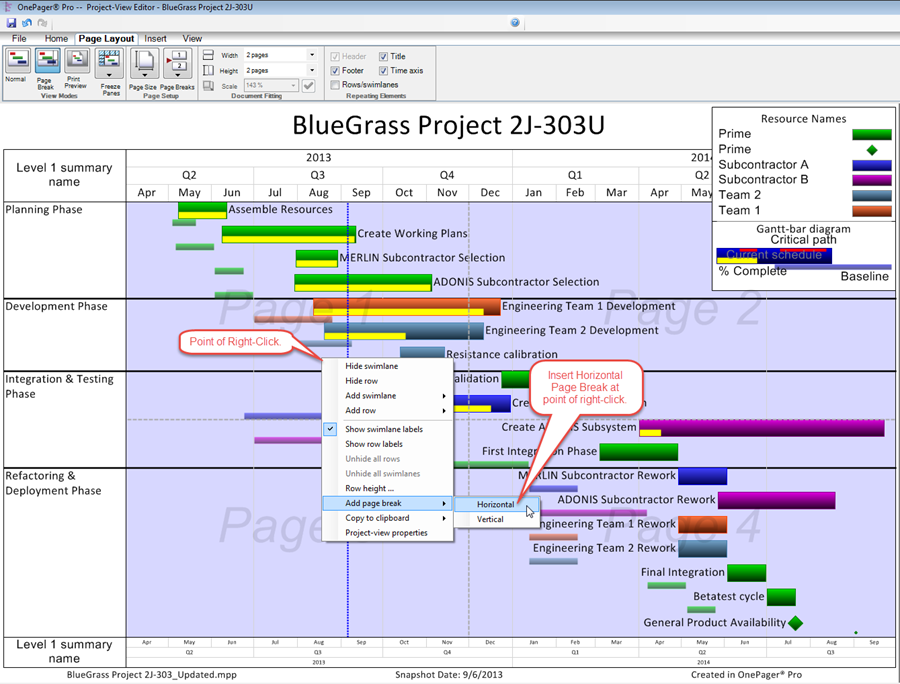
- c) When you click the Horizontal sub-command as shown above, OnePager will create a new page break at the position of your original right click as shown below:
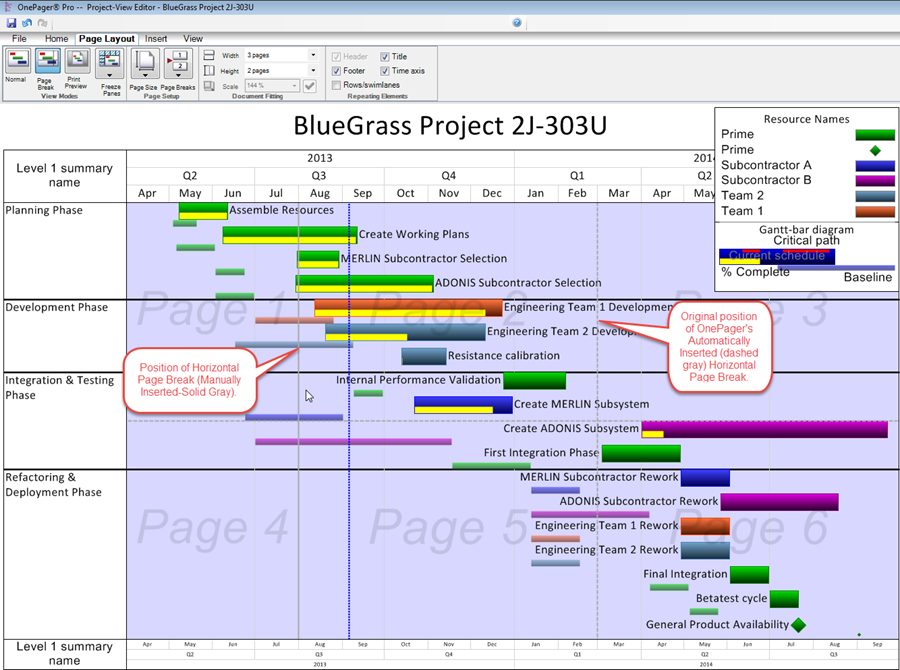
- d) Both automatically generated and manually inserted page breaks will now be shown if you are in the M x N mode.
- e) If you are in automatic x automatic mode, the manually inserted page break may replace an automatic page break if it is possible to do so.
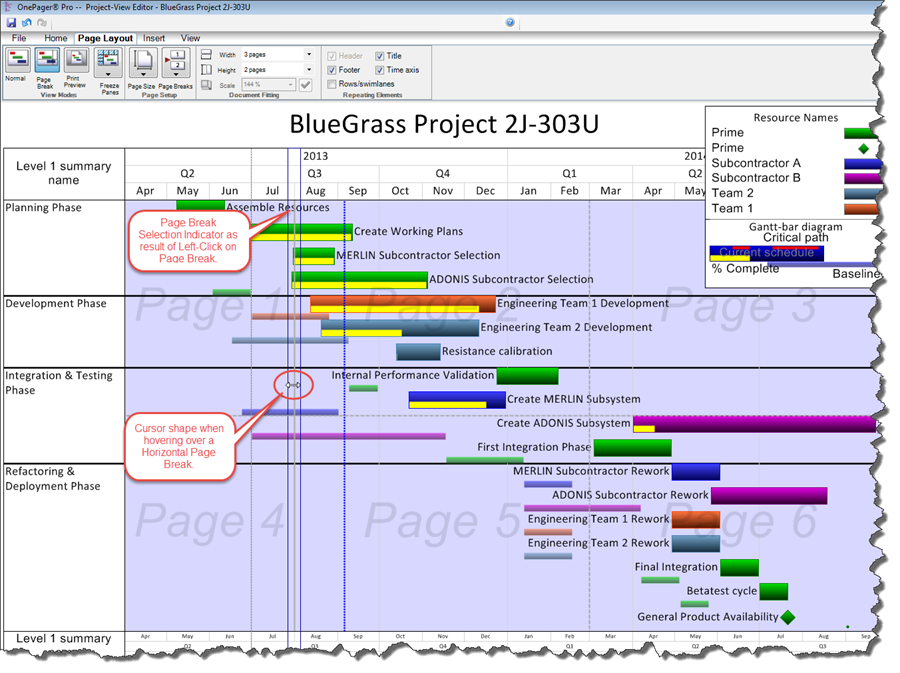
- f) You may now select the page break with a left or right click. Also, a left click will display a border around the page break as shown below:
- g) After selecting the horizontal page break, dragging the cursor to the left or right will change the location of the page break. Since horizontal page breaks are placed between the lowest level time axis tic marks, you should drag the page break as close as you can to the appropriate time axis tic boundary. Releasing the left mouse button will complete the action as shown below:
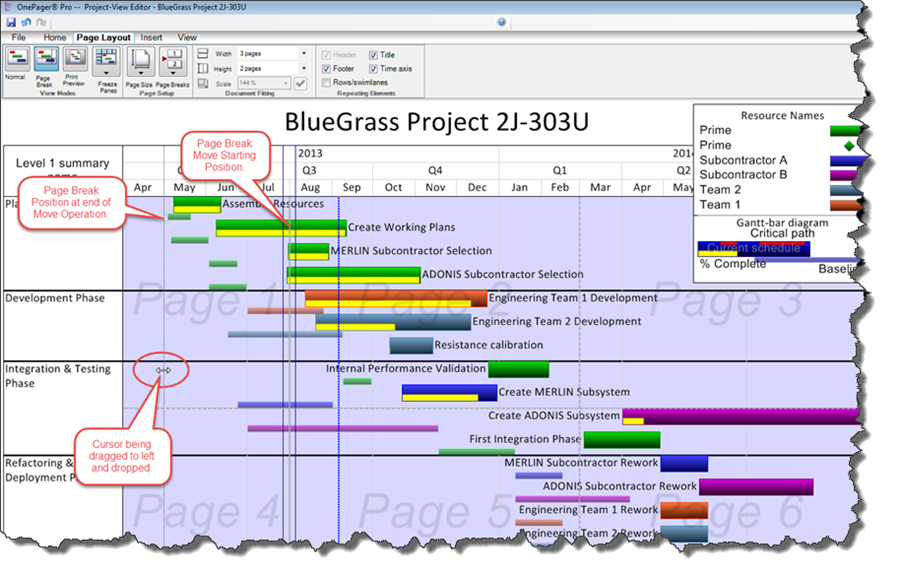
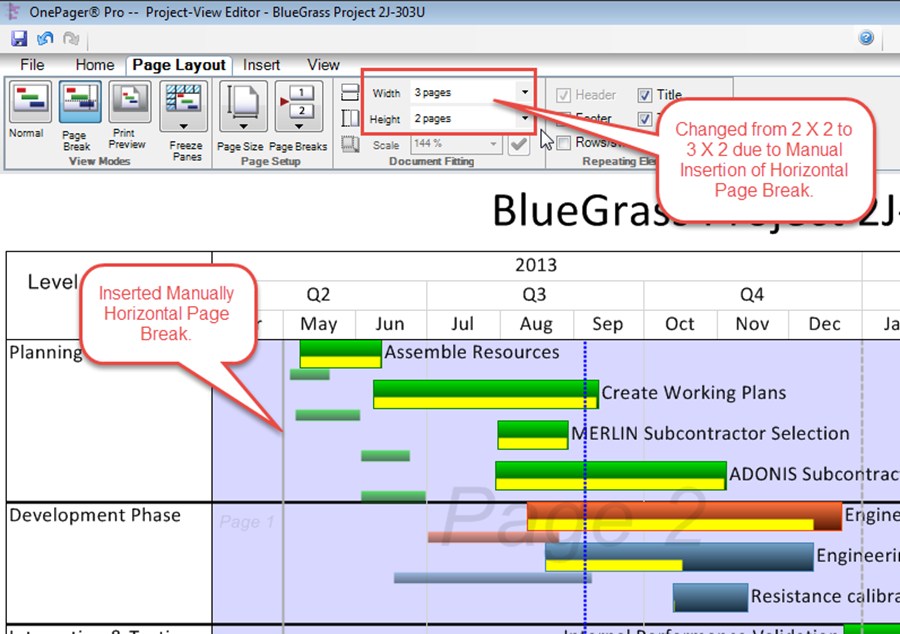
- h) Inserting a page break manually will override any previous settings of the Height or Width settings section as shown below:
- i) Right clicking a manual page break lets you delete it. The right click brings up a small context menu with a delete command as shown below:

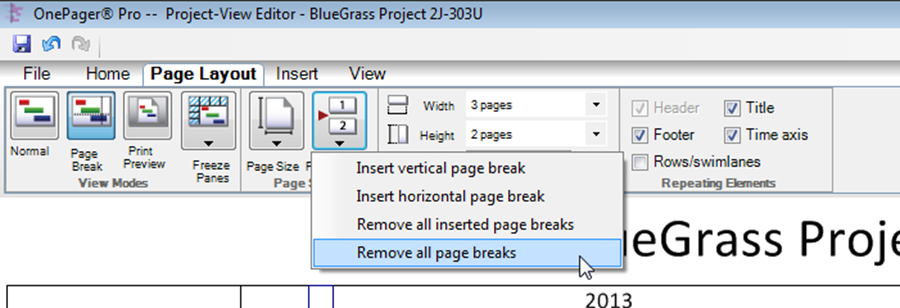
- j) Note that you cannot delete an automatic page break in this way. Rather, you can remove all the page breaks by using the Page Breaks button.
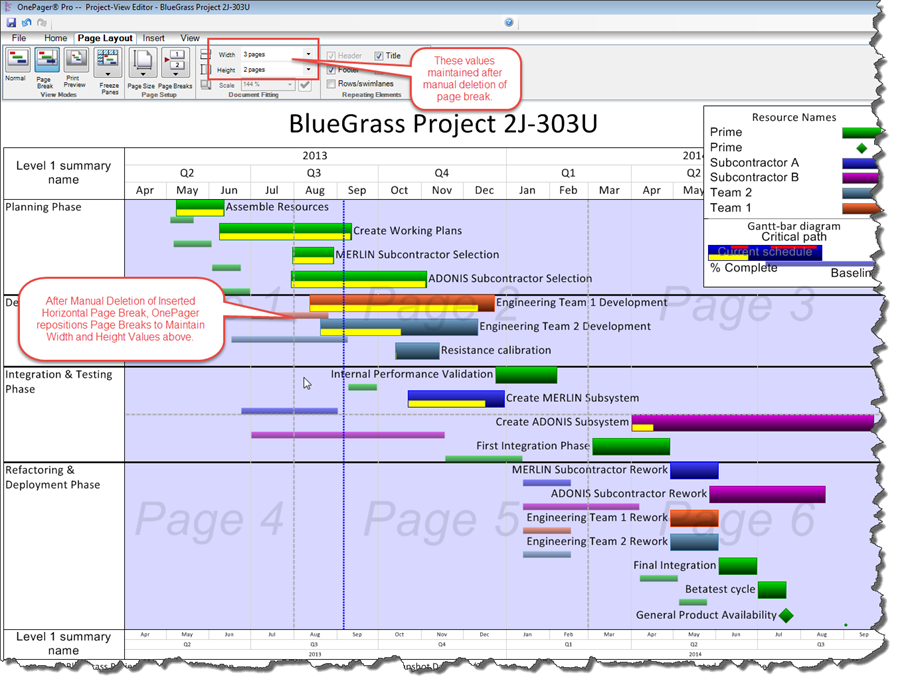
- k) Further, if you are in the 3 X 2 mode, say, and you delete a manual page break, OnePager will insert an automatic page break to maintain the 3 X 2 mode condition.
- l) If you want to go back to the 2 X 2 mode, you will need to change the contents of the Width window on the Page Layout tab.
- m) After completing the delete of the page break, the project view will look like this in the Page Break view:
Using the Page Layout Tab’s Document Fitting Settings to Manually Change Page Breaks
3) The Height and Width controls on the Page Layout tab in the Document Fitting group lets you manually set the number of output pages vertically and horizontally.
- a) The default setting for both of these is one (1).
- b) The two controls are synchronized with the Page Layout tab of the Project-View Properties (PVP) form.
Global Editing of Page Layout with the Project-View Properties (PVP) Form
4) Global controls over multiple pages are in a new tab in both the PVP form and the Template Properties forms. This tab, the Page Layout tab, is shown below:
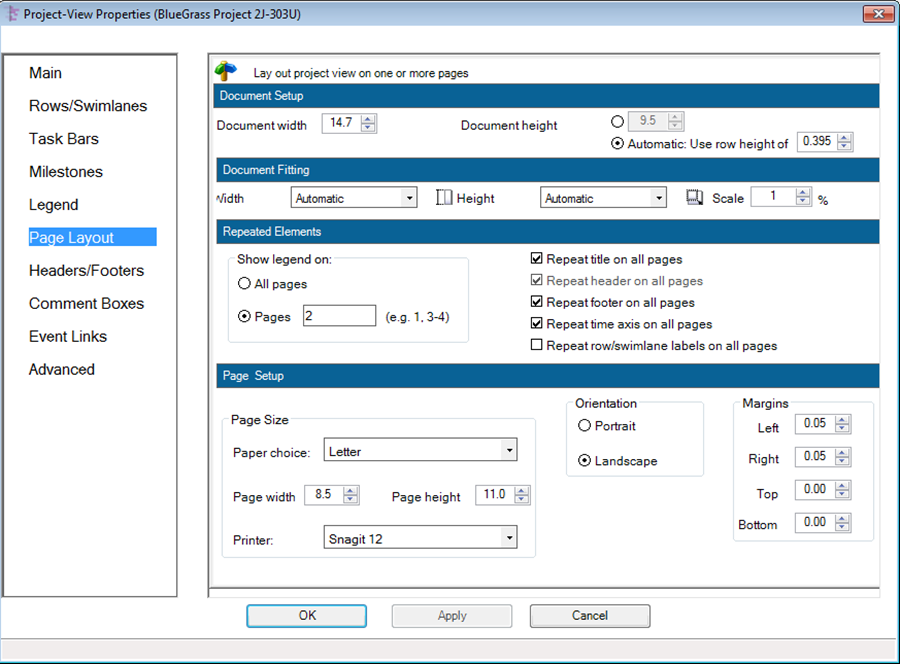
- a) The above is from the PVP form but the format and controls are exactly the same for the Page Layout tab in the Template Properties form.
- b) This tab provides central control for the multi-page feature. There are some duplicate controls related to repeating adornment elements that are on their associated tabs. The details for the controls in the above are explained in this article: Page Setup, Document Fitting, and Repeating Elements (Portal).
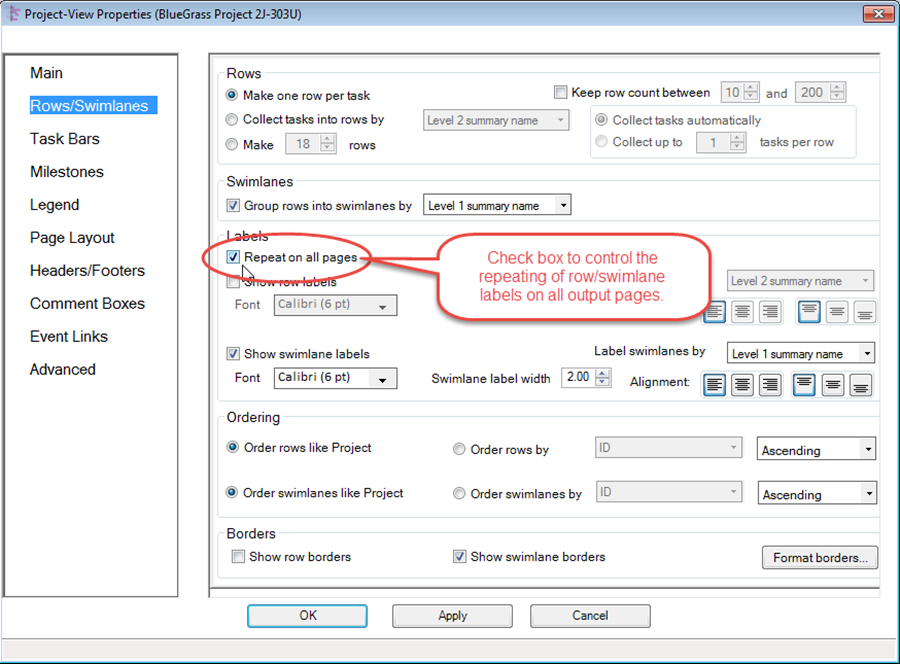
- c) An example of the repeat controls being duplicated on other tabs is shown below for row/swimlane labels:
Multi-Page Controls on the Print Tab of the File Tab
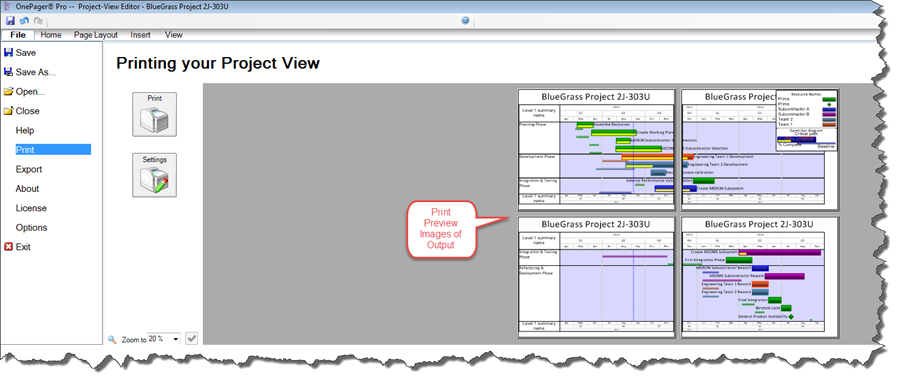
5) Multi-page controls are also accessible from the Print tab under the File tab of the ribbon:
- a) Clicking the Print button in the File tab above will bring up the Windows Print form as shown below:
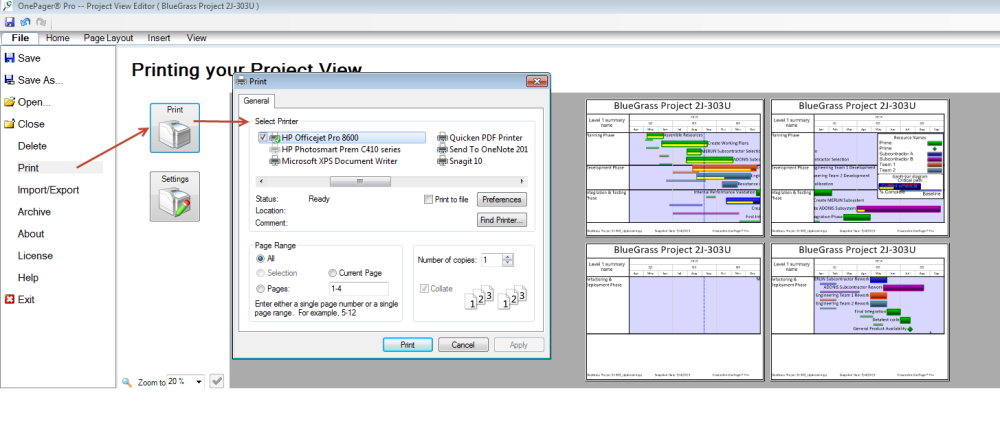
- b) Clicking the Settings button will bring up the Page Layout tab of the PVP form as shown below:

Global Editing of Page Layout with the Templates Properties Form
6) Global editing of multi-page features is provided in OnePager's Templates Properties form which may be accessed from the Microsoft Project or Microsoft Excel tool bar.
7) The controls provided on the Page Layout tab of the Template Properties form are identical to the controls on the Page Layout tab of the PVP form.
8) Changes made to the OnePager template with will be automatically applied to any project view subsequently created with that template.
9) Changing a template does not affect a project view that was created with the template before the template was changed.
(5.3)