Creating and Managing Comment Boxes
Contents
About Comment Boxes
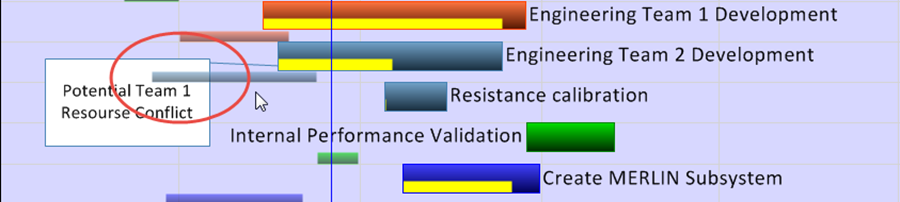
Comment boxes are a way to attach additional text to a task or milestone that may not otherwise exist in your Microsoft Project plan. They are a great way to call attention to an aspect of your project.
Adding Comment Boxes
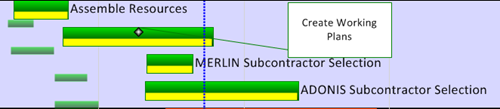
To add a comment box to any task/milestone on the screen, right-clicking the task/milestone and select “Comments…” as shown below:

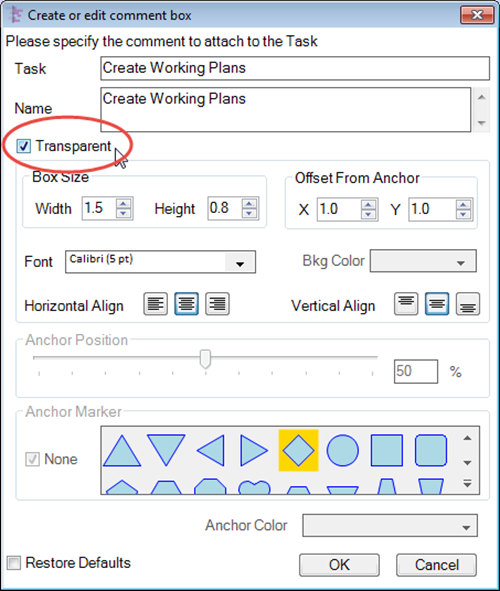
1) This will bring up the “Create or edit comment box” form shown below:
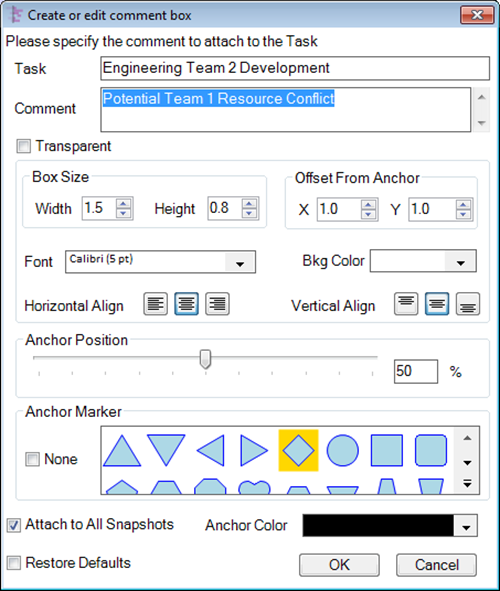
2) A brief description of some of the parameters in this form follows:
- a) Comment: text that appears in the box
- b) Box Size: size of the box
- c) Offset from Anchor: displacement of the comment box from the Anchor. Normally you would drag the box to a new position, but you can also set it with these numbers.
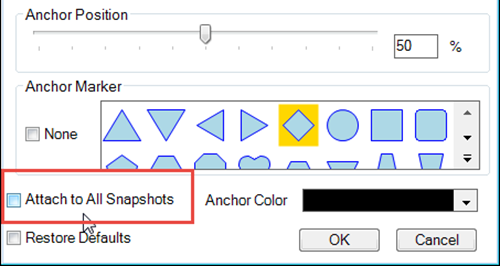
- d) Anchor Position: horizontal location along the task/milestone at which the comment is “anchored.” It is a percentage of the task/milestone’s time extent.
- e) Font: font properties of the text in the comment box.
- f) Bkg Color (Background Color): Use the standard Color Chooser to select the color for the background within the box.
- g) Anchor Shapes: Select from the symbols available as anchors for the comment box to the task/milestone. The anchor shapes are the same shapes available for Milestones.
- h) Anchor Color: color of the anchor shape on the task/milestone.
- i) Attach Comment to All Snapshots: if checked, this comment will appear in all snapshots. Later on, you can delete the comment from any snapshot you choose.
- j) Restore Defaults: check this box to restore the properties of the comment box to the settings in the “Project-View Properties” form.
Editing Comment Boxes
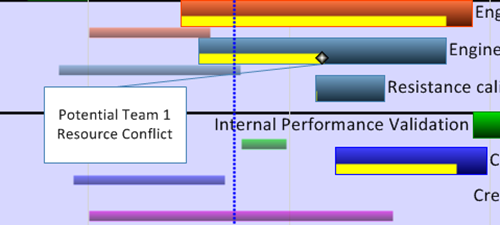
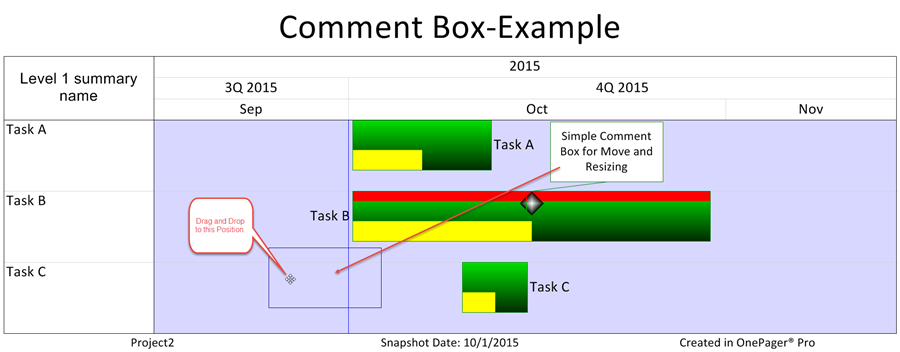
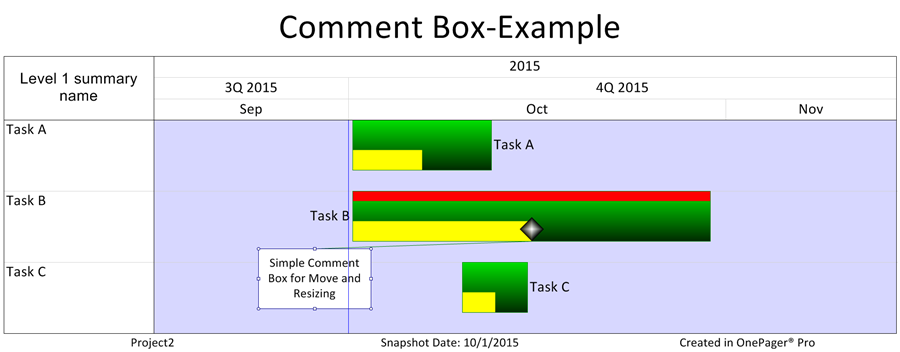
After creating a comment box, you can drag it another position on the screen, as is shown below:
1) Select one or more comment boxes (hold down the CTRL key to select several of them) and then change their properties in one of several ways:
2) Right-click one to get the context menu shown below:
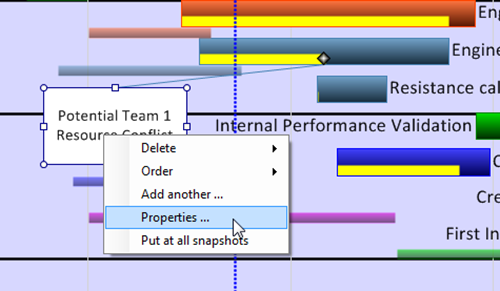
3) Select the “Properties…” command to bring up the “Create or edit comment box” form shown above. In this form you can change properties of all selected comment boxes.
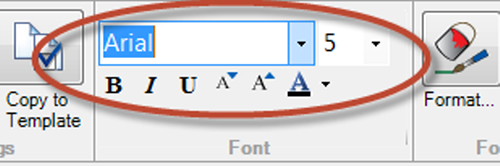
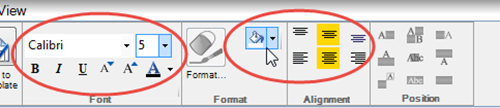
4) As an alternative, you may use the controls on the OnePager “Home” tab to change the font properties or background color of the selected comment box:
5) Go to the “Home” tab and then choose one of the editing commands that are active for selected comment boxes:
6) There are a couple of options regarding the background color for a Comment Box:
- a) When a comment box is created for an individual task/milestone, the “Create or edit comment box” form is displayed and the “Bkg color” window in this form allows you to change the background color for that individual comment box.
- b) You may change the comment box’s background by right-clicking it and selecting “Properties…” to bring up the “Create or edit comment box” form, where you can click the “Bkg Color” control.
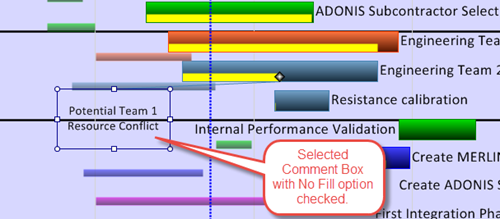
- c) You can turn on the “No Fill” feature by selecting the “No Fill” checkbox after clicking the “Bkg Color” control shown below:

- d) Clicking the “OK” button on the “Create or edit comment box” form changes the comment box to look like this:
- e) Note: You may eliminate the border, connecting line, and anchor for a comment box by checking the “Transparent” check box shown above in the “Create or edit comment box” form.
- f) Further Note: Unchecking the “No Fill’ check box is a three step process described above in the “Changing Individual Task/Milestone Colors” group of this document.
Deleting Comment Boxes
To delete a comment box, follow the steps shown below:
1) Right click it, and choose “Delete” from the context menu. You will have the option to delete the comment box from the current snapshot only, or to delete the comment box from all snapshots.
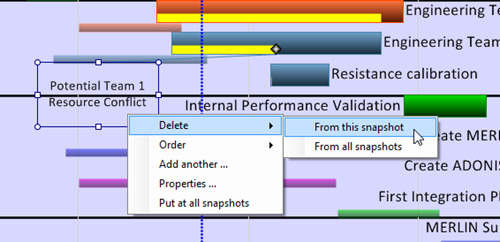
2) Generally, it is more common to delete a comment box from all snapshots, unless you want it to reappear at a different snapshot later on.
Ordering Comment Boxes
Comment boxes, when created, are automatically displayed in front of all other graphics in the project view. If you want to avoid covering up Tasks/Milestones, or labels, you may use the “Order” command to adjust the display of comment boxes on the z-Axis as described in the steps below:
1) Right-click on the comment box and then click on the “Order” command as shown below:
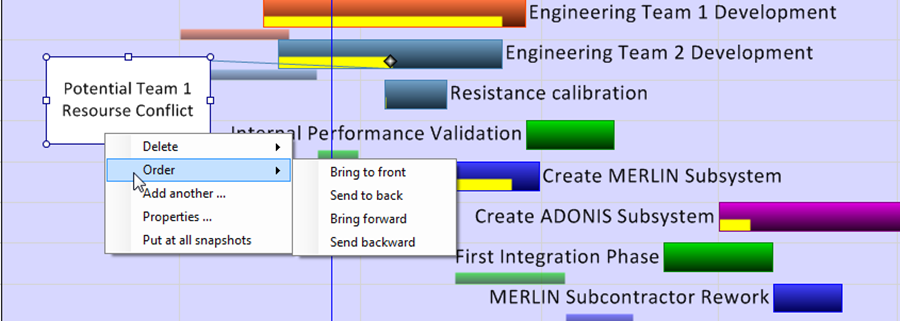
2) Mousing over the “Order” command will bring up four sub-commands as shown above. These are explained in detail in the “Legend” section of this document.
3) As shown above, the comment box appears to be hiding the baseline element of the task. If you want that baseline element to appear on top of the comment box, click the “Send to back” sub-command, for example, and the project view will look like this:
Adding Another Comment Box
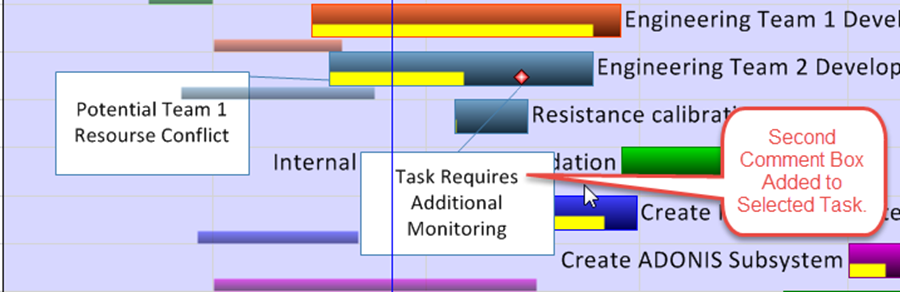
You may want to have more than one comment box attached to a Task/Milestone. To accomplish this use the “Add another…” sub-command as described in the steps below:
1) Right-click on any comment box attached to the Task/Milestone that requires an additional comment box. Then click the “Add another…” sub-command.
2) These actions will bring up the “Create or edit comment box” form where you can specify the comment box’s label and other properties.
3) When you click the “OK” button, the added comment box will be displayed on the selected Task/Milestone as shown here as an example:
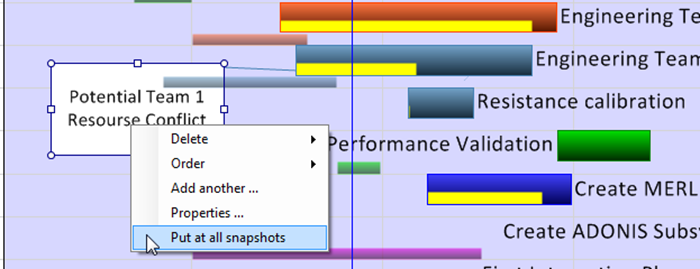
Putting Selected Comment Box in All Snapshots
The default setting for created comment boxes is to put the comment box in all snapshots. Sometimes a comment box is only appropriate for a selected snapshot and should not appear in all snapshots. When this is the desired result, you should un-check the “Attach to All Snapshots” check box in the “Creat or edit comment box” form when the comment box is first created.
The comment box created in this manner will all its other properties set to the default values.
Should you subsequently decide that this comment box should be included in all snapshots, right-click on the comment box and click the “Put at all snapshots” sub-command as shown below:
Making Comment Boxes Invisible Except for the Text
To remove the border of a comment box or boxes, follow the steps below:
1) Sometimes it would be convenient to put some text at some arbitrary position near a task or milestone but not have it surrounded by a box and connected by an anchor line. In the example below, we push the task name into a comment box and then make the comment box invisible. We start with this:
2) Then we right-click the task/milestone, select “Format…”, go to the “Task Label” tab of the “Change Marker Properties” form, and change the “Label Position” window to “in comment box”. Start and Finish Dates if displayed with the Task Label are not brought into the Comment Box. This will push the task name into a comment box as shown below:
3) To make the comment box and anchor line disappear, right-click the comment box and click “Properties…” selection to bring up the “Create or edit comment box” form:
4) The last step is to check the “Transparent” check box, which makes the comment box look like this:

5) Above, the Comment Box’s border and connector are both made transparent.
Moving and Resizing Comment Boxes
To move or resize a comment box the box must first be selected. Selecting a comment box, will result in the comment box being highlighted and surrounded by eight grab boxes as shown below:

1) To move the comment box, just select it and drag the outline to the new position:
2) Releasing the left-mouse completes the move as shown below:
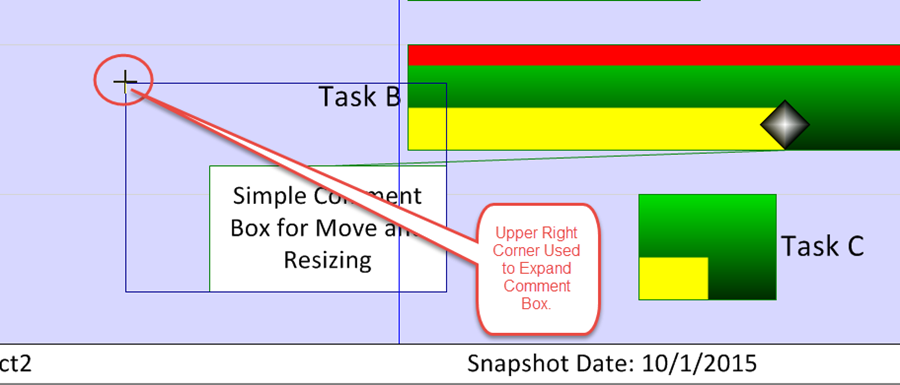
3) To resize a comment box, select it to display the highlight and eight (8) grab boxes with which you may it box as shown below:
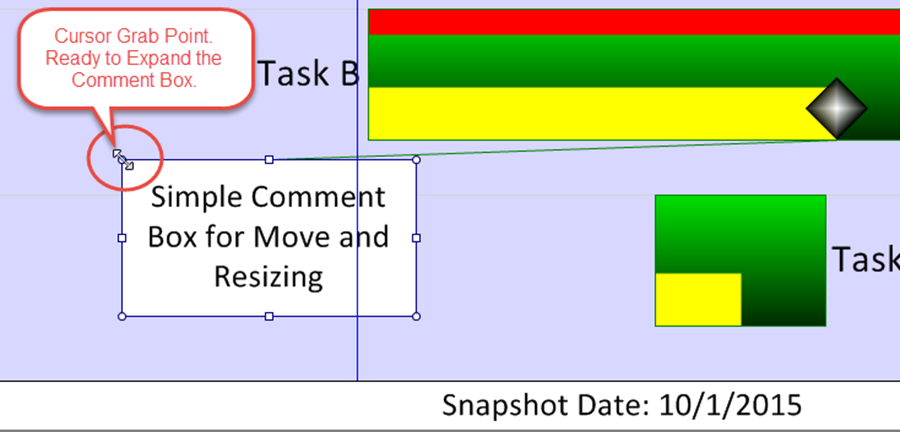
4) In the project view above the lower left grab box is selected. When the mouse is moved a rectangle shows the proposed new position. This intermediate step is shown below:
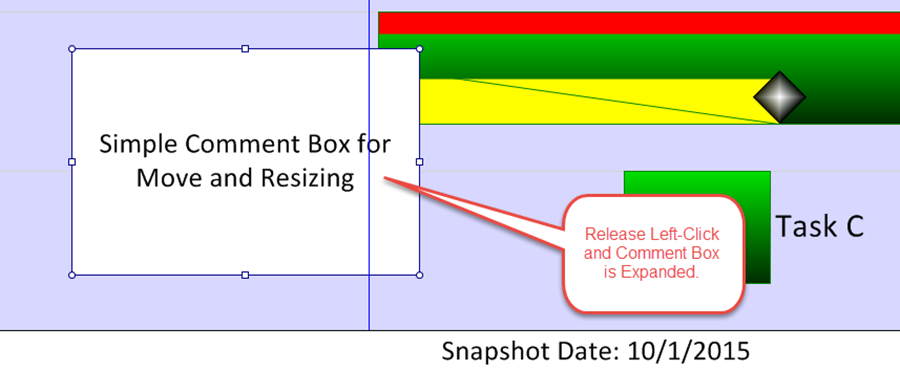
5) When the left mouse button is released, the comment box is resized redrawn as shown below:
(13.0)