Creating and Managing Curtains for OnePager Live
Contents
About Curtains
16.0.1-OPL Two Bugzilla Items identified 4352 and 4253 that need to be cleaned up.
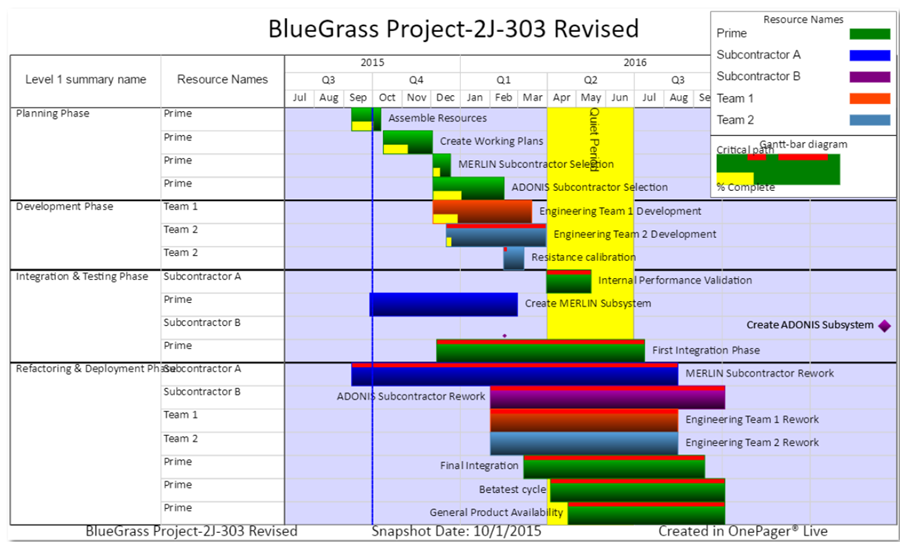
A curtain is a vertical strip that marks a period of time across all rows. The example below shows a curtain entitled Quiet Period that appears from 4/1/2016 to: 6/30/2016.
Adding a Curtain
To add a new curtain to a project view, follow the steps below:
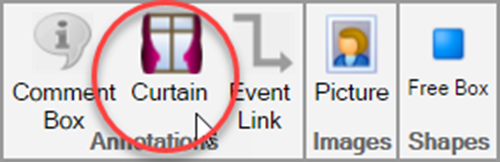
1) Go to the ribbon's Insert tab and click the Curtain… button as shown below:
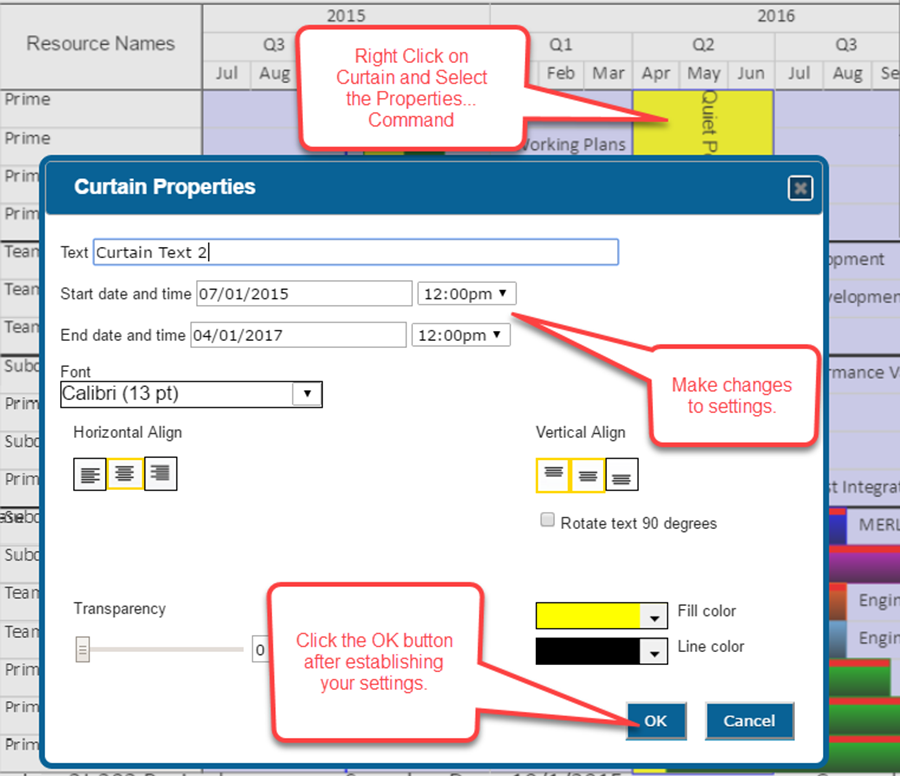
2) This brings up Curtain Properties form that lets you define the date extents, appearance, and text label for the curtain:
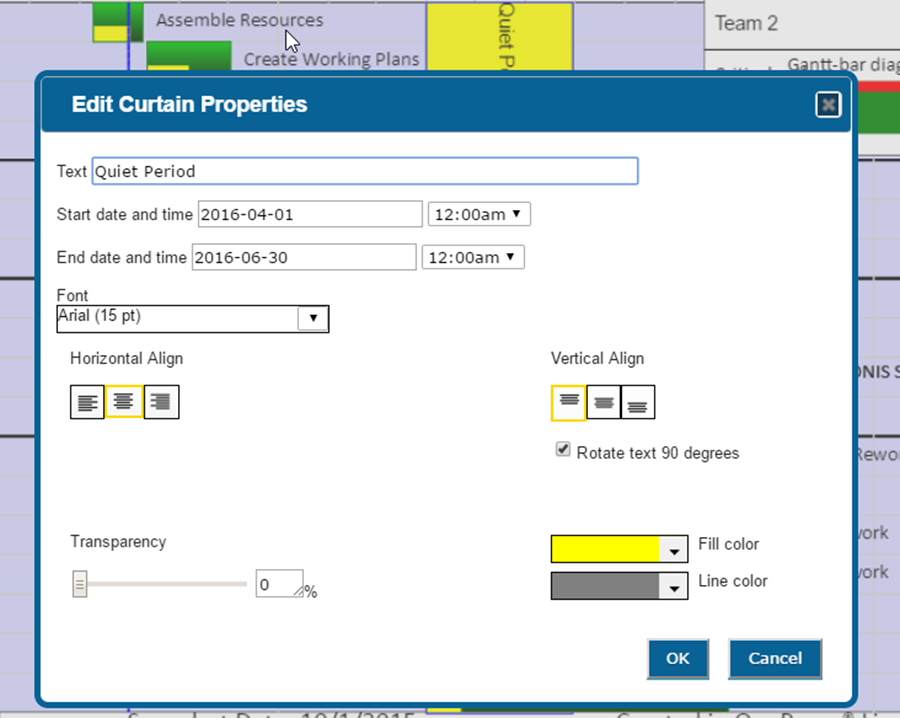
3) Once you have entered the start and end dates and other selections, click the OK button to create the curtain.
4) In project views with multiple snapshots, this method of creating a curtain will put the curtain in all snapshots.
Editing a Curtain
Editing a curtain is similar to editing all the other shapes appear in the project view such as comment boxes. Just follow the steps described below:
1) Double click or right click on the curtain to bring up the Curtain Properties form:
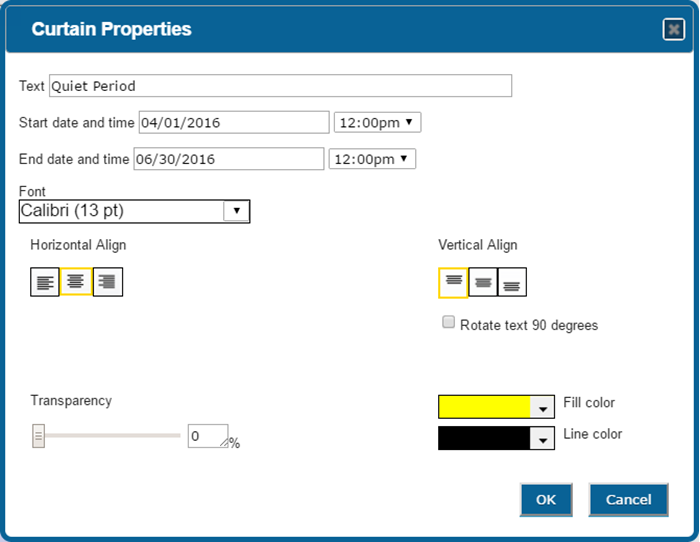
2) Make your option selections for font text properties, curtain text position and orientation. fill color, curtain border properties, and transparency level.
3) The No Fill feature applies to curtains. See the referenced articles for more information on the No Fill option: ( Creating and Managing Comment Boxes 13.0.1-OPL and Creating and Managing Free Boxes 14.0.1-OPL).
4) In project views with multiple snapshots, this method of editing a curtain will change the curtain’s properties in all snapshots where the curtain still appears.
5) Once you have completed your curtain editing actions, click the OK button to update the curtain.
Deleting Curtains
Deleting curtains is similar to deleting any other shape in your project view such as a comment box. Just follow the steps below:
1) Right click the curtain and choose Delete from the context menu:

2) Using the sub-command Delete: From this snapshot will delete the curtain from the currently displayed snapshot. Curtains that remain in other snapshots will still be treated as a single entity with respect to their properties.
3) The sub-command Delete: From all snapshots will remove all instances of the curtain from all snapshots.
Ordering Curtains
Curtains may be ordered in the project view from front to back using the following the steps:
1) As shown above, right clicking on a curtain displays a context menu with several sub-commands including the Order sub-command.
2) This sub-command operates in the same way as the Order sub-command provided for comment boxes, free boxes, and the legend.
3) When the Order sub-command is used, the results with respect to the z-Axis positioning of the curtain will be displayed in all snapshots where the curtain is displayed.
Adding Another Curtain
Also shown above is the Add another… sub-command in the context menu displayed by right clicking on a curtain. Then, follow the steps below:
1) Click the Add another… sub-command and OnePager will display the Curtain Properties form also shown below:
2) Use the visible Curtain Properties form to configure the setting for the additional curtain as required.
3) Click the OK button when finished.
4) As with all uses of the Curtain Properties form, when you click the OK button the additional curtain will appear in all snapshots of the project view.
Putting A Curtain in Some Snapshots
The Curtain Properties form used to create a curtain puts the curtain in all snapshots.
Procedure for Displaying Curtains in Some Snapshots
1) There is no Attach to all snapshots checkbox in the Curtain Properties form as there is in the Create or edit comment box form.
2) The recommend way to display a curtain in one or a select set of snapshots is to use this two step procedure:
- (1) First create the curtain as desired which will make the curtain appear in all snapshots and
- (2) Delete the curtain individually from snapshots where the curtain should not appear.
Reinstating Curtains in the Future
Subsequent project demands may require you to later on put the curtain in all snapshots. To do this, just follow the steps below:
1) To put a curtain in all snapshots, use the Put at all snapshots sub-command found in the right-click context menu for existing curtains as shown below:
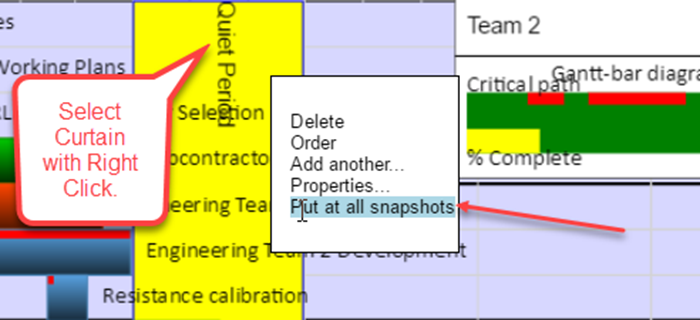
2) After clicking the Put at all snapshots sub-command the selected curtain will appear in all snapshots.
3) By using the first procedure above, you may now selectively remove curtains from snapshots where they are not desired.
Resizing a Curtain
As described above, the width of a curtain in terms of its start and end dates can be edited through the Curtain Properties form. To do this follow the steps described below:
1) Changes to the start and end dates for curtains can be done by using the curtain grab boxes on the left and right edge of the selected curtain. You can drag these edges to change the curtain boundaries as shown below:
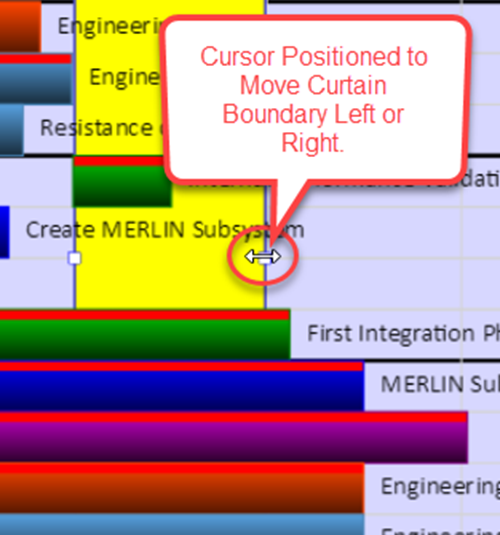
2) Moving the mouse to the left or right will move the curtain’s edge as desired.
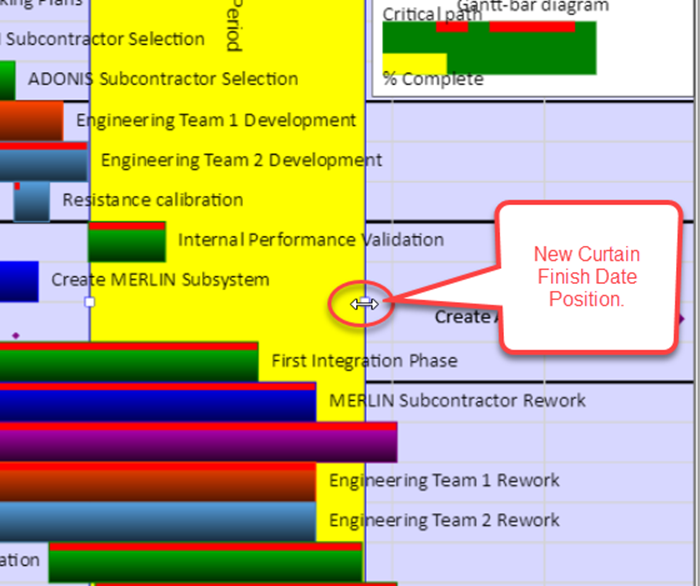
3) In the example above, the right edge is moved to the right to increase the width of the curtain as shown below:
Note
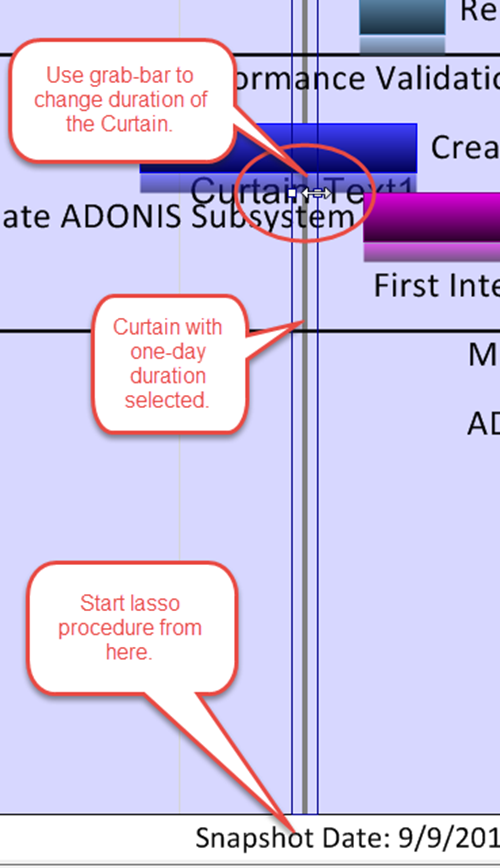
You may find it difficult to select a curtain that is very narrow. To select such a curtain we recommend the following:
1) Position the mouse at the bottom of the screen (in the footer area) to the left of the curtain.
2) Hold the left mouse button down and drag the mouse upward and to the right until the lasso completely encloses the curtain.
3) When you release the mouse button, the curtain will be selected.
4) At this point you can widen the curtain by dragging the handlebars to the left or right as shown below:
Related Links
Creating and Managing Comment Boxes 13.0.1-OPL
Creating and Managing Free Boxes 14.0.1-OPL
(16.0.1-OPL)