Making Multi-Project Graphs from Separate Microsoft Project Plans for OnePager Live
Contents
- 1 Overview
- 2 Setting up the Template for a Multi-Project Graph
- 3 Adjustments to Rows and Swimlanes
- 4 Use the First Microsoft Project Source File
- 5 Use the Remaining Microsoft Project Source Files
- 6 Create the Multi-Project Project View
- 7 Settings for Microsoft Project
- 8 Updating Project Views Created from Separate Microsoft Project Plans
- 9 Related Links
Overview
8.2.1-OPL Not Edited Beyond this Point.
Suppose you desire to build a multi-project project view without first creating a Microsoft Project Integrated Master Schedule (IMS). To illustrate an approach to do this, we’ll use the OnePager Pro (OPP) desktop application. Just follow the steps listed below:
Setting up the Template for a Multi-Project Graph
1) Launch OPP from the desktop icon and navigate to the File tab on the ribbon.
2) Then, click on the Options button on the left margin. On the Options form, go to the Template button on the right side and click it. This action will bring up the Template Properties form. Finally, navigate to the Advanced tab on the Template Properties form as shown below:
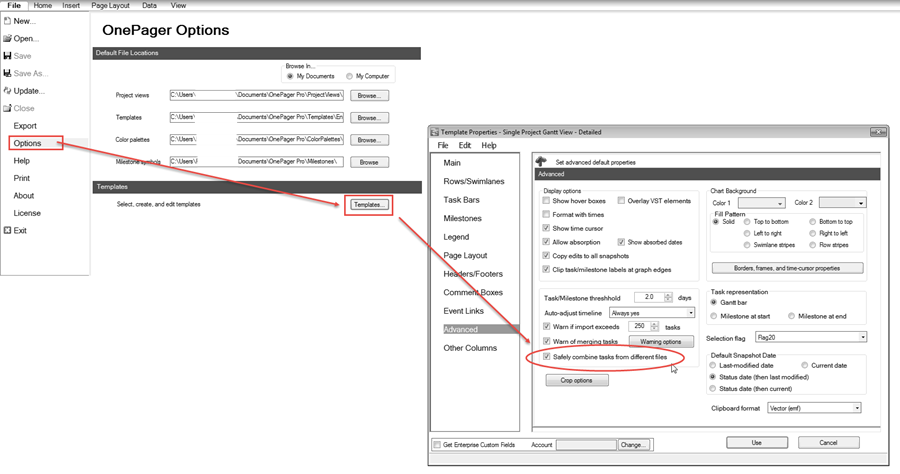
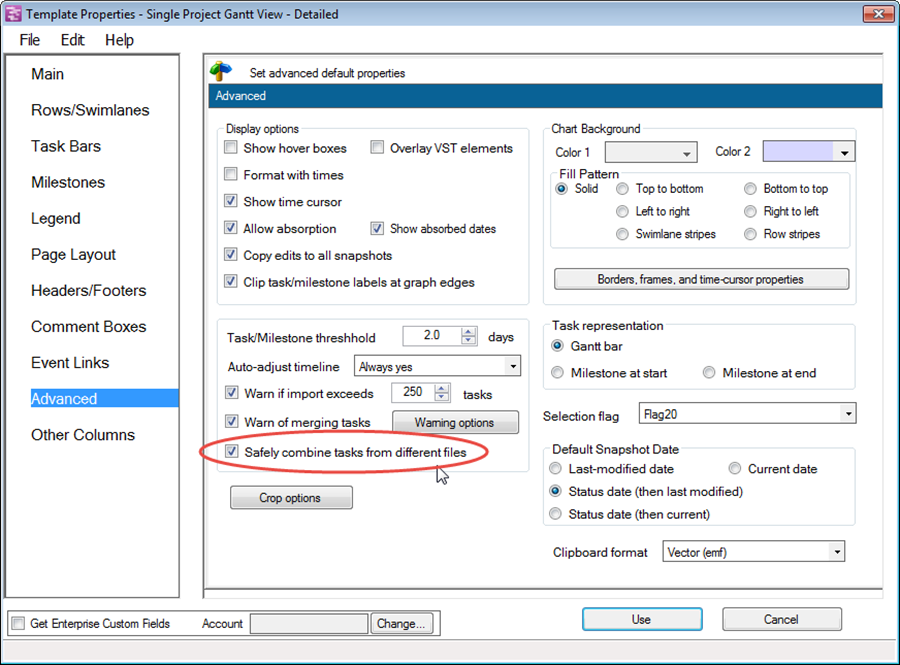
3) At the Advanced tab check the Safely combine tasks from different files checkbox. This setting allows you to import multiple standalone Microsoft Project plans. If you do not check this checkbox, OnePager may confuse tasks from one Microsoft Project plan with tasks from another when the tasks have the same UniqueID in Microsoft Project Professional.
Adjustments to Rows and Swimlanes
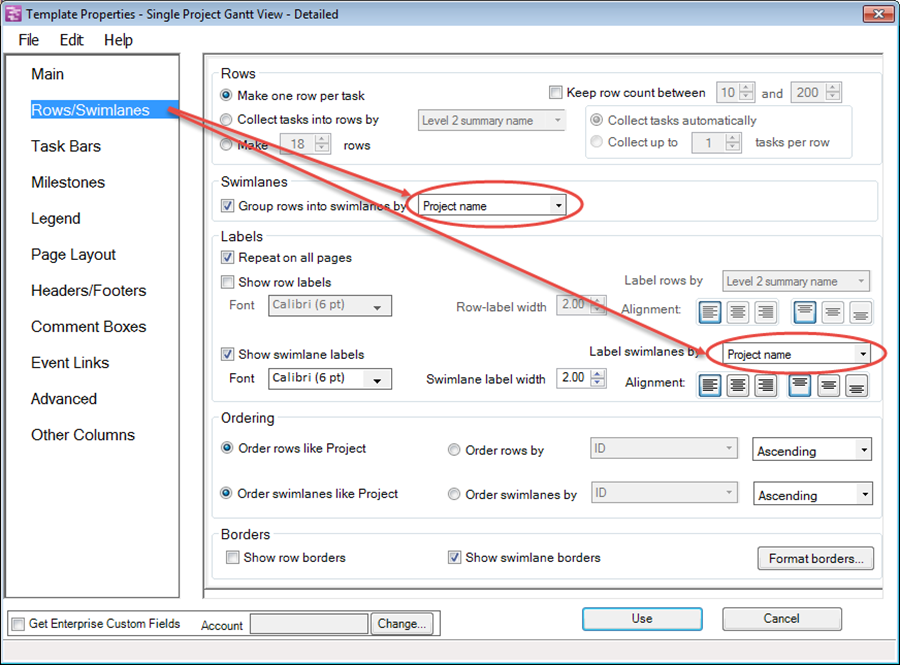
4) Go to the Template Properties form’s Rows/Swimlanes tab shown below. Ensure that you are grouping and labeling swimlanes by the Project Name. Though this step is optional, it is strongly recommended.
5) Now click the Save and use or Use button to make this template the current template to support creating a multi-project project view.
6) Once you’ve saved the Template Properties form, now click the New… button on the left margin of the File tab. You should still be on the File tab at this point.
Use the First Microsoft Project Source File
7) When you click the New… button, OnePager will take you back to the Home tab and display the OnePager choices (OPC) form. Click the Select button in in the upper right corner and select the BROWSE FILES… option from the dropdown menu. A Windows Open form will appear as shown below:
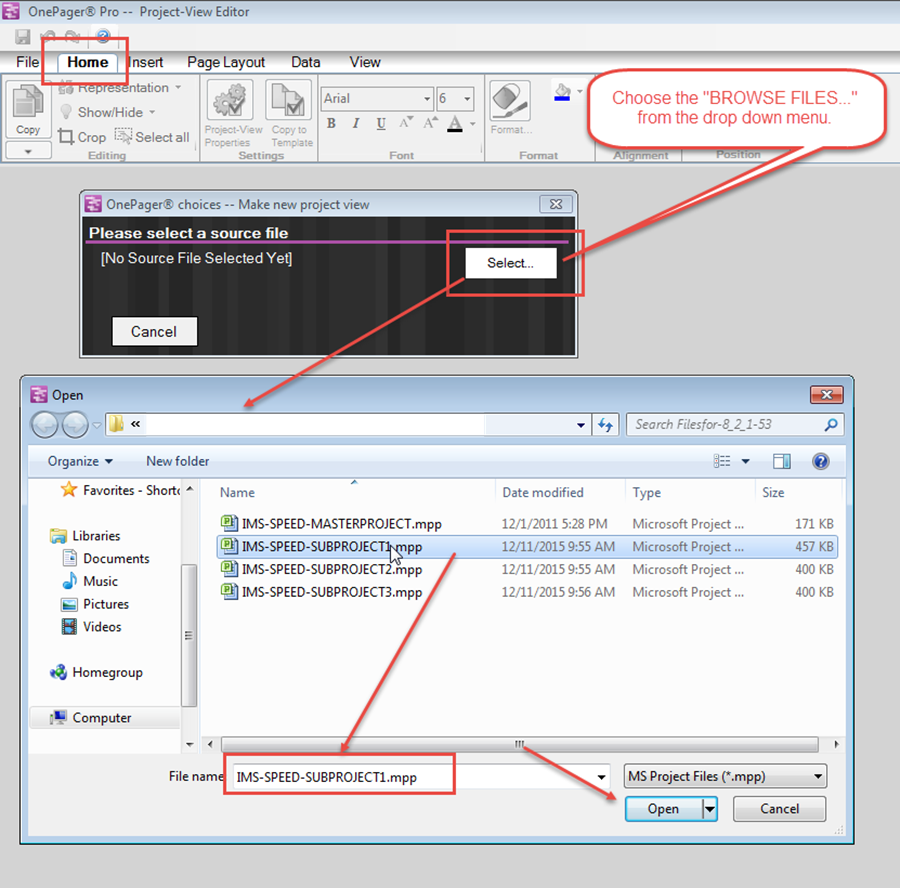
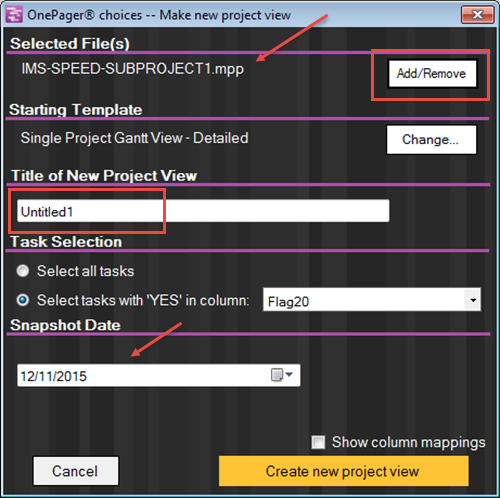
8) Select the first Microsoft Project source file in the set of three and then click the Open button. When you do this, the OPC form expands as shown here:
Use the Remaining Microsoft Project Source Files
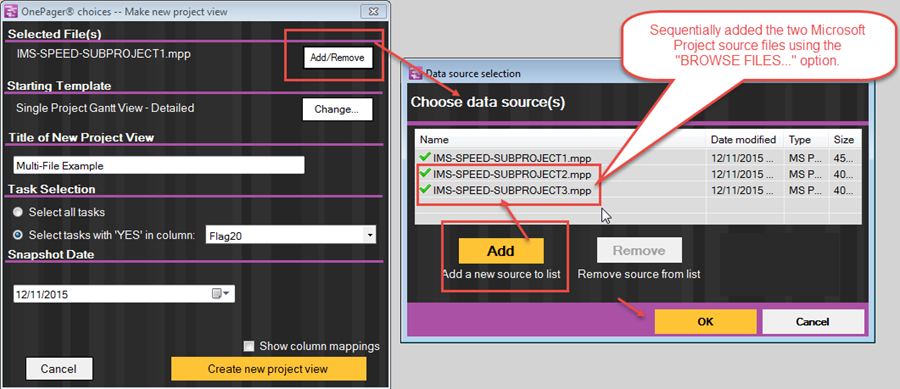
9) At this point we are going to confirm the name of the Microsoft Project source file. Type in a new project view title and confirm the snapshot date. Once that is done, we are going to click on the Add/Remove button. When you do this the Data source selection form will appear and you can use the Add button to add the two remaining Microsoft Project source files to the source packet as show below:
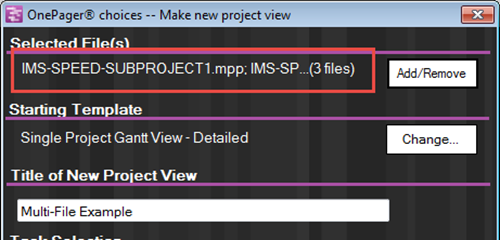
10) When you click the OK button, OnePager will update the Selected File(s) group of the OPC form indicating that all three Microsoft Project source files were found as shown below:
Create the Multi-Project Project View
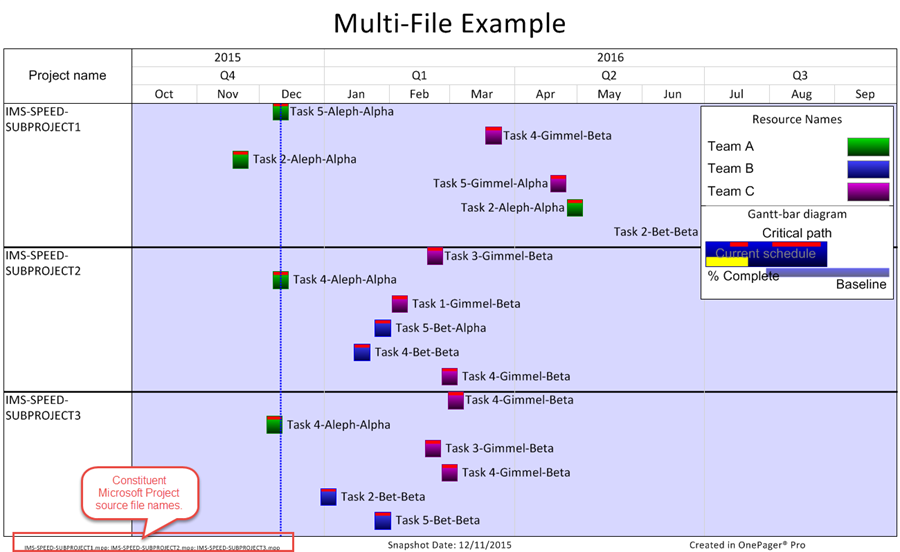
11) Now, go ahead and click the Create the new project view button on the OPC form and the resulting project view will look like this:
Settings for Microsoft Project
12) OPP always uses the label (name) of the project-summary task to identify each project in a multi-project situation. OnePager does not use the Microsoft Project plan name to identify projects. If you want to display the project summary task (Task 0) at the top of a project file, go to the File tab on Microsoft Project’s tool bar. Then navigate to Options tab and once there, to the Advanced tab and check the checkbox that is shown below:
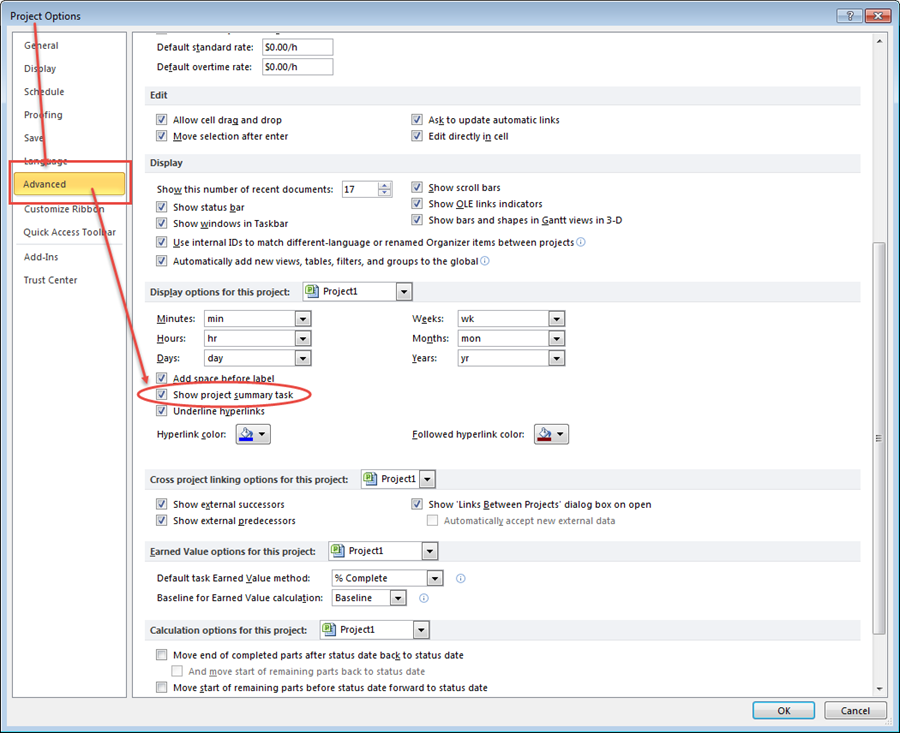
13) Since we are using the pull operation workflow to create this multi-project project view, the setting above on the Microsoft Project’s Project Options page must be set before the first designated Microsoft Project source file is pulled in and must stay set for all subsequent source file pull operations. This is because, although Microsoft Project as an application will not appear on your screen anytime during the pull operation, nevertheless, it will be launched by OPP and will operate on the designated files before OPP processes them.
Updating Project Views Created from Separate Microsoft Project Plans
14) Eventually you will want to update your multi-project project view by either adding a snapshot or replacing a snapshot with better data. To perform either the add or the replace snapshot, the processes described in the related links below can be used.
15) The key to making updated to multi-project project views is the proper management of the source packet. Recall that the source packet contains the file or files that are to be used to either create or update a project view. They are stored as file names and path names in the project view’s .TAM file and can be accessed from the Data tab’s Selected file(s) button on the ribbon as shown below:
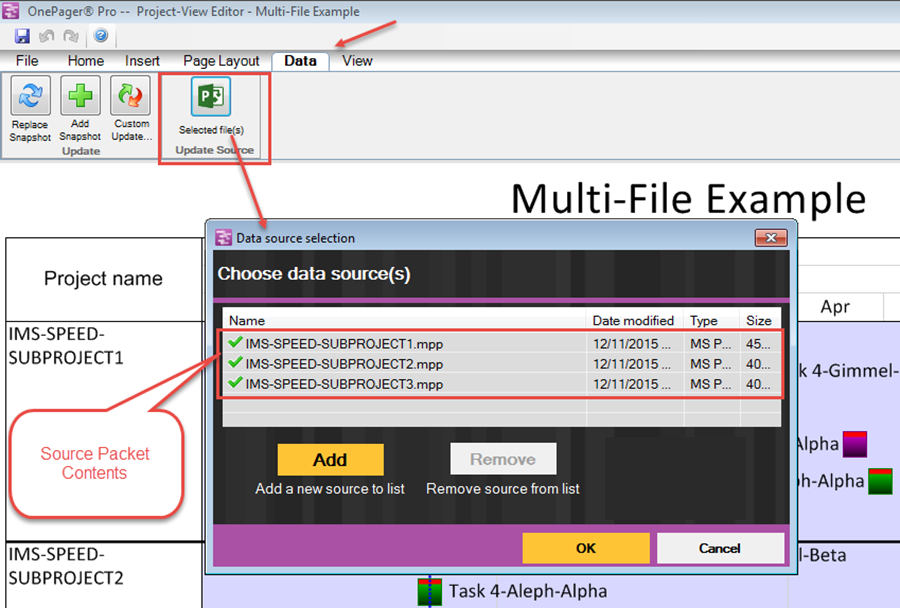
16) Validating the contents of the source packet and assuring that these are the Microsoft Project source files that were updated is an essential step before proceeding to perform a project update.
Related Links
Creating a NEW Project View from Microsoft Project Server/Online 7.13.1-OP
REPLACING a Snapshot with Microsoft Project Server/Online 7.14.1-OPL
ADDING a Snapshot from Microsoft Project Server/Online 7.15.1-OP
(8.2.1-OPL)