Page Setup for OnePager Live
Contents
About Page Setup
8.6.2.1-OPL Not Edited Beyond this Point.
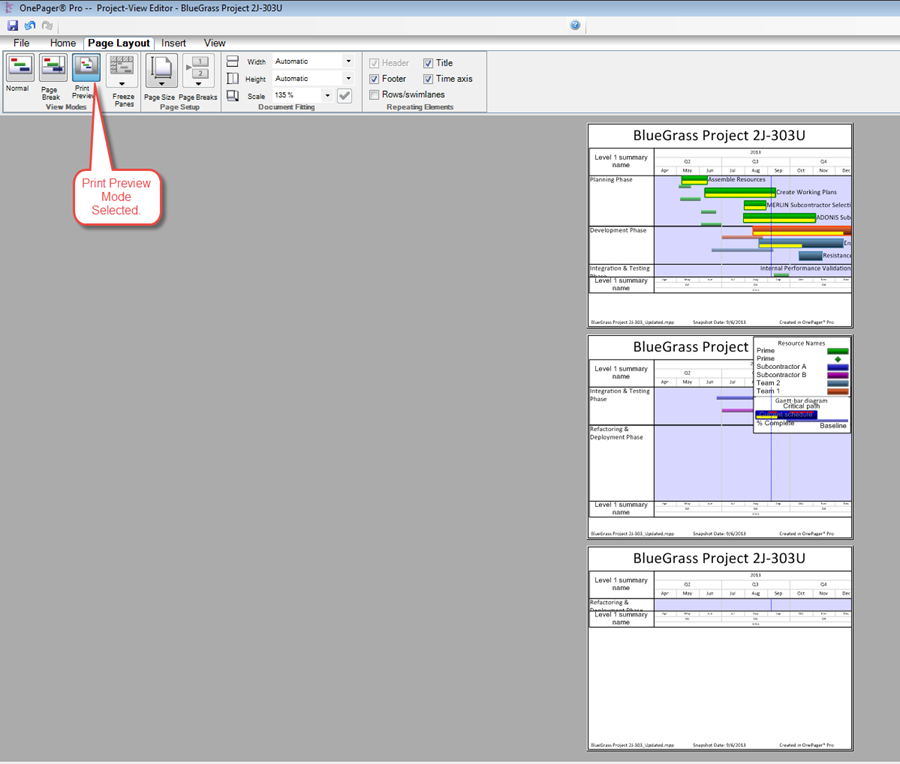
The Page Setup group on the Page Layout tab provides two controls for selecting from different Page size (e.g., letter, legal, A4, etc.) and for inserting manual page breaks when in Page Break view mode.
Each of these controls will be described in the subsections below.
Page Size Setup
1) The Page Size button is active in all viewing modes.
2) Clicking the Page Size button brings up the Page Size dropdown menu where you may change the selection of the output page product size.
3) The Page Size dropdown menu looks like this:

- a) The list of page size selections is determined from your printer selection made in the Page Layout tab of the Project-View Properties (PVP) form or the Template Properties form.
- b) Whenever you change printers and the new printer has a different list of page sizes, OnePager will adopt that list of page sizes and display them in the dropdown menu.
- c) Making a change to the page size selection may have an impact on how the pages appear in the output. The appearance can be easily checked by clicking the Print Preview button.
- d) The position of page breaks may also change if a change is made to the Page Size selection. Accordingly, page size selection is applied to the document’s size and OnePager will fit the project view to fit best within that document size.
- e) Page Size' selections made with the Page Size dropdown menu are independent of snapshot. That is, a selection made in any snapshot will be applied to all snapshots.
- f) In the list of page sizes, the arrow at the bottom of the list (as shown above) and an arrow at the top of the list are not clickable. Rather you can scroll up and down the list by using your keyboard up and down arrow buttons.
Page Breaks
1) OnePager supports both vertical and horizontal page breaks.
2) Additionally, OnePager has the capability to insert page breaks automatically depending on a number of factors.
3) Finally, you may insert both manual vertical and horizontal page breaks. Page Breaks are displayed in the Page Break view mode as follows:
- a) Automatic page breaks are represented by dashed gray lines and
- b) Manual page breaks are represented by solid gray lines.
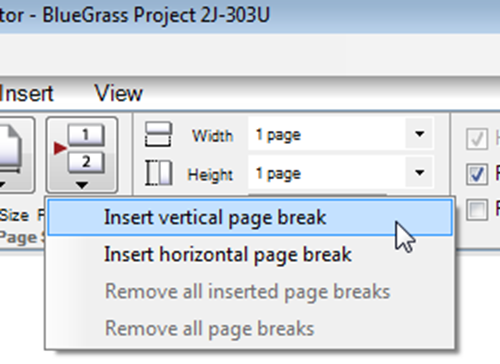
4) The options available under the Page Break' button allow you to:
- (1) Insert a horizontal page break,
- (2) Insert a vertical page break,
- (3) Remove all inserted page breaks, and
- (4) Remove all page breaks.
5) The dropdown menu under the Page Break button looks like this:
Insert Vertical Page Breaks
6) When this option is selected, OnePager changes the cursor to a plus, places a dark horizontal line in the project view that is responsive to the movement of the mouse, and snaps the vertical page break to the nearest row boundary. Upon left clicking, the vertical page break will be inserted as shown below:
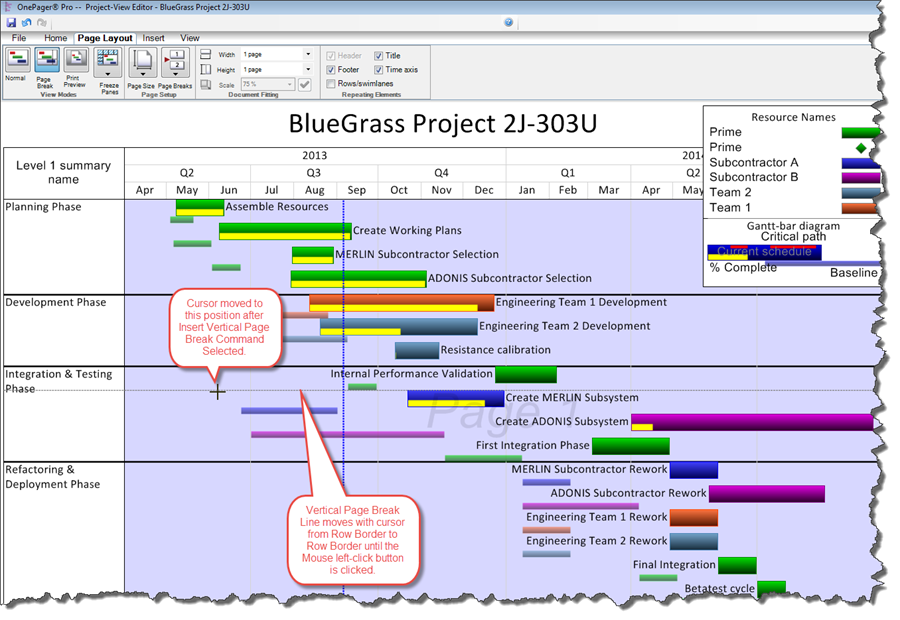
7) After left clicking, OnePager completes the vertical page break insertion and the project view looks like this:
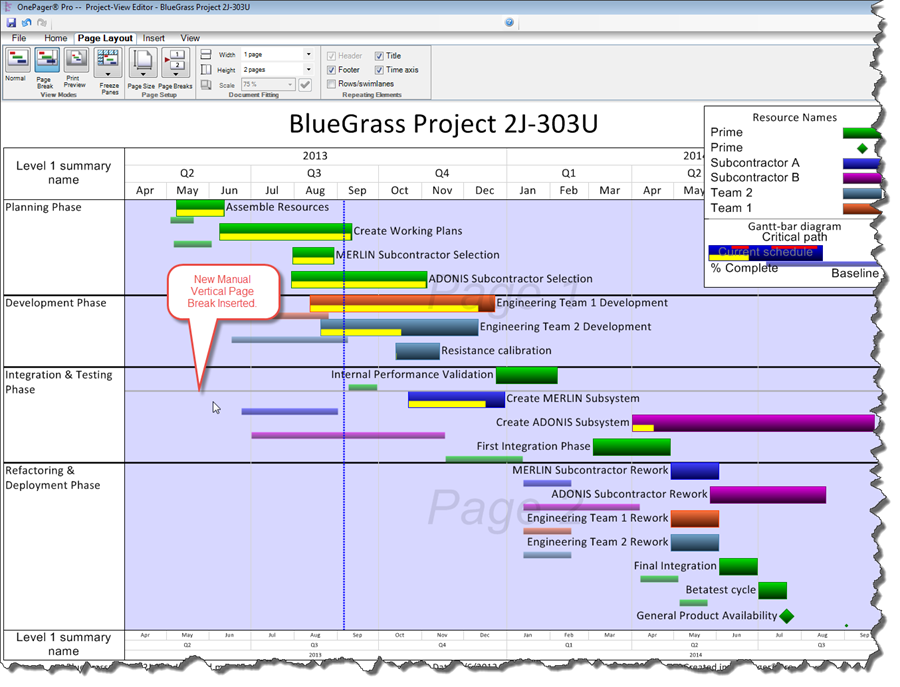
8) When you add a vertical page break manually, the integer in the Height window is increased by one (1). Likewise, when add a horizontal page break manually, the integer in the Width window is increased by one (1).
- a) Removing manual page breaks may not decrease these numbers back to their previous values in all cases.
- b) In these situations, you can manually set these numbers back to their desired values.
- c) Note that setting these numbers to lower values may cause some or all of the manual or automatic page breaks to be deleted, with automatic page breaks being deleted first.
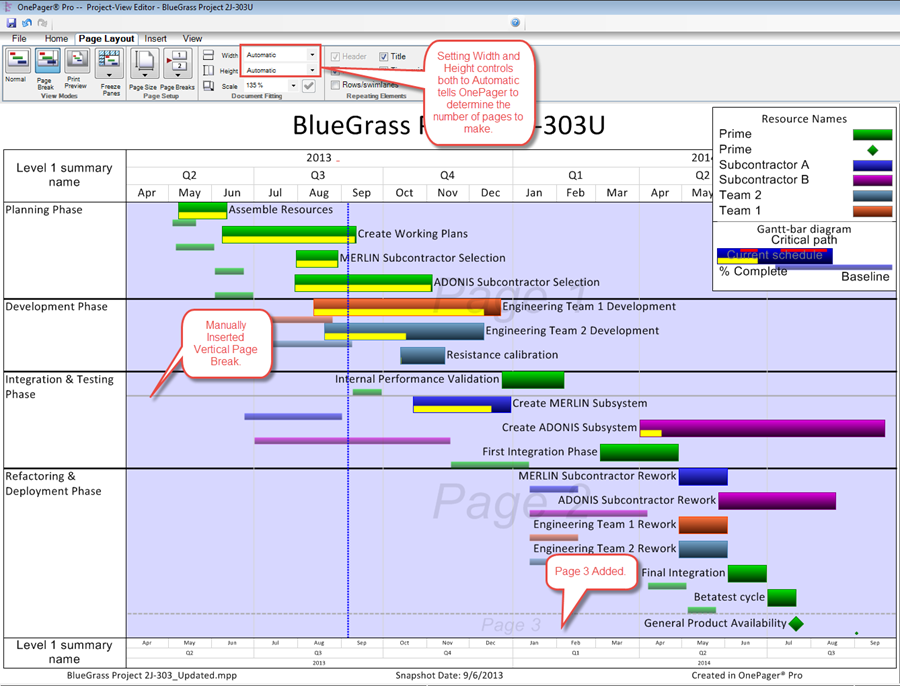
9) If the Height and Width window settings in the Document Fitting group of the Page Layout tab are either or both set to Automatic, OnePager will make changes to the number of pages in order to retain the aspect ratio of the document.
10) An example is provided below, where the Height and Width settings are Automatic, the original number of pages was determined to be four (4) and you inserted a vertical page break as in the previous example:
11) Looking at the above project view in Print Preview view mode, the pages are configured as shown below:
Insert Horizontal Page Breaks
12) The procedure and conventions applicable to the insertion of a vertical page break applies as well to the insertion of the horizontal page break.
13) When inserting a horizontal page break, the cursor is changed to a plus sign, and a vertical line is moved from left to right, snapping at smallest time unit on the time axis as shown below:

14) When the horizontal page break insertion action is completed, the resulting project view will look like this in Print Preview view mode:

Removing Page Breaks
15) The Remove all inserted page breaks command will remove all manually inserted page breaks.
16) Removing all manual page breaks by this method may still leave some automatic page breaks.
17) The Remove all page breaks command will remove all manual page breaks previously inserted as well as all automatically inserted page breaks.
18) The values for the Width and Height are reset back to one (1).
Moving a Vertical or Horizontal Page Break
19) You can change in the location of page breaks by dragging them. You can also change the number of pages desired in the vertical and horizontal directions.
20) This, in combination with the Page Size dropdown, provides extremely fine control over the final output whether that output goes to a printer, is copied to some other application, or rendered as an image.
21) Manual and automatic page breaks may be moved by hovering the cursor over the desired page break.
- a) When this is done the cursor changes to the double arrow and may be dragged with the left mouse button.
- b) Once the left mouse button is released, the selected page break will snap to the nearest appropriate boundary.
22) Page Break view mode is the only mode in which you can interact with page breaks on the screen.
Copying Pages to the Clipboard
Although this feature is explained elsewhere (See the article at this link: Sharing via Other Applications (e.g., PowerPoint)), it is important to note that you have the option to
- (1) Copy an entire document to the Windows clipboard,
- (2) Copy the current page (where the current page is the last clicked page in a multi-page project view, or to
- (3) Copy a specific page number.
(8.6.2.1-OPL)