Splitting and Parsing Columns (OnePager Pro)
The column splitting feature allows you to duplicate tasks when a task in your Microsoft Project plan is assigned to multiple resources (or anything else). Because assignments from Microsoft Project often are comma-delimited, this feature enables OnePager to parse the comma-delimited list and create a unique task for each instance in the comma-separated list. Consider the following example.
Say you want to use color-codes on tasks/milestones based upon your Microsoft Project plan’s “Resource Name” column as shown below:
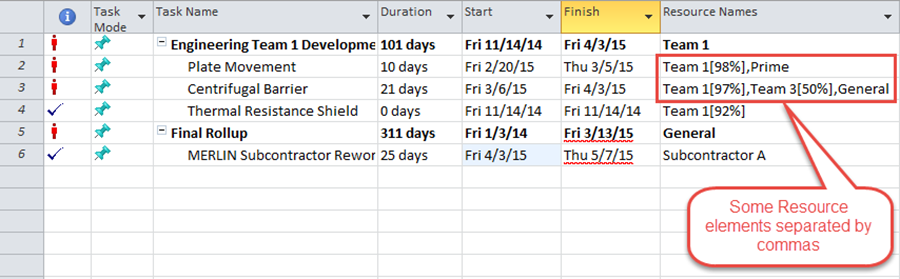
Some of the entries in the Resource Names column consist of multiple, comma-separated items and that some of these are followed by percentages in square brackets. Without the column splitting feature, if we made a project view from these data and assigned task/milestone colors based upon the “Resource Name” column, we would get this result:
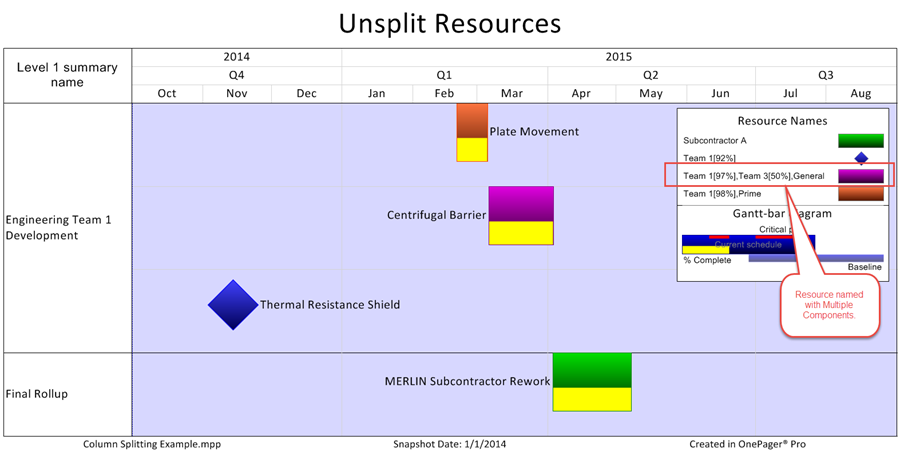
This is not a very satisfying result for some purposes. To give us more flexibility in displaying tasks that have multiple resources assigned to them, OnePager supports concept of a “split column.” This feature recognizes comma-separated values in a designated column and creates a separate task for each of the comma-separated values.
To access this feature, click the “Templates…” button and navigate to the “Other Columns” tab page on the “Template Properties” form as shown below and follow the steps described:
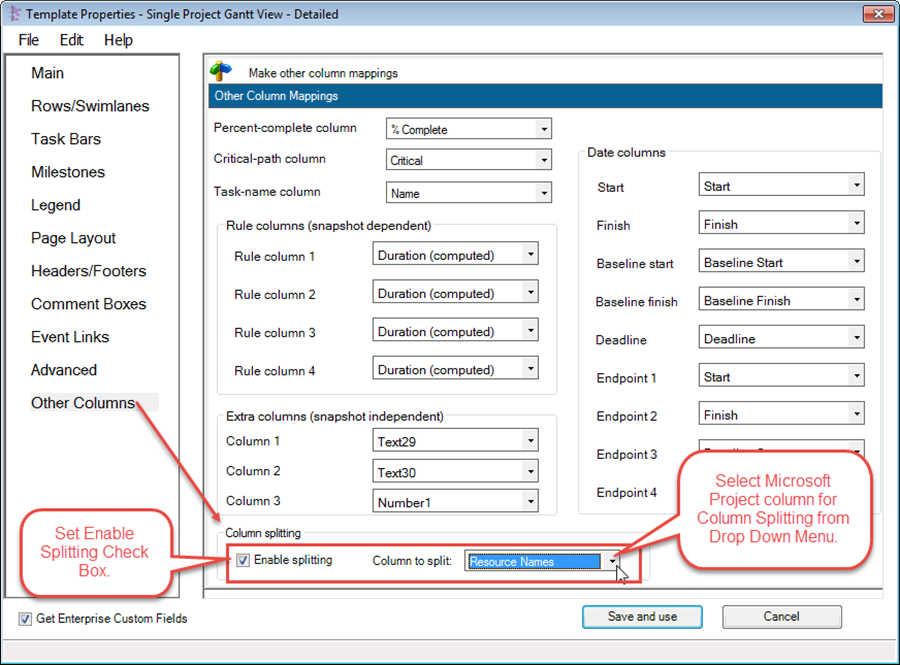
1) In the form above, the “Enable splitting” check box is set and the “Resource Names” column is identified to participate in the Column Splitting process.
2) After making the above change and while still within the “Template Properties” form, navigate to the “Task Bar” or “Milestone” tab and go to the “Gantt Bar/Milestone Fill Color” group of this tab and note that the “Based on value of color column” check box is set and the drop down window show that “Resource Names (Split)” is set as shown below:

3) Next, save the modified template.
4) Now make a NEW Project View using the modified template (and splitting of the “Resource Names” column). The project view will look as follows:
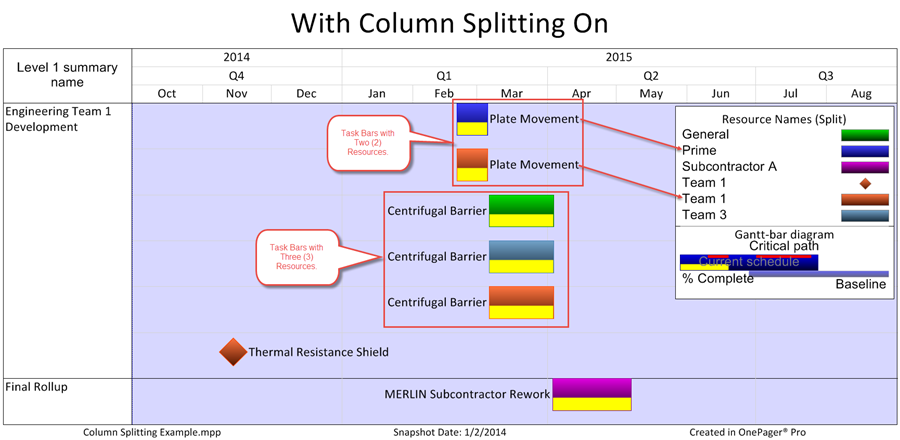
5) Note what has happened above.
- a) There are now several more tasks on the screen than there were before. The Task “Centrifugal Barrier” has now been split into three separate tasks, one for each of the three resources that was assigned to this Task.
- b) Each of the resources has a unique color assigned.
- c) Each of the resources appears by itself in the Legend.
- d) The square brackets enclosing the percentage figures (%) are removed from the Legend.
With this feature, you can use the split column just like any other column. You can use this feature not only to assign colors but also to label tasks and milestones or to define/label rows and swimlanes.
(24.4)