Template Only Features for OnePager Live
Contents
About Template Only Features
24.1.1-OPL Not Edited Beyond this Point.
1) Because the Template Properties and Project-View Properties (PVP) forms are similar, this article only covers the areas of the former that are different from the later. If you are unclear on the differences between a template and a PVP, please review the explanation in the Core Concepts (Portal) 4.0.1-OPL and Templates versus Project Views 4.0.1.3-OPL articles.
2) You should familiarize yourself with the PVP form before reading this article. Please see the article at this link: Editing with the Project-View Properties form (Portal) 21.0.1-OPL for more information and access to more detailed articles.
A Few Words On Templates
1) Permanent Template Chronicle Graphics, Inc. ships OPP with one pre-defined permanent template that you cannot accidentally delete. The permanent template has the word Permanent in its name. The permanent template cannot be modified hence all the control features on each tab are disabled (ghosted).
2) Metric versus Non-Metric Within a template there are settings which are measures that must be considered when building the project view graph.
- a) These include the height of individual rows, the height of the percent-complete bar within a task bar, and the like.
- b) OnePager supports two measurement conventions: English (inches) and Metric (centimeters). For convenience you can identify a Metric based template because the word (metric) is included in the title. And these two sets of templates are separated by default into English and a Metric subfolder of the default templates folder.
3) In addition to the English and Metric folders in the template folder there is a Legacy folder containing templates from versions of OPP prior to version 5.3.
4) Ideally, you will use one of the templates provided you one time and then from there you will customize your project using your own customer template.
- a) Once a project view is customized it may be transformed into a template using the Copy to Template button on the ribbon's Home tab.
- b) Our templates will give you a starting point, but to maximize your efficiency, we recommend you learn how to create and update your own templates.
Main Template Tab
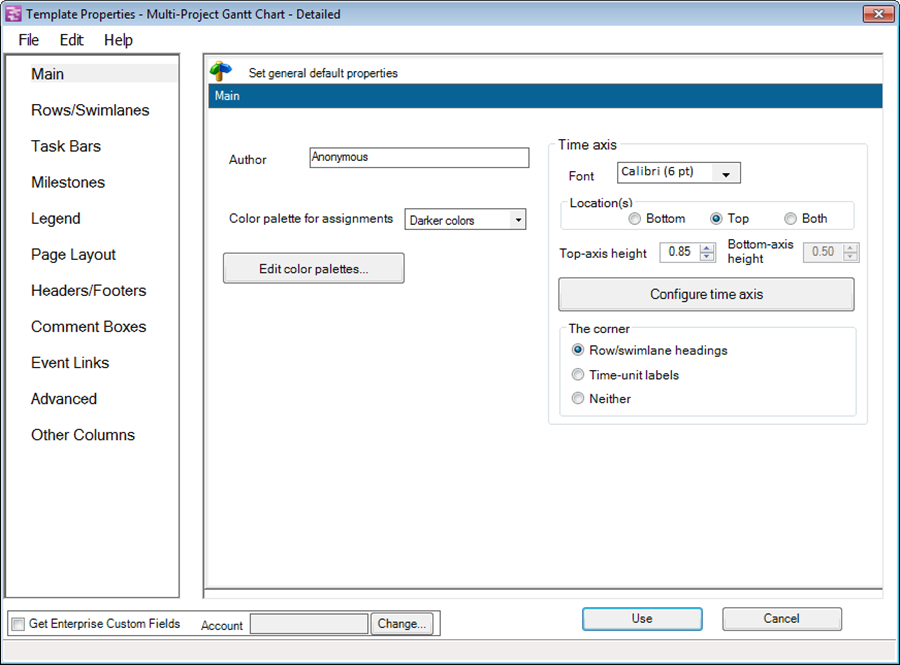
1) The Main tab of the Template Properties form differs slightly from the PVP form. The template does not have entry positions for the Start date, and End date, or project view title, because these dates are systematically produced by OnePager based on the earliest start date and latest finish dates in your data. The Title is something you designate as you create the new project view with the OnePager choices (OPC) form.
Advanced Template Tab
2) The Advanced tab is shown below. Most of these parameters in the template are identical to those appearing in the PVP form.
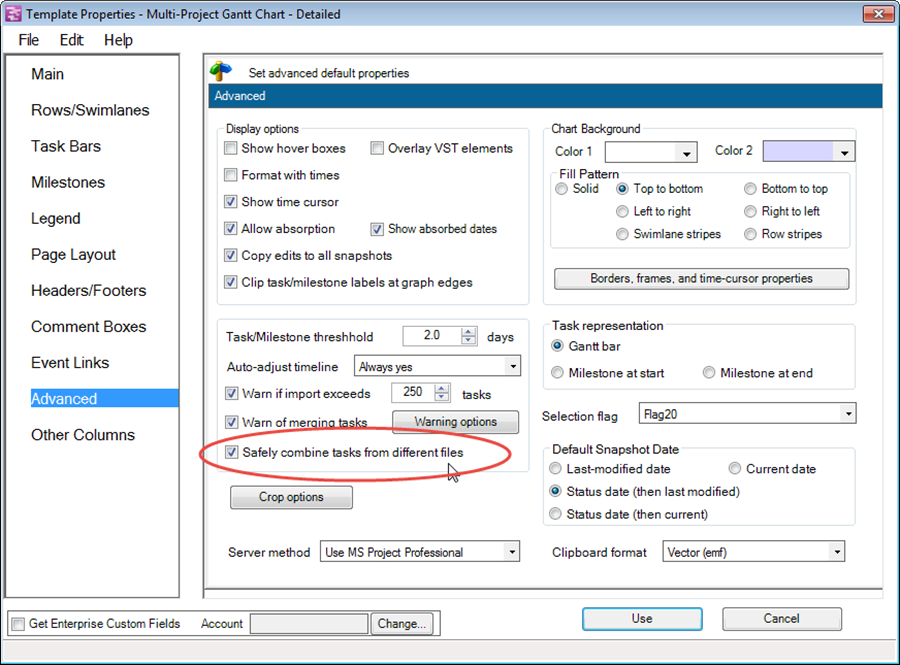
- a) In the template’s Advanced tab there is no Lock background checkbox in the Display options group. This is an option available after the project view is created.
- b) One key difference between the Template Properties form and PVP form is the ability to use the template to configure a multi-project import without the use of some sort of Microsoft Project integrated master schedule (IMS). The next sub-section explains this further.
- c) For more information on creating multi-project project views please visit these two articles: Basic Workflows (Portal) 7.0.1-OPL and Advanced Workflows (Portal) 8.0.1-OPL
Safely combine tasks from different files:
3) Checking this checkbox in the template puts any project views created with this template into the multi-file multi-project mode. This mode is specifically designed to support users who want to create multi-project project views from independent Microsoft Project plans without creating a Microsoft Project integrated master schedule (IMS) prior to creating the project view.
4) This is an advanced feature and when used, OnePager will number tasks and milestones imported from the various Microsoft Project plans accessed differently than when only a single project plan is imported. This is done so that OnePager can establish a means to support your creation of subsequent snapshots for the multi-file multi-project project view in the future.
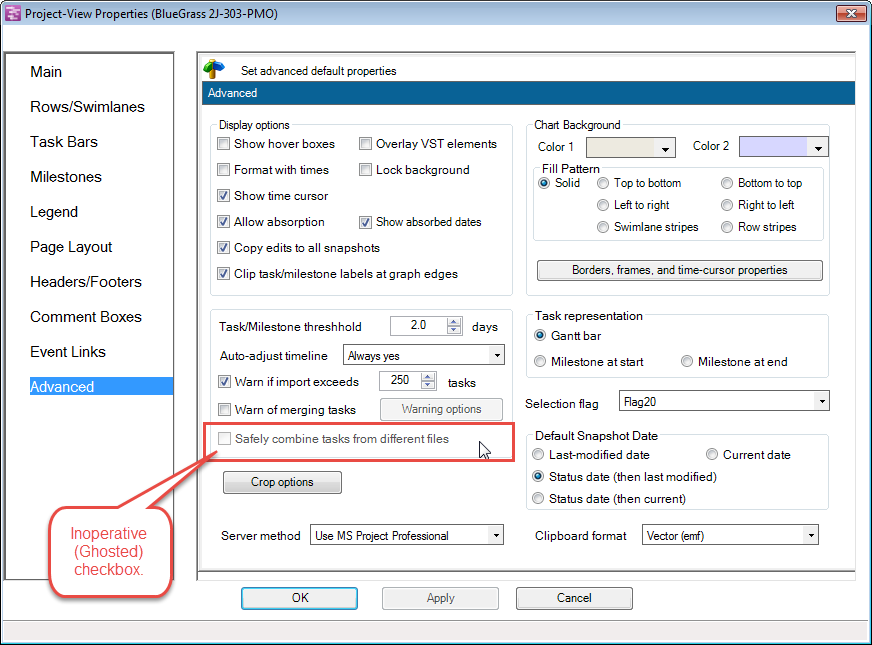
5) Once you adopted this scheme for the project view being created, it is not possible to update the project view in the future in the default single-file single-project mode. To enforce this requirement, the OPP’s PVP form’s Advance tab shows the Safely combine tasks from different files checkbox but the command is ghosted.
Other Columns Tab
1) This tab is unique to the Template Properties form, and is not available in PVP form. The Other Columns tab is shown below:
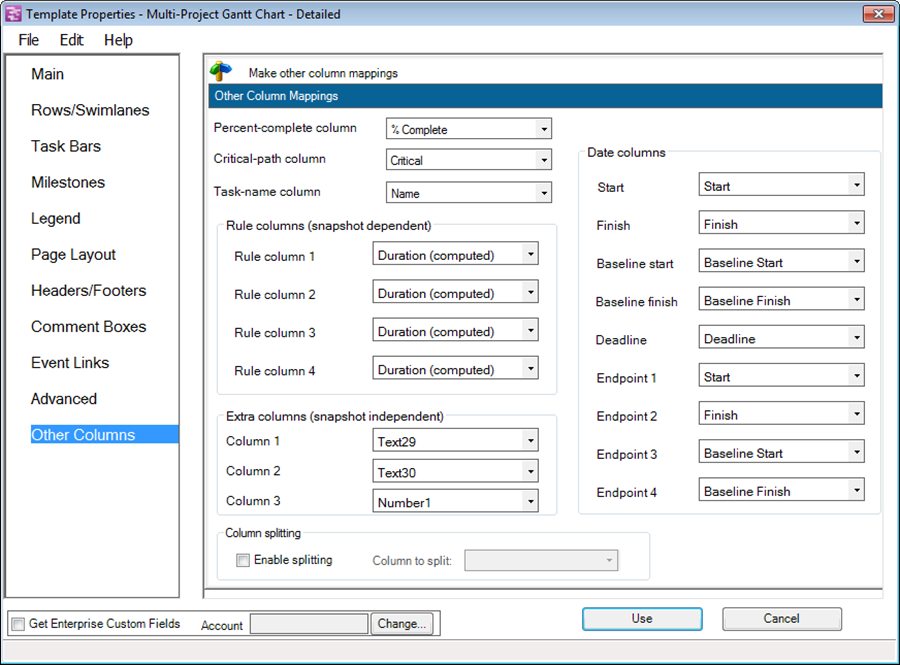
2) This tab allows you to specify which columns, including additional columns from your Microsoft Project plan, should be imported when the project view is first created. This tab gives you the flexibility to use columns for conditional formatting, row labeling, or round-robin color that you did not use when you originally created the project view.
3) As shown in the Other Columns tab form above, are window options available for you to change the columns used for the Percent-complete column, the Critical-path column, and the Task-name column. These are useful in the template whenever your standard for using Microsoft Project is different than the common columns used for these data elements.
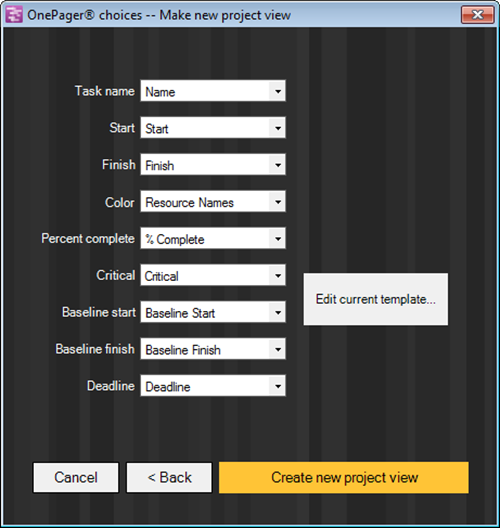
4) Additionally, you may change the standard Microsoft Project plan usage for any of the columns mentioned in the Date columns group shown on the right side of the Other Columns tab. This is useful if your standard column usage differs and you want to avoid having to constantly make the changes on the second page of OPC form shown below:
Rules Column (snapshot dependent) group
5) When you desire to make use of additional Microsoft Project plan columns for the creation of Conditional Formatting Rules, it is necessary to mention these columns in this Template Properties form’s Other Columns tab before creating your project view.
- a) These four (4) columns, with their associated window dropdowns, are available for use with Conditional Formatting Rules.
- b) However, these four (4) columns are not exclusively reserved for this purpose so you may use them for whatever creative purpose you have in mind.
- c) Note that any column you choose for conditional formatting will be refreshed during any' form of Update.
Extra Columns (snapshot independent) group
6) The Other Columns tab also lets you import three extra columns from your Microsoft Project plan in case you later change your mind about which Microsoft Project plan columns you want to use.
- a) These three (3) extra columns with the four (4) Rule columns mentioned above may be used for any purpose such as row or swimlane labels, round-robin color assignments, collecting tasks into rows, etc.
- b) Note that only those Microsoft Project plan columns specified on this tab of the Template Properties form, on the Rows and Swimlanes tab, and on the Task Bars and Milestones tabs (e.g. the round-robin color column and conditional formatting columns) will be imported to OnePager and are available to you once the project view is created.
- c) The features described here are not available on the PVP form as that form is available after data are imported from your Microsoft Project plan.
(24.1.1-OPL)