Zebra Striping for Rows and Swimlanes (OnePager Pro)
Contents
About Zebra Striping
OnePager Pro lets you stripe the background colors for rows or swimlanes and their respective label areas. The controls are in the “Advanced” tab of the “Project-View Properties” and of the “Template Properties” forms. The controls consist of two radio buttons and the selection of the desired alternating colors.
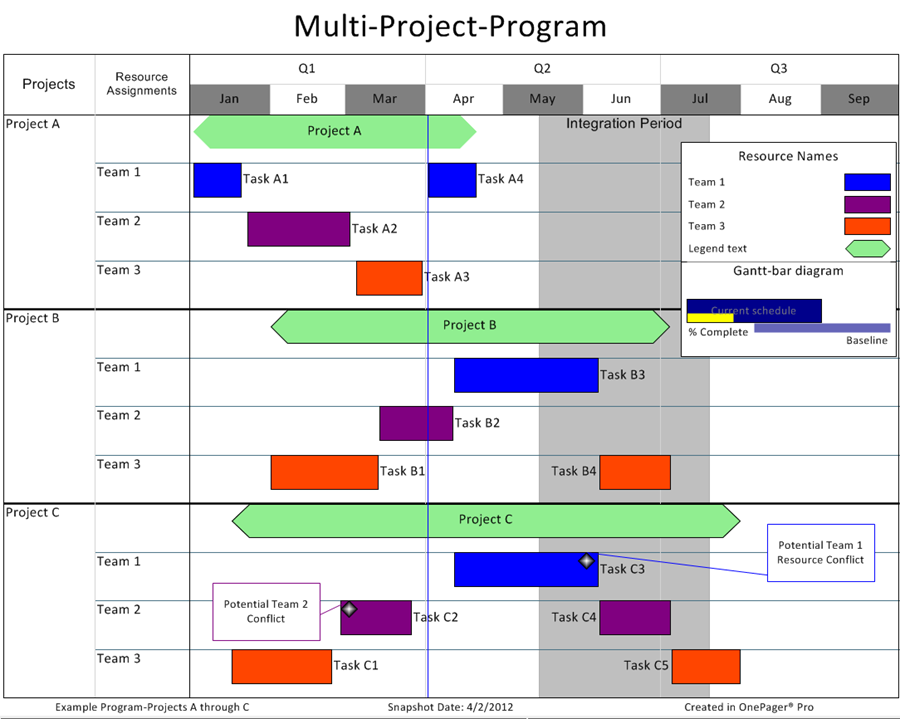
Let’s look at an existing project view as an example and apply Zebra stripes to both rows and swimlanes. The following is a project view where we have multiple projects and have eliminated all background color:
General: OnePager will apply alternate row or swimlane stripes from the bottom most row/swimlane to the top. It will start the stripes in the bottom most row/swimlane with Color 2 alternating to Color 1 in that fashion until the top most row/swimlane is finished. If rows or swimlanes are changed in any way by manually moving them up or down, splitting them, merging time, or through reconfiguring rows and swimlanes by changing the Microsoft Project column driving the configuration, OnePager will automatically re-stripe the project view from bottom to top starting with Color 2 as previously described.
Row Stripes
1) To Zebra stripe rows in your project view, go to the “Project-View Properties” form by clicking the “Project-View Properties” button on the OnePager “Home” ribbon. Then go to the “Advanced” tab.as shown below:
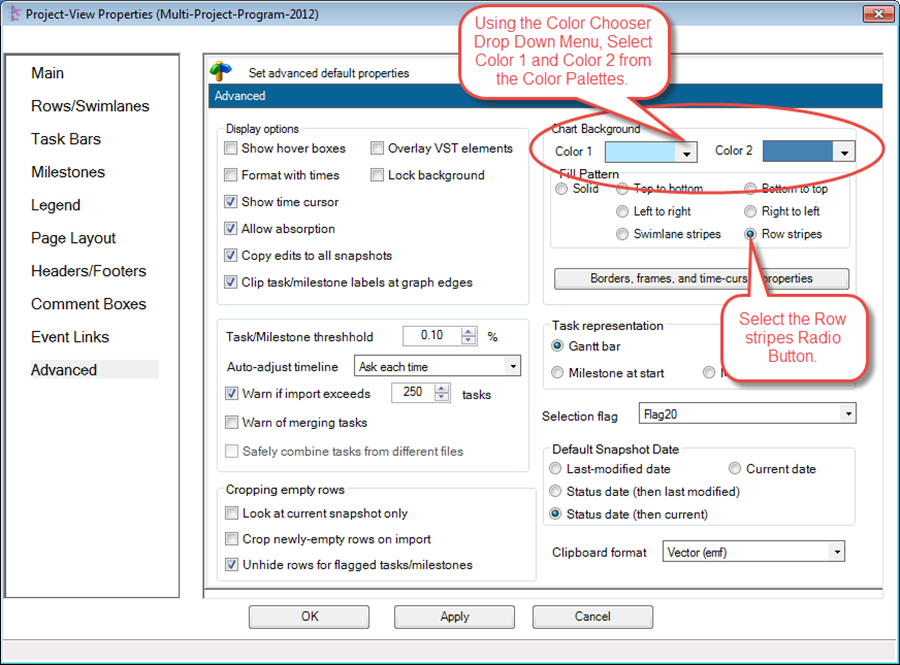
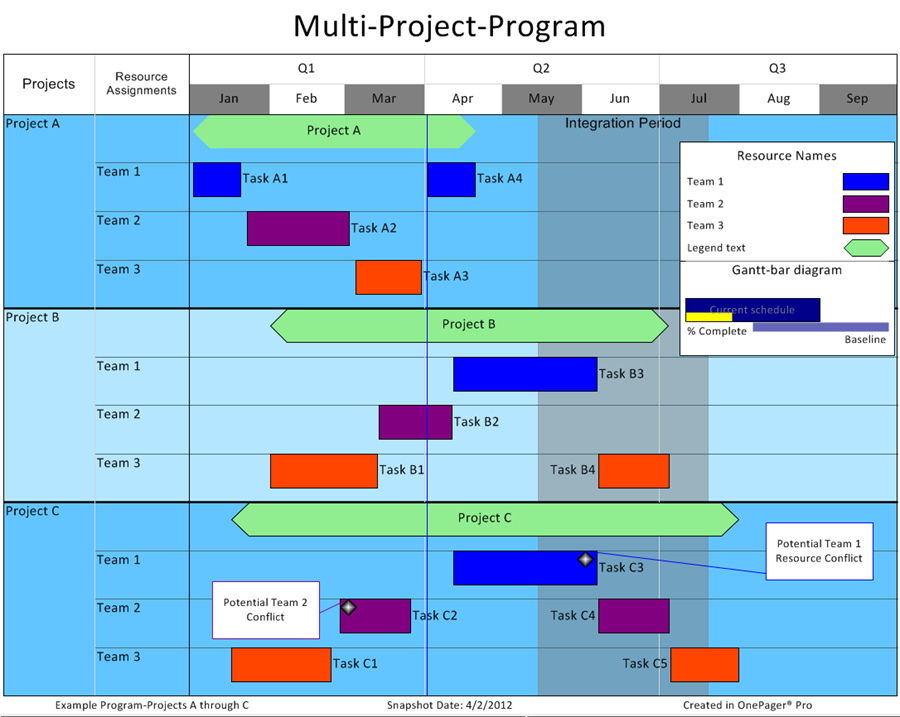
- a) In the form above, select the “Row stripes” radio button and select two colors, Color 1 and Color 2 were selected from the available color palettes.
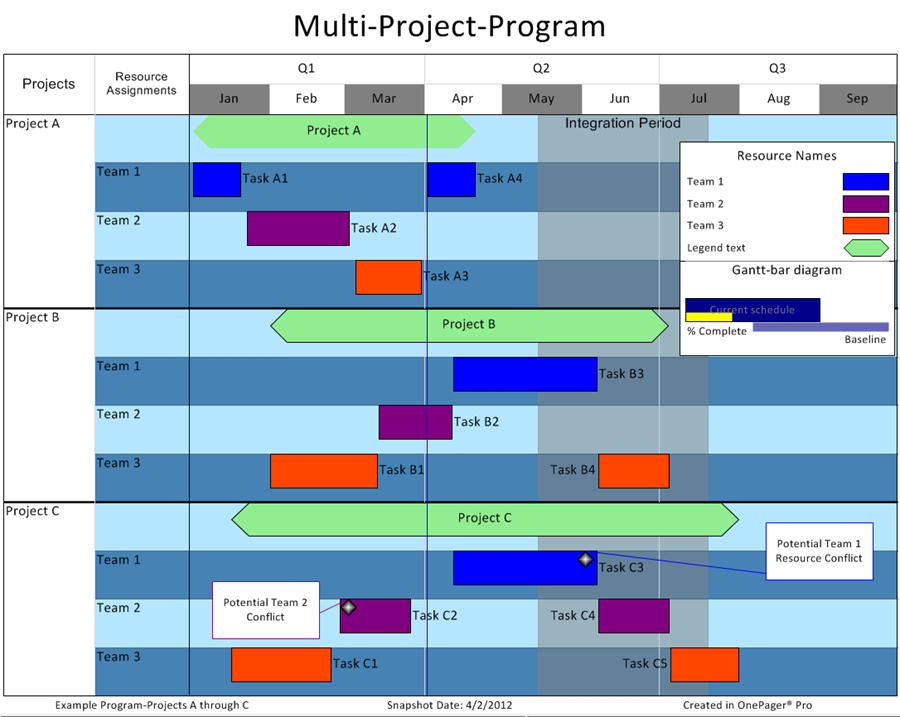
- b) Click “Apply” and “OK” and the project view will look like this:
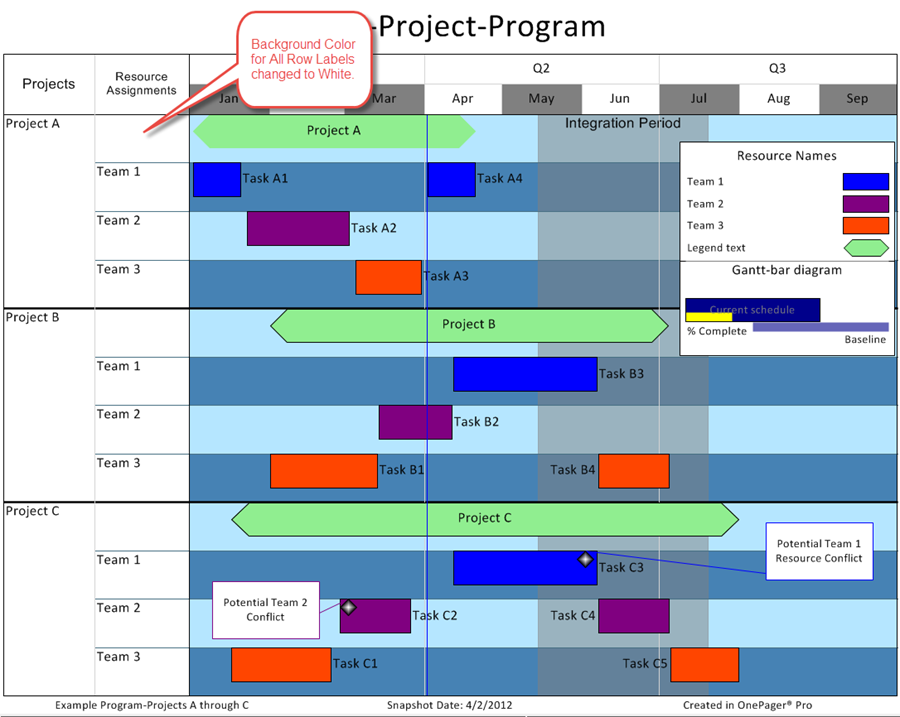
- c) If you do not desire the Row Labels to be included in the row striping operation, manually select all row labels. Then right-click and select the “Properties” command to reveal “Edit Row properties” form as shown below:
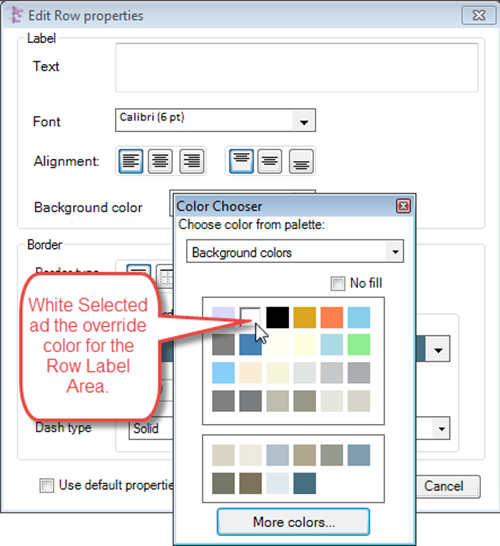
- i) For illustration, we’ve selected white as the background color for the Row Label area.
- ii) Select the color and then click “OK” on the “Edit Row properties” form.
- iii) After this step is completed, the project view will look like this:
Swimlane Stripes
2) To Zebra stripe at the swimlane level, the process is similar to the Row Stripes process described in the previous sub-section except that the “Swimlane Stripes” radio button is selected. For illustration, the following project view has swimlane stripes applied (which includes the Swimlane Label):
A Note
3) In the project view above, where swimlane stripes are applied and both Swimlane and Row Labels are displayed, the swimlane stripes will be applied to the appropriate Row Labels.
Row and Swimlane Stripes with Multi-Page Output
4) Zebra striping in multi-page outputs is handled sequentially from top to bottom using first “Color1” and then “Color2” alternatively. Since horizontal page breaks may be at the row or swimlane level, OnePager will continue the striping of alternative colors from page to page honoring the page breaks.
- a) Here’s an example of swimlane zebra stripes in a multi-page project view:
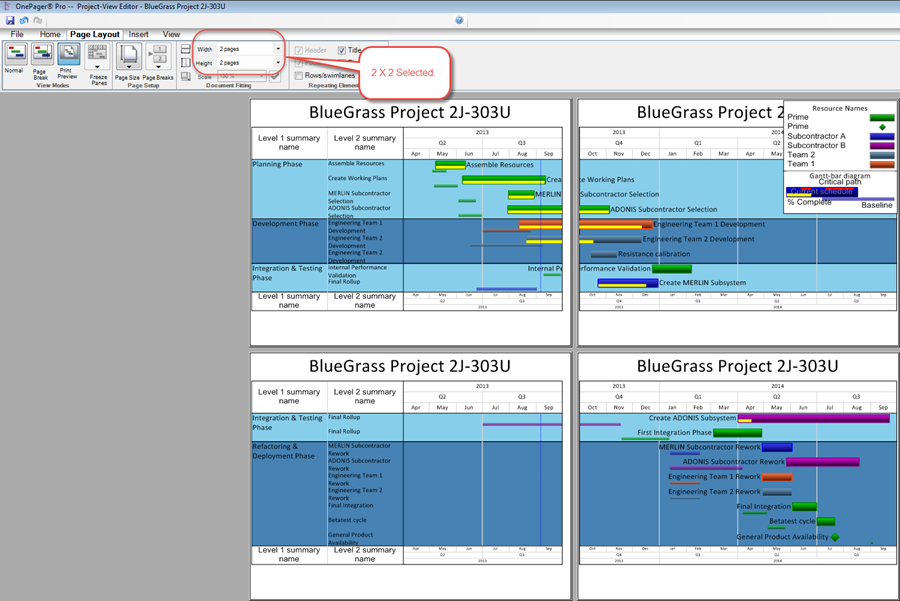
- b) Here’s an example of row zebra stripes in a multi-page project view:

(12.23)