Difference between revisions of "Moving and Resizing Images"
From OnePager Documentation
m (Text replacement - ".png]]" to ".png|link=]]") |
|||
| Line 3: | Line 3: | ||
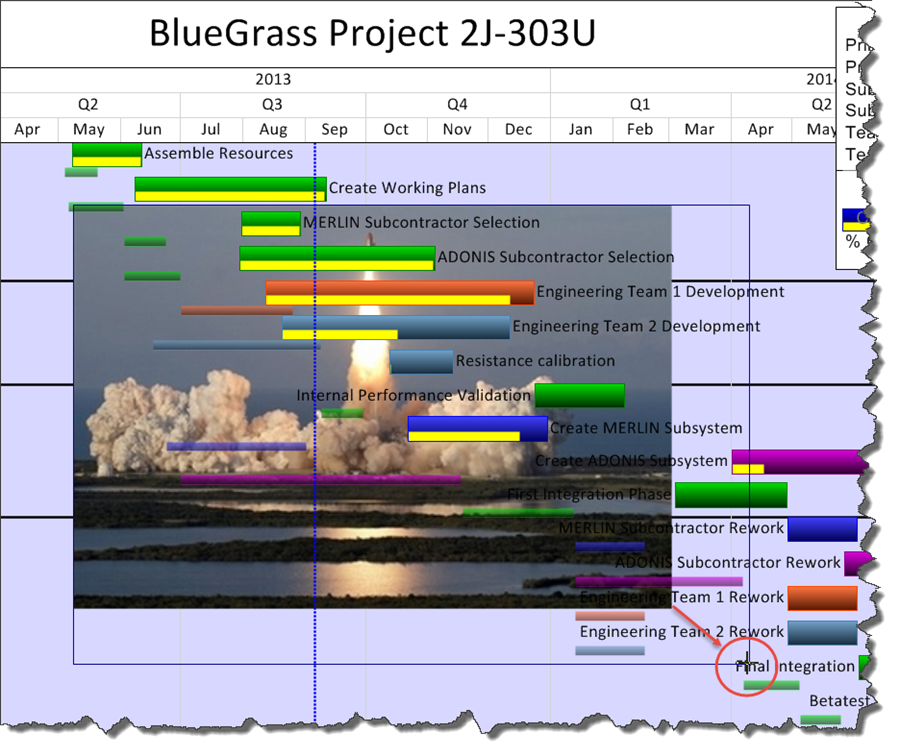
1) To resize an image, left-click it and then drag one of the grab points to the desired place and finally release the mouse left-click button to finish the resizing as shown below: | 1) To resize an image, left-click it and then drag one of the grab points to the desired place and finally release the mouse left-click button to finish the resizing as shown below: | ||
| − | <center>[[File:P52-20_2-(1)-06042015.png]]</center> | + | <center>[[File:P52-20_2-(1)-06042015.png|link=]]</center> |
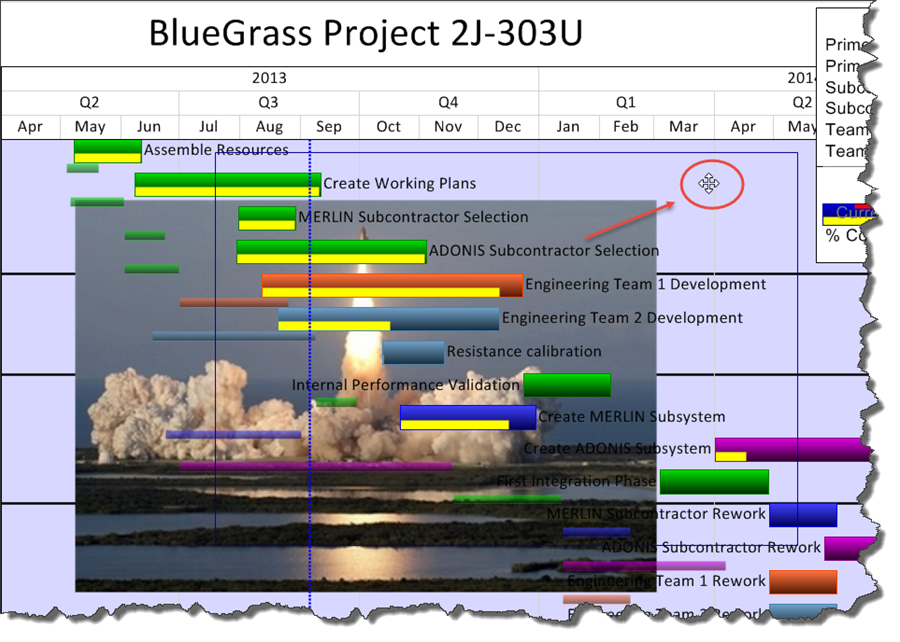
2) To move an image, left-click its interior and then drag it to the desired position on the screen and then release the left-click button as shown here: | 2) To move an image, left-click its interior and then drag it to the desired position on the screen and then release the left-click button as shown here: | ||
| − | <center>[[File:P52-20_2-(2)-06042015.png]]</center> | + | <center>[[File:P52-20_2-(2)-06042015.png|link=]]</center> |
(20.2) | (20.2) | ||
Latest revision as of 18:22, 7 June 2024
When a graphic is inserted into a project view and selected with a mouse click there are eight grab points that appear indicating that the image may be moved to any location or resized.
1) To resize an image, left-click it and then drag one of the grab points to the desired place and finally release the mouse left-click button to finish the resizing as shown below:
2) To move an image, left-click its interior and then drag it to the desired position on the screen and then release the left-click button as shown here:
(20.2)