Handling Microsoft Excel Spreadsheets Containing Multiple Projects For Version 5.3
Contents
Handling Microsoft Excel Spreadsheets Containing Multiple Projects For Version 5.3 (X53-8_3_1-12112015)
Representing multiple projects originating in a single Microsoft Excel plan can be easily done using the Rows and Swimlanes feature.
Multi-Project Excel Spreadsheet
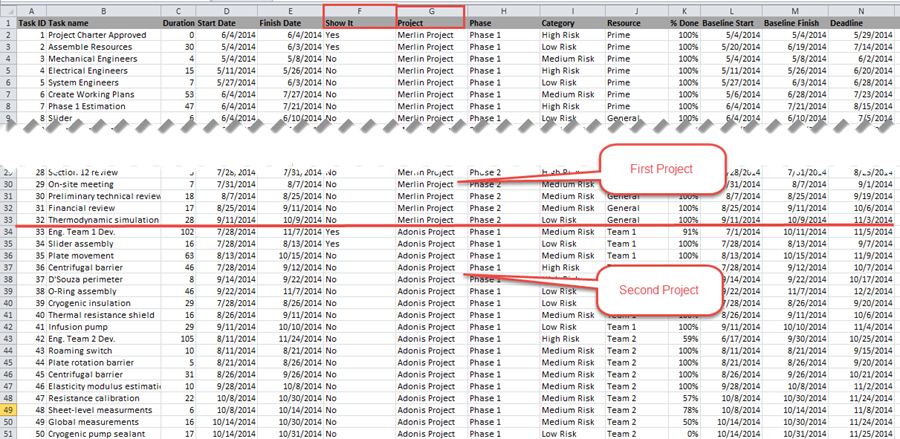
One method is to add a column to your Microsoft Excel plan with a column name of “Project.” This name is recognized by OnePager Express and is utilized in OnePager Express Multi-project Templates shipped with the product. An example spreadsheet with the “Project” column is shown below:

After configuring your Microsoft Excel plan with the “Project” column and the necessary multi-project schedule data you may create a useful Multi-Project project view by following the steps below:
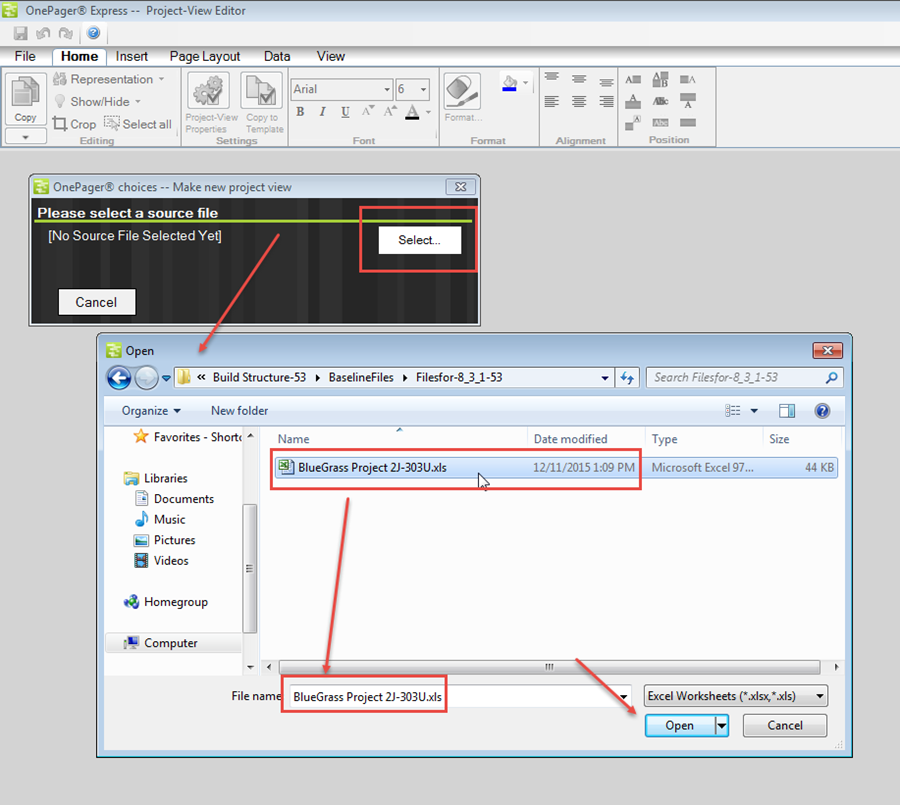
1) Launch OnePager Express from the desktop icon and click the “NEW button on the “OnePager Express Start” form. This will bring up the short form of the “OnePager choices” form where you should click the “Select” button and navigate to multi-project Excel file desired as shown below:

Setting up the Template for a Multi-Project Graph
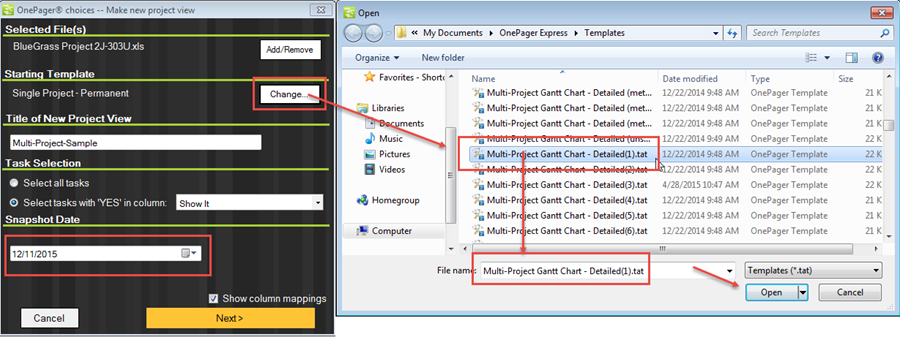
2) Clicking the “Open” button on the “Open” form will bring up the expanded “OnePager choices” form where you can confirm the Excel source file, provide a name for the project view you are creating and confirm the snapshot dated. Additionally, you need to change the “Template” to a multi-project template which is done by clicking the “Change” button in the “Starting Template” section of the form as shown below:

3) When you click the “Open” button on the “Open” form shown above, OnePager will change the current Template to the “Multi-Project Gantt Chart – Detailed” Template.
Pull In the Microsoft Excel Source File to Create the Project View
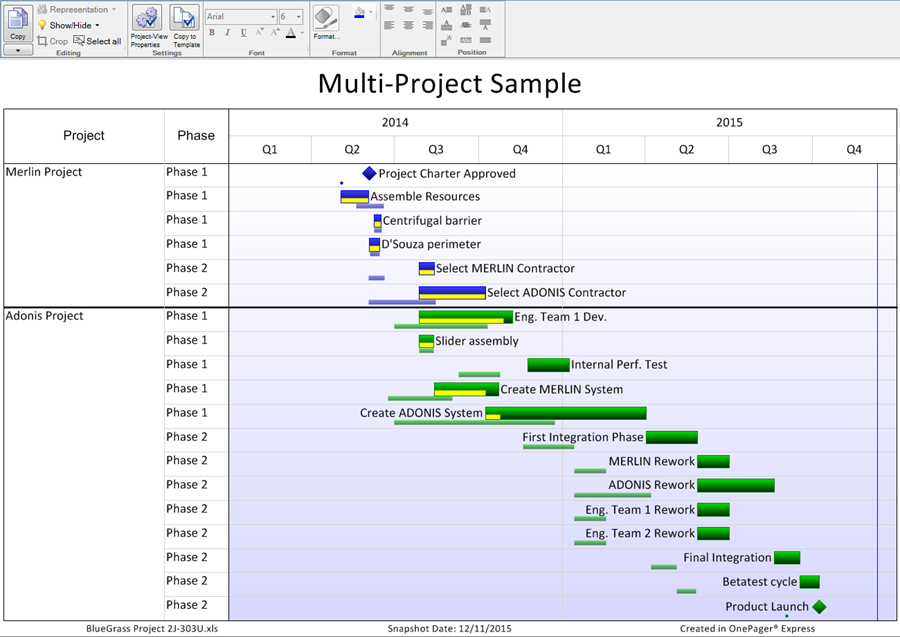
4) At this point you are ready to create the multi-project project view. First, click the “Next>” button which takes you to the second page of the “OnePager choices” form where you can check your column settings or make a Template adjustment. When you are finished just click the “Create new project view” button on the second page and OnePager will generate a multi-project project view that looks like this:

5) The project view above represents two separate projects using the swimlanes to organize the tasks/milestones for each.
6) As the Program progresses and additional projects are added, the additional swimlanes with their corresponding rows will be added to the project view in future snapshots.
Related Links
Creating a NEW Project View via Pull Operation - OnePager Express for Version 5.3 7.13.2-53
REPLACING a Snapshot via Pull Operation - OnePager Express for Version 5.3 7.14.3-53
(8.3.1-53)