Creating a NEW Project View - OnePager LIve for OnePager Live
Overview
7.1.1-OPL Not edited beyond this point.
Here are the steps to create a new project view:
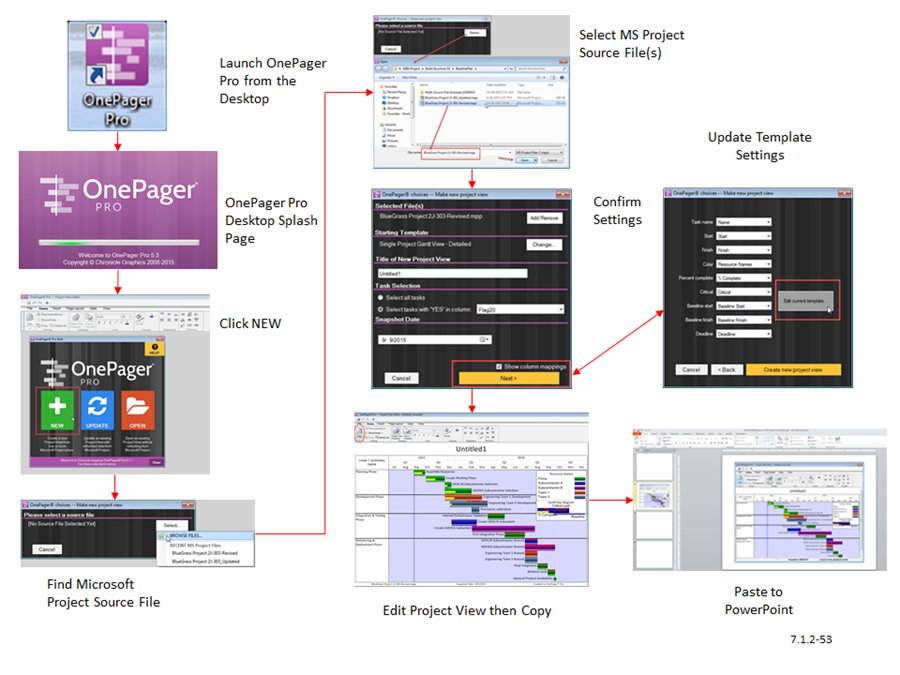
Procedures
1) Set Flags/Numbers column into the Microsoft Project plan. This will be the flag that OnePager uses to determine which rows to import. Determine which of the task/milestone rows are to be included and set the Flags/Numbers cell to Yes for these while leaving the remainder of the task/milestone row’s flag field set to No, 0, or blank.
2) Launch OnePager from the desktop icon.
3) The OnePager splash page will appear briefly followed by the OnePager Project View Editor (PVE) form displaying the OnePager Pro Start form as shown below:
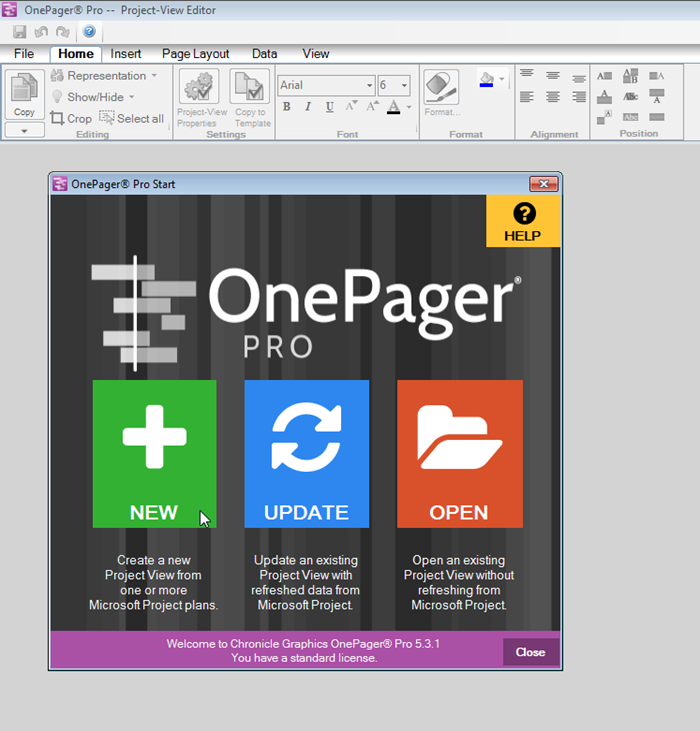
4) At the completion of step 3) when you click the NEW button, OnePager will display an abbreviated OnePager choices (OPC) form as shown below:
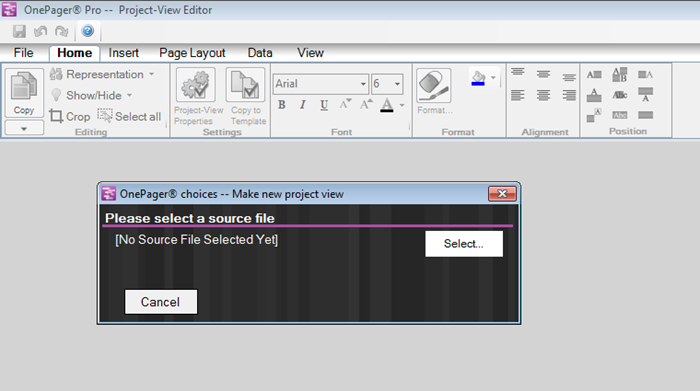
5) Click the Select button. The OnePager application will then provide a dropdown menu for you to either choose to use the BROWSE FILES... to select a source file or click the RECENT MS Project Files... option to access Microsoft Project Server source files:.
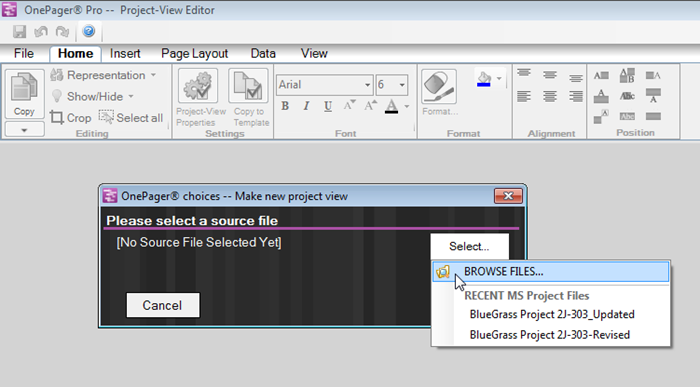
6) Clicking the BROWSE FILES… option as shown above will bring up a Windows Open form where you may select a Microsoft Project source file to load as shown here:
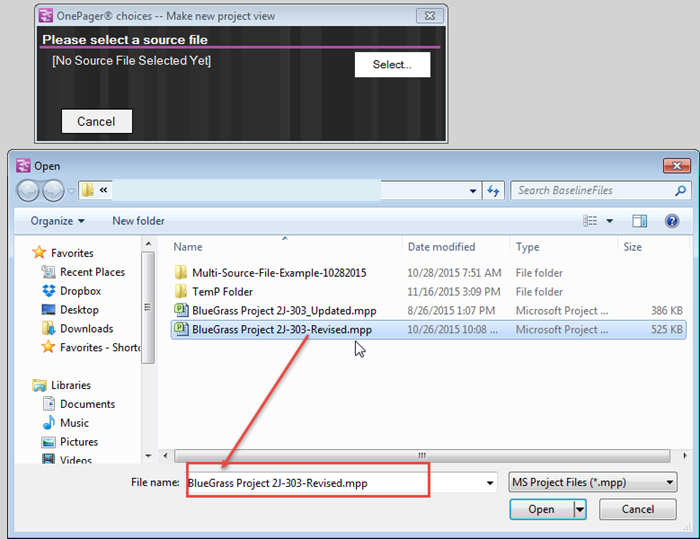
7) When you click the Open button on the Windows Open form above, OnePager will load the selected Microsoft Project plan and provide you with the expanded OPC form so that you can confirm or change the settings before OnePager creates the new project view.
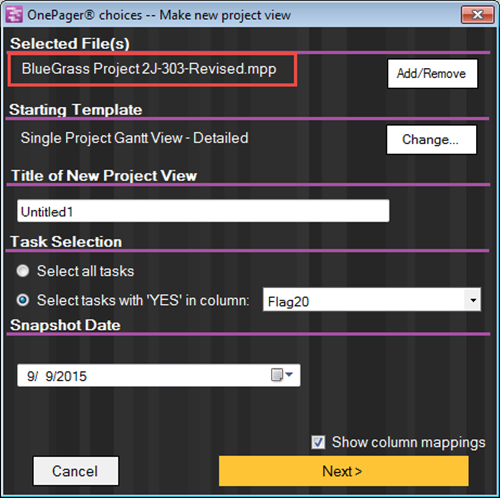
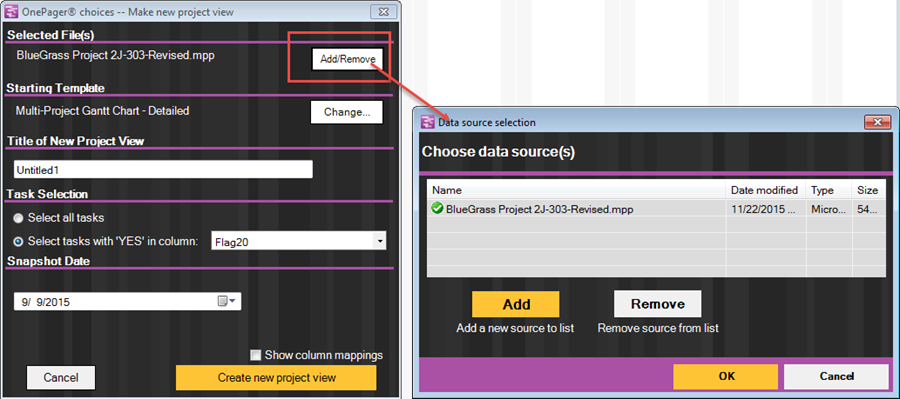
- a) As shown above, OnePager displays the loaded Microsoft Project source file in the Selected File(s) group of the OPC form. You may use the Add/Remove feature (described elsewhere) to modify the choice of Microsoft Project source file, add additional files to the source packet, and remove files. Clicking the Add/Modify button brings up the Data source selection form as shown below:
- b) It is recommended that the project view name selected refer to both the project and, perhaps, the audience that will be viewing the completed project view.
- c) Additionally, notice that the Select Tasks with ‘YES’ in column: is showing Flag20 as a default. Most users select Flag20 to tell OnePager which task/milestone rows to import but any of the 20 Flag fields or any of the 20 Number fields can be used. It is important that the flag field number represented in this window correspond to the flag field containing the Yes and No data placed in the Microsoft Project plan.
- d) The Snapshot date represents the time now or as-of date for the project report you are about to create. If the date created by OnePager does not reflect the status date required, change the date by using the calendar dropdown window. As the plan changes later on, you can create additional snapshots to show changes consistently.
- e) Finally, note that the Show column mappings checkbox is checked as shown above. Checking this checkbox and pressing the Next> button will take you to the form shown below:

8) This allows you to change which Microsoft Project plan columns are used for various purposes such as task name and start date. The Edit current template button also gives you a second chance to change many more initial properties of the project view. Once these choices are confirmed or changed, click the Create new project view button and OnePager will import the flagged data and make the project view.
9) Once the project view is produced, you may edit it such as by clicking shapes and using the controls on the ribbon or right-clicking, double-clicking, or dragging the shapes.
10) When the desired editing is complete, click the Copy to Clipboard button on the ribbon and paste the graph into a PowerPoint presentation, email message, or Word document. If the project view contains more than one page, you may choose to copy the entire document, the last page (current page), or a selected numerical page to the clipboard.
11) OnePager can save all project views and snapshots after editing.
Related Links
Creating a NEW Project View - OnePager Live 7.1.1-OPL
Creating a NEW Project View from Microsoft Project Server/Online 7.13.1-OP
Creating Another New Project View - OnePager LIve 7.3.1-OPL
Opening an EXISTING Project View - OnePager LIve 7.5.1-OPL
ADDING a Snapshot - OnePager Live 7.7.1-OPL
ADDING a Snapshot from Microsoft Project Server/Online 7.15.1-OP
REPLACING a Snapshot - OnePager Live 7.9.1-OPL
REPLACING a Snapshot with Microsoft Project Server/Online 7.14.1-OPL
Custom Update (Replacing) of a Snapshot with Microsoft Project Server/Online 7.1.16.1-OP
Using the OnePager Live Data Tab's Selected file(s) Button 7.17.1-OPL
Merging the Wrong Tasks into a Project View from Microsoft Project 7.11.1-OPL
Merging the Wrong Tasks into a Project View from Microsoft Excel 7.12.1-OPL
(7.1.1-OPL)