Installing and Activating OnePager Pro for Version 7.0 (Portal)
Contents
Installing OnePager Pro Version 7.0
Installation of OnePager Pro (OPP) for version 7.0 remains the same as previous versions. The process is repeated here for your convenience. We smartened up our installer and are offering you two installation options to launch OPP (1) as an Add-in to Microsoft Project and (2) a new option to launch OPP directly from a desktop Icon. For more information on further details, please see the article at: Getting Started with OnePager Pro Desktop
Smart Installer
The OPP installer comes in two varieties:
- 1) an .EXE file for individuals to install on their desktop and
- 2) a .ZIP file for IT professionals that are installing OPP into a managed network environment.
The .EXE smart installer figures out the bitness of your computer (i.e., 32-bits or 64-bits) and installs the correct bitness to match your computer automatically.
The .ZIP file contains all installation instructions in the .ZIP file’s README.rtf file. No further discussion on IT professional installations is provided here.
Both installers provide the options to install both the OPP Add-in and desktop Icon launch options or to just install the OPP desktop Icon launch option only. Regardless of which of these two options is selected, your computer still requires that Microsoft Project be installed and available.
Microsoft .NET Version Requirements to Run OnePager
Version 7.0 requires that the users have installed Microsoft .NET Framework version 4.5 Full or later on their computer. After installation is complete, OnePager displays both the required Microsoft .NET Framework version and the Microsoft .NET Framework version installed at the About tab on the ribbon’s File tab as shown below:
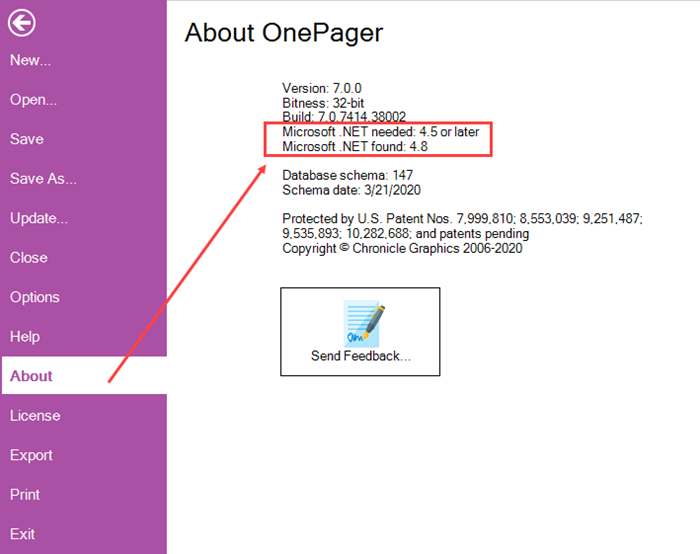
If the .NET 4.5 or later Framework is not installed on your computer, download it for free from Microsoft.
OnePager Pro Installation Process
To install OPP version 7.0 locate the .EXE file from the download and double click on the file name. The following form may appear:
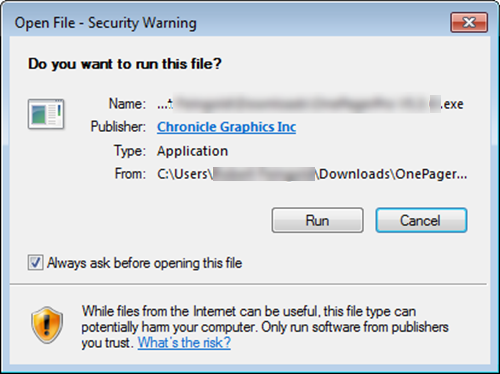
Click the Run button which launches the OPP installer and the following form appears:
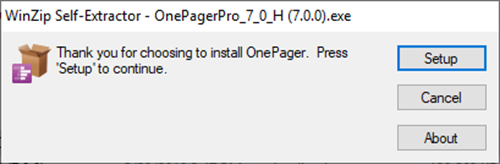
When you click the Setup button the installer begins the installation process and the form below appears:
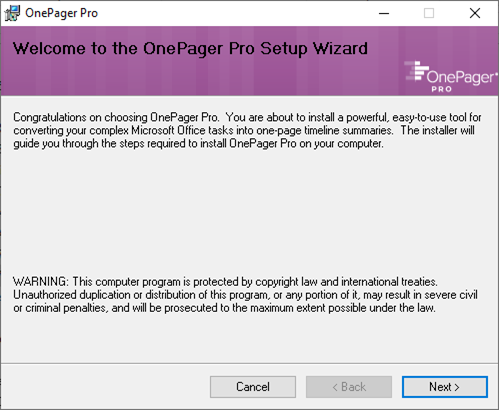
Clicking the Next> button accesses the License Agreement form which you should read.
Then, click the I Agree button and the “Next>” button as shown below:

After clicking the Next> button on the form above, the OPP installer displays the Installation Options form shown below:
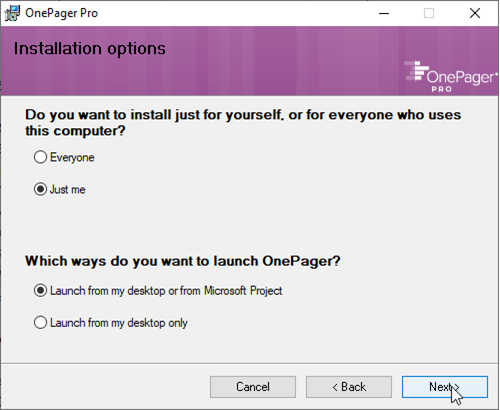
Everyone or Just Me Selection Options
At this point, you can either accept the default options or change the selections as required.
The first set of options allows you to install OPP for every user account on the computer or only for the user account performing the installation.
Add-in And Desktop Application Selection Options
The second set of options, both of which require the presence of Microsoft Project on the computer, allows you to install both the Add-in and desktop applications and their launch Icons for OPP or just the desktop application and its launch Icon.
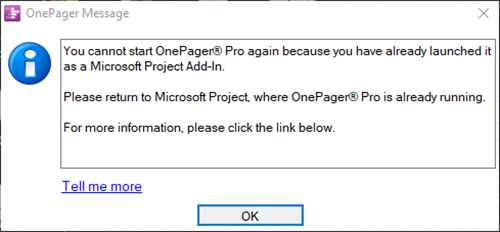
Selecting the Launch from my desktop or from Microsoft Project option inserts OPP as a Microsoft Project Add-in and place a OPP desktop Icon on your desktop. Please note that after selecting this launch option that you only are able to launch either OPP Add-in or OPP desktop. Only one of these applications can be launched at a time. If you attempt to launch both, a warning message appears as shown below:
Selecting the Launch from my desktop only option places the OPP desktop Icon on your computer. After making your option selections, click the Next> button on the form above to access the OnePager Pro Information form shown below:
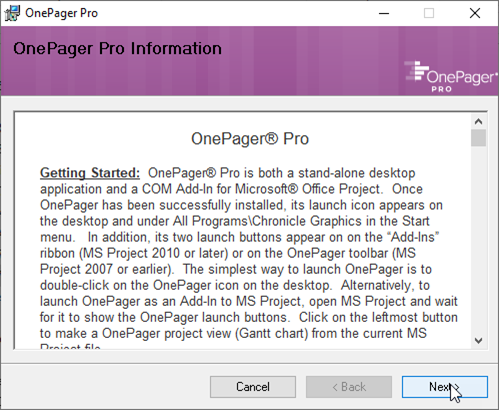
At this point, you can copy the contents of the OnePager Pro Information form for later reference and then click the Next> button. This action accesses the OnePager Pro Installation Complete form shown here:
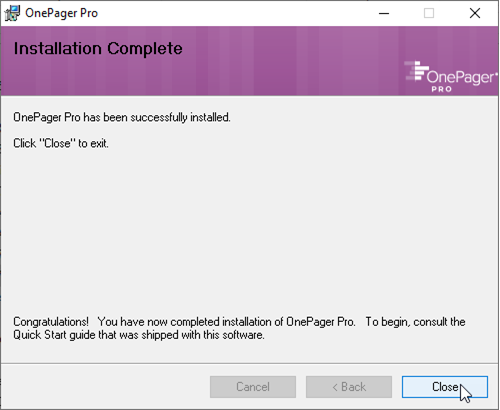
Clicking the Close button completes the installation process and you are ready to begin.
OnePager Pro Help
OnePager Pro Tutorial
The first time you launch Microsoft Project a Getting Started Tutorial form appears as shown below. You can take the tutorial or close it so that you can take the tutorial at another time. The Getting Started Tutorial form continues to appear each time you launch Microsoft Project until you check the Do not show this tutorial at start up checkbox.
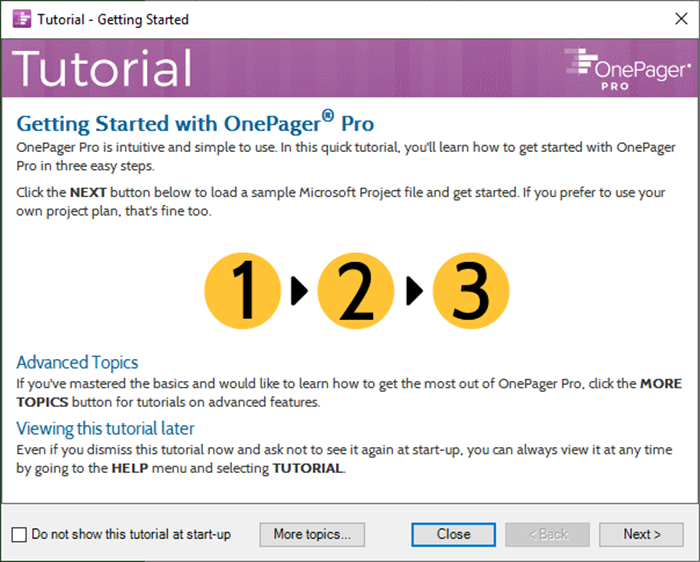
The Getting Started Tutorial does not automatically appear when you launch OPP from the desktop Icon. To get to the tutorial from the OnePager Start form, click the Help button in the upper right corner of the form as shown below:

Getting Help
When you click the Help button on the OnePager Start form the OnePager Pro Help form is accessed with its seven (7) help button selection options as shown below:
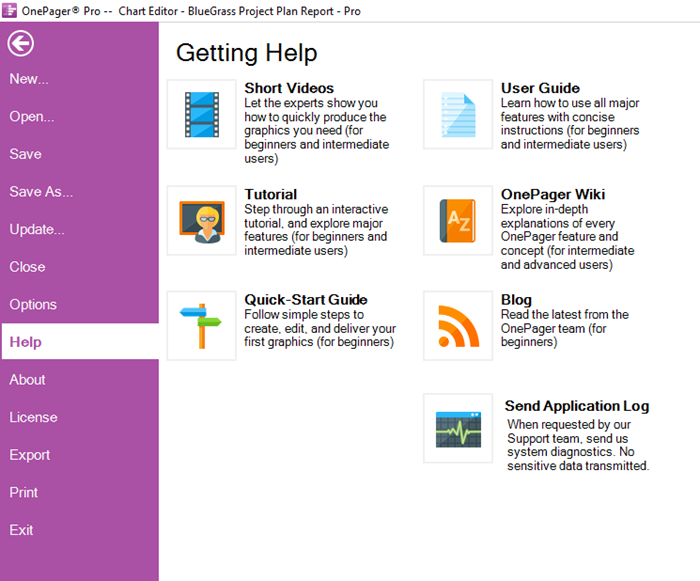
In addition to the Tutorial button, you can access other helpful information by clicking on Short Videos, Quick-Start Guide, User Guide, OnePager Wiki, or the Blog button. If you encounter any issues during or after your installation of OPP, please contact us at support@onepager.com or go to the following link: Getting Support and Contacting OnePager.
Get Standard License
To start the licensing process, click the License tab on the OnePager File form to access the tab shown below:
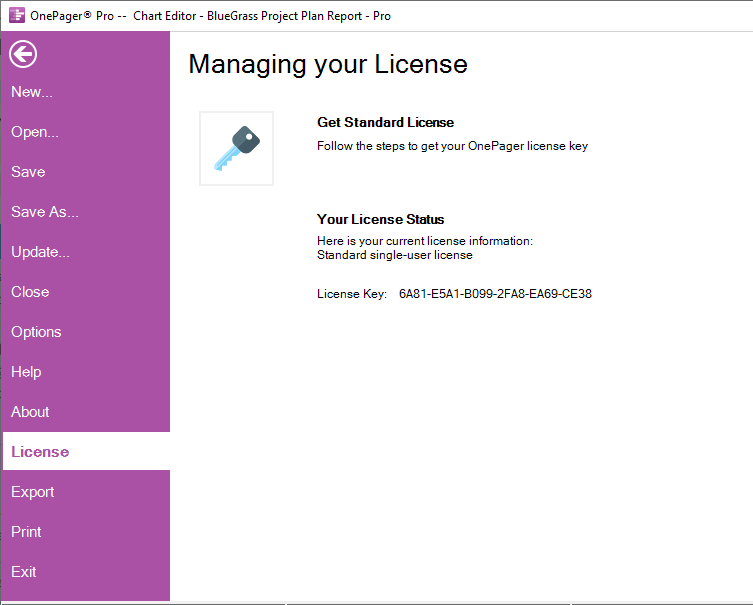
The Get Standard License button accesses the OnePager Express license form which you can use to access your OnePager software license from Chronicle Graphics, Inc. The OnePager Pro license form is shown below:
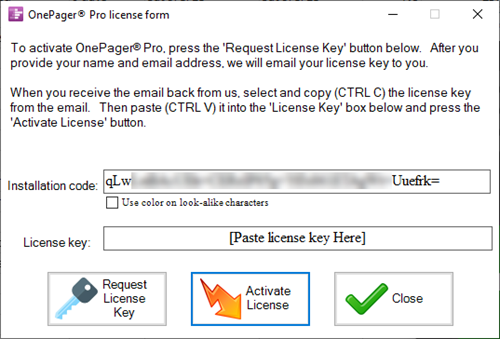
For complete details on accessing your OnePager Pro license please see the article at: Activating Your OnePager Pro License
Temporarily Disabling and Re-enabling OnePager Pro
OnePager Pro can be temporarily disabled as an Add-in to Microsoft Project and later re-enabled as an Add-in to Microsoft Project to resume its role. Instructions for temporarily disabling and re-enabling OnePager Pro for Microsoft Project are found in this article: Temporarily Disabling and Re-Enabling OnePager Pro for Microsoft Project
Uninstalling OnePager Pro
If you find it necessary to uninstall OnePager Pro, please see this article for instructions: Uninstalling OnePager Pro
Related Links
Activating Your OnePager Pro License
Getting Support and Contacting OnePager
Activating Your OnePager Express License
(1.0.1-70)