Managing Images in the Chart's Headers and Footers for Version 7.2
Contents
Overview
Illustrations used in this article are from OnePager Pro using data from Microsoft Project but the features, function, controls, and manual edits apply equally to other OnePager editions that import from data sources like Microsoft Excel, Smartsheet, Oracle Primavera P6, Project for the Web, Planisware Enterprise, Asana, and Wrike.
The purpose of this article is to introduce you to a new feature whereby you can insert and manage images in any of the six (6) OnePager chart Headers and Footers.
Introduction
For years, users of OnePager have needed to put graphical images such as company logos into the headers and footers of charts. Because OnePager supported only text in headers and footers, these users resorted to inserting images at the top or bottom of the chart, near where a text header/footer would be normally appear. This work-around was acceptable in simple cases but allowed the image to drift away from the desired header/footer location when OnePager divided the chart into multiple pages or when the dimensions of the chart changed. A new feature of Version 7.2 solves this problem by allowing the user to literally put an image into any header/footer location, where it will remain during pagination or resizing operations.
The controls for managing (inserting and editing) images in a OnePager chart’s Headers and Footers are provided in the Template Properties and Chart Properties form’s Headers/Footers tab as described in this article. There are a total of six (6) Header/Footer positions in the chart and images can be inserted into any of these. After an image is inserted in the chart’s headers or footers, the image can be changed by using the controls described below in the same Template Properties and Chart Properties form’s Headers/Footers tab. Additionally, once inserted in the chart, the inserted image can be edited in the chart using the context menu provided and the available Image Properties form also described in this article.
These six (6) dropdown windows allow you to specify what property you want to appear in each of the six (6) possible header/footer positions. The choices for header/footer positions are shown below:
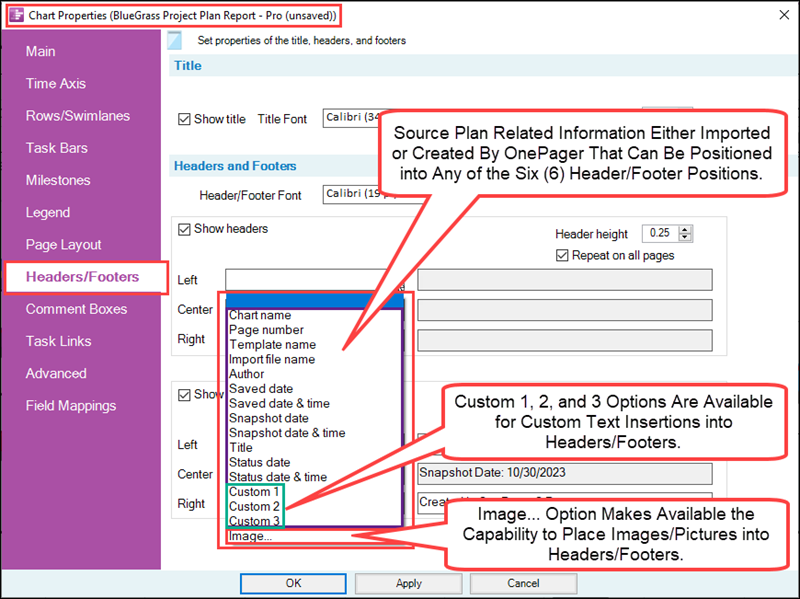
For example, when you click the Image… option shown above, OnePager accesses the Choose image file to insert into the left header form where you can select the desired image to insert as shown here:
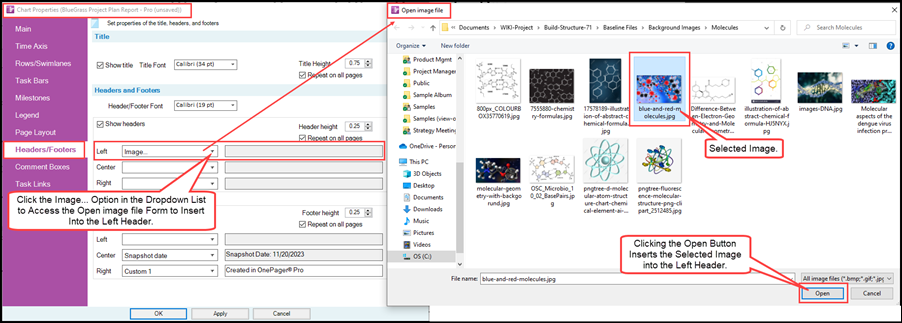
When the Open button is clicked, the selected image is inserted into the window to the right of the Left Header dropdown window as shown below:
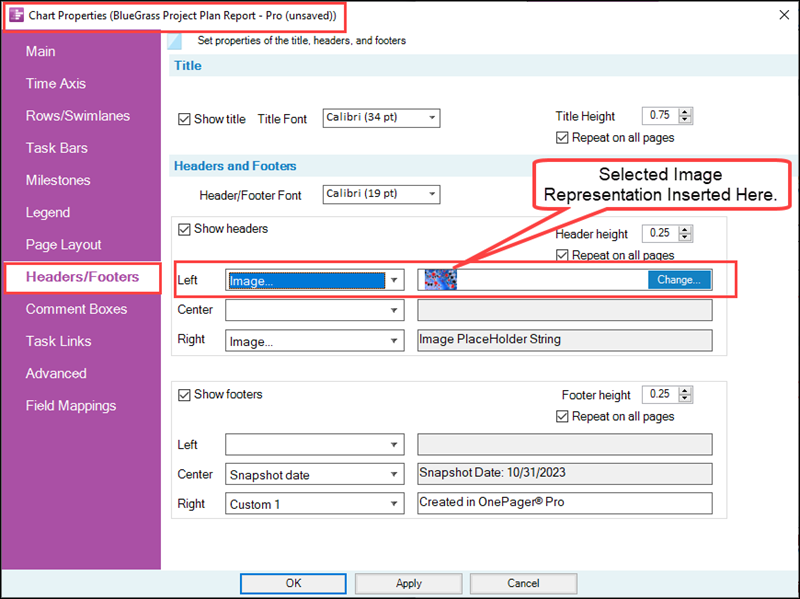
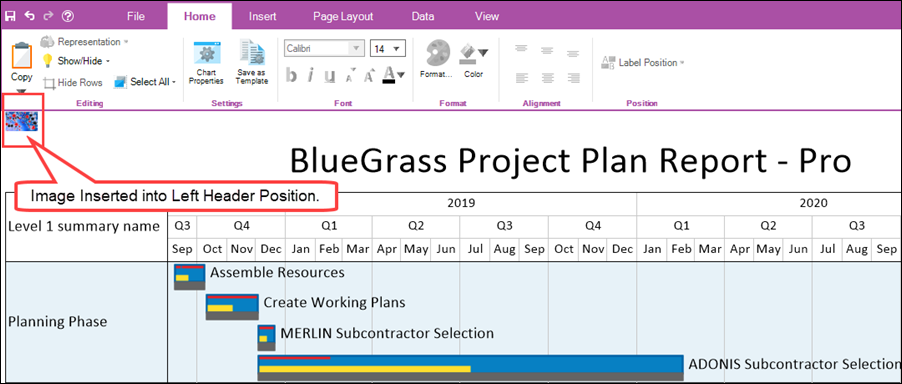
To complete the action, if there are no other headers or footers to edit, click the OK or Apply button to update the chart, which then displays the image precisely in the left-header position:
The Headers/Footers tab has an option present in the adjacent window whereby you can change the image originally selected to another image after the initial inserted image was selected. This clickable option is shown in the illustration below:
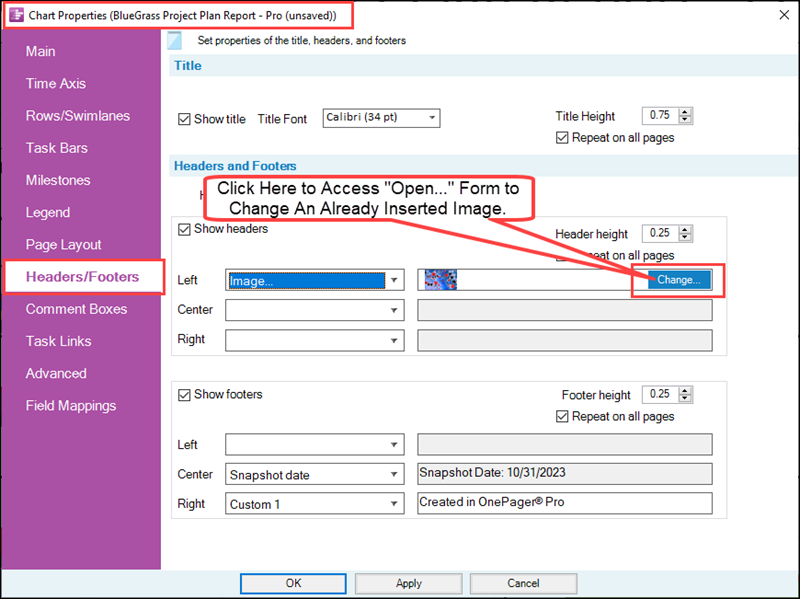
When you click the Change… option, it accesses the Choose image file to insert into the left header form where you can select another image to insert as shown here:
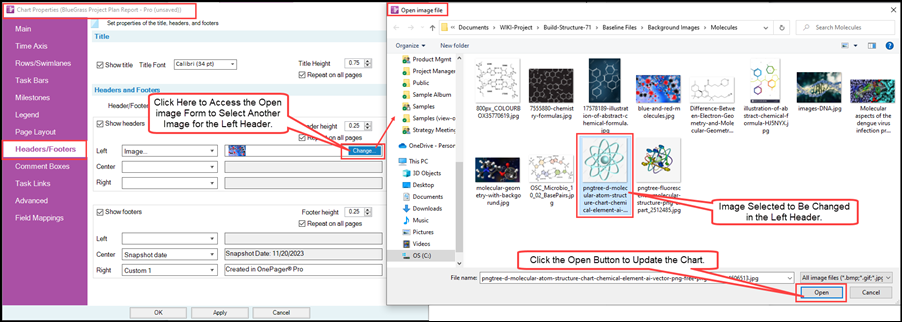
After the inserted image to be changed is selected and the Open button is clicked, the updated chart looks like this:
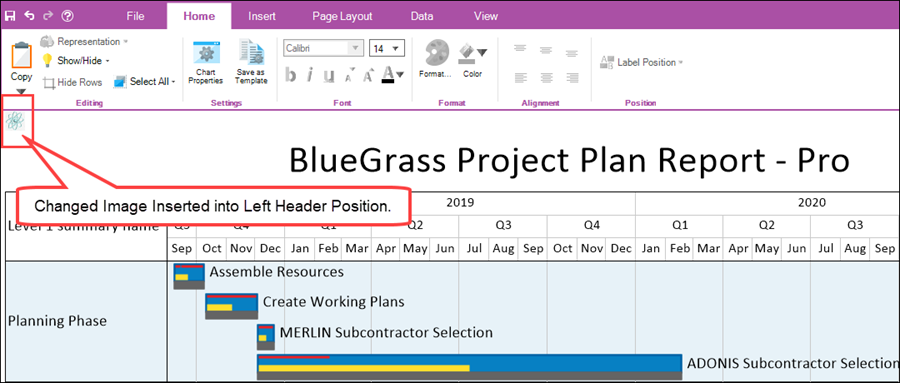
Header and Footer inserted images are snapshot-independent and appear in all snapshots. Changing a header/footer inserted image in any snapshot changes the inserted image in all snapshots.
Once inserted images are positioned in OnePager chart Headers and/or Footers, you can edit them using two methods. First, the inserted images are selectable when left-clicked. When an inserted image in a header or footer is selected with a left-click, grab-boxes and circles appear that can be used to change the size of the image (width or height) or to move the inserted image to a different location in the vicinity of the header or footer. Note that moving or resizing the image still leaves it pinned to the header or footer location so that it continues to appear near this header or footer location after pagination or change of chart dimensions.
Second, performing a right-click on an inserted image in the header or footer accesses its context menu. The context menu contains three (3) commands that are discussed below.
Selecting an Inserted Image with the Left-Click
In the illustration below, the left header’s inserted image is left clicked with the mouse:
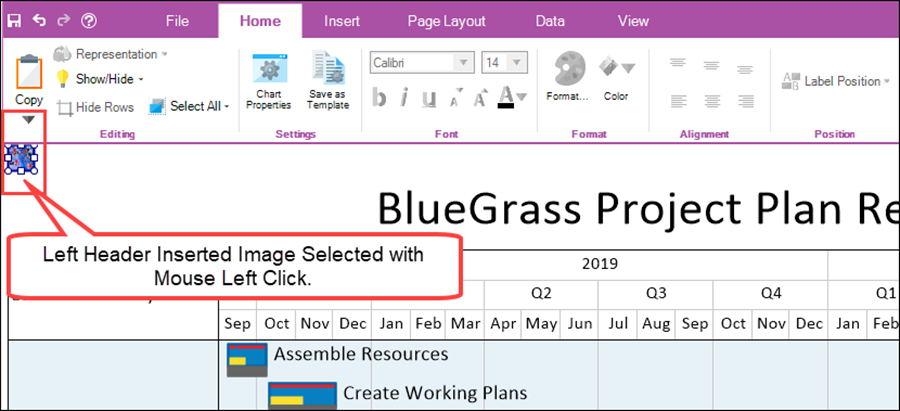
Making the selection with a left-click, accesses the eight (8) grab boxes and circles.
Manually Resizing an Inserted Image
As with all selected images in OnePager, performing a left-click access the eight (8) grab boxes and circles are used to resize the inserted image as demonstrated in the illustration below where the selected image is grabbed in the lower right corner and moved in a lower right direction:
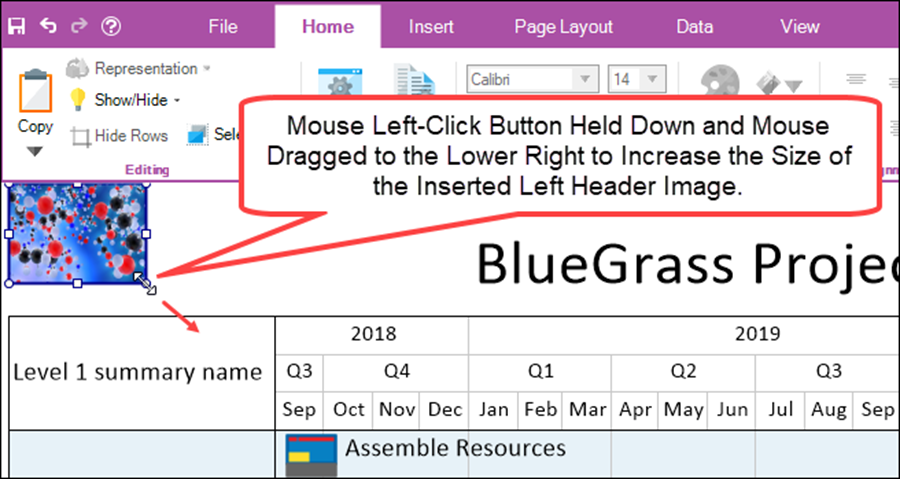
OnePager, as a default, maintains the aspect ratio of width to height as the inserted image’s size is changed. As explained later on, you can override the maintenance of the aspect ratio when resizing the inserted image in the header or footer. This convention is the same for pictures inserted into the chart using the Picture icon on the OnePager Insert tool bar tab.
Manually Moving a Selected Inserted Image
Selecting an inserted image in a header or footer, as mentioned above, accesses the eight (8) grab boxes and circles that are used for resizing the image. Selecting the inserted image also allows you to use the mouse with its left-click button held down over the inserted image to move it to a different position near the particular header or footer as shown below:
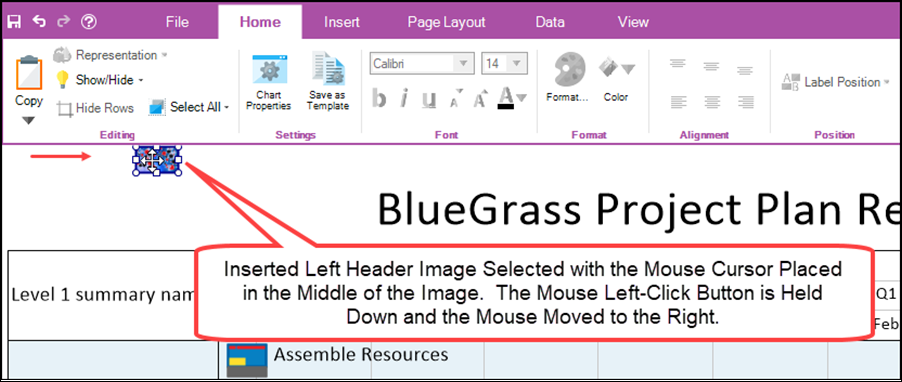
Left-clicking the mouse anywhere in the chart deselects the inserted image in its new position. The inserted image can be moved to any location in the left header for the illustration used above.
A couple of notes are required here. First, moving the image is intended only as a fine-tuning operation, so OnePager will not allow you to move a header or footer image to any arbitrary location. You are constrained to keep the image near the original header or footer location. Furthermore, it is not possible to cause an inserted image to become associated with a different header or footer location. For instance, moving an enlarged inserted image from the left header to the right causes the movement to seem to bump against a wall as the inserted image hits the right boundary of the left header fine-tuning area.
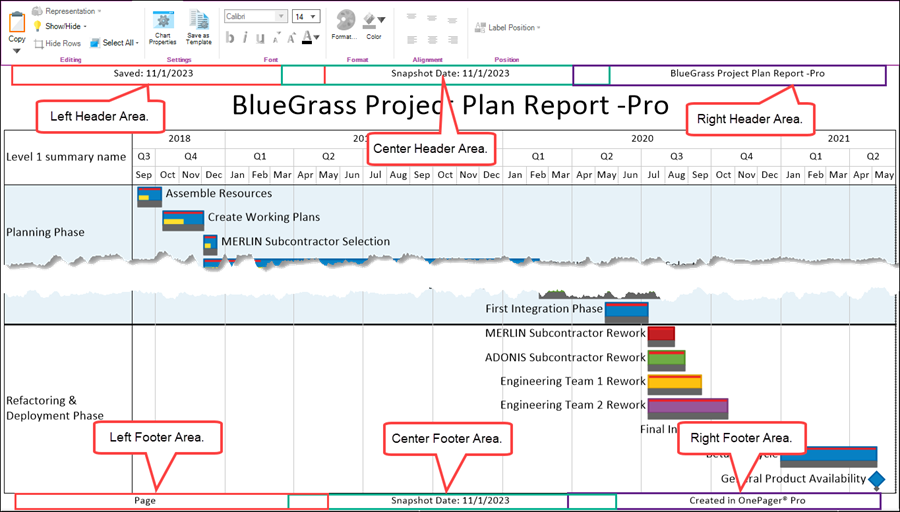
With this flexibility, it is possible to move inserted images very close to one another in either the header or footer. This is especially true if the inserted images are enlarged. However, each image remains associated with its original header or footer during pagination or resizing.
Right-Clicking an Inserted Image
With an inserted image positioned in a header or footer, the second option to select the inserted image is to perform a right-click. This action accesses the inserted image’s context menu as shown below:
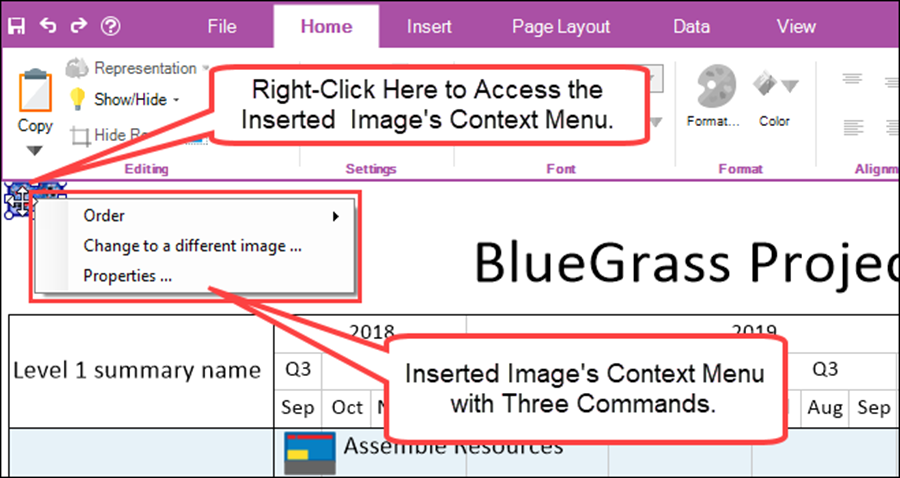
There are three (3) commands provided in the inserted image header or footer context menu that are described in the following sub-sections.
Inserted Image Order Command
The Order command is used in several contexts in OnePager and the inserted image Order command operates the same way. When the Order command is selected, the four (4) sub-command look like this:
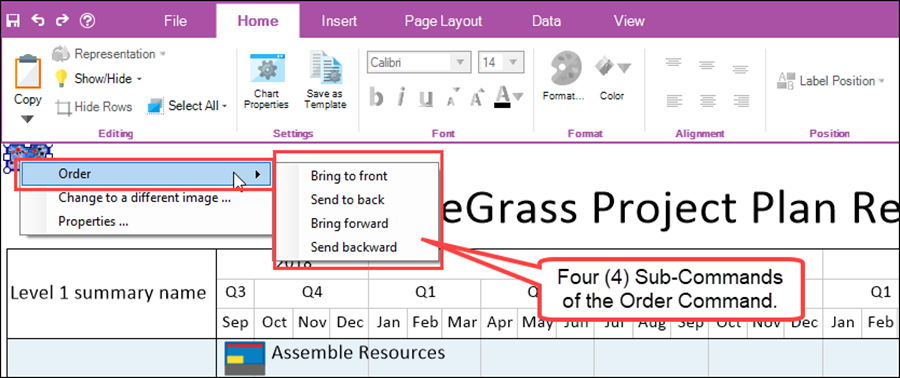
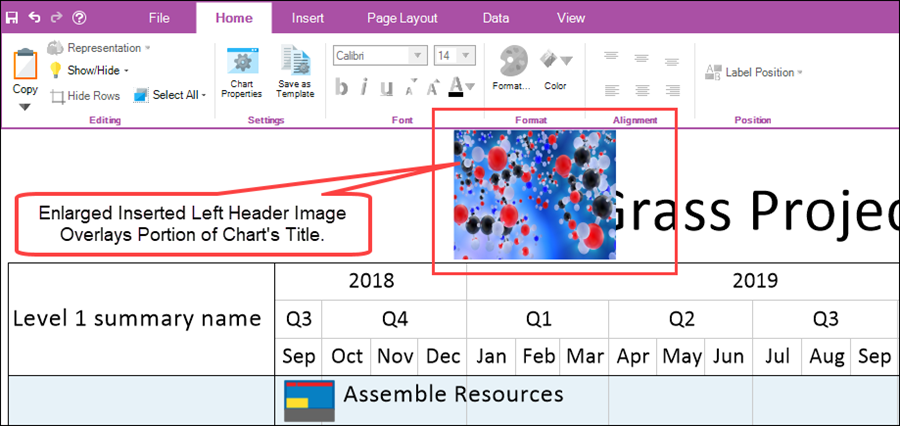
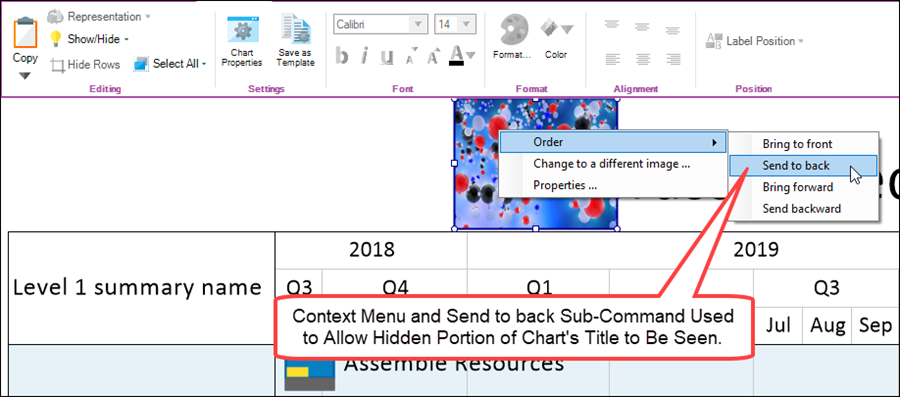
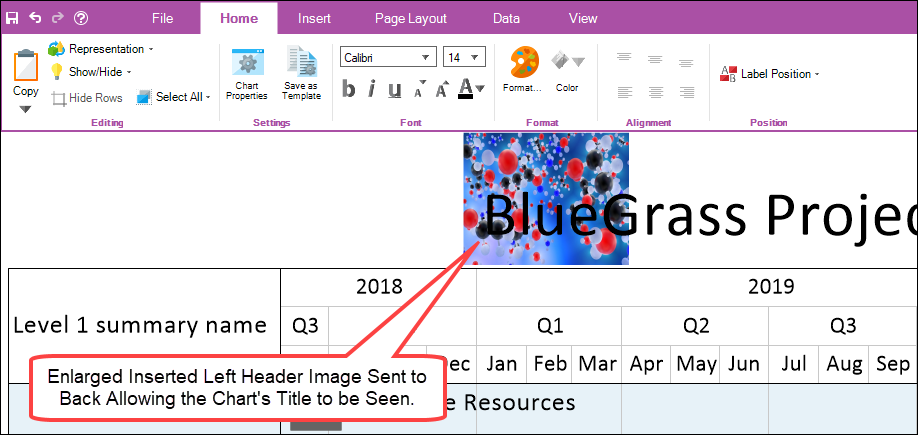
The four (4) sub-commands shown in the above illustration are standard for OnePager and are used to avoid overlaying one graphic in the chart over another. Using one of these sub-commands may be necessary if you resize the inserted image or move the inserted image to a location where it overlays another graphic such as the chart’s title as shown below in the series of three illustrations where the left header inserted image is sent to back behind the title:
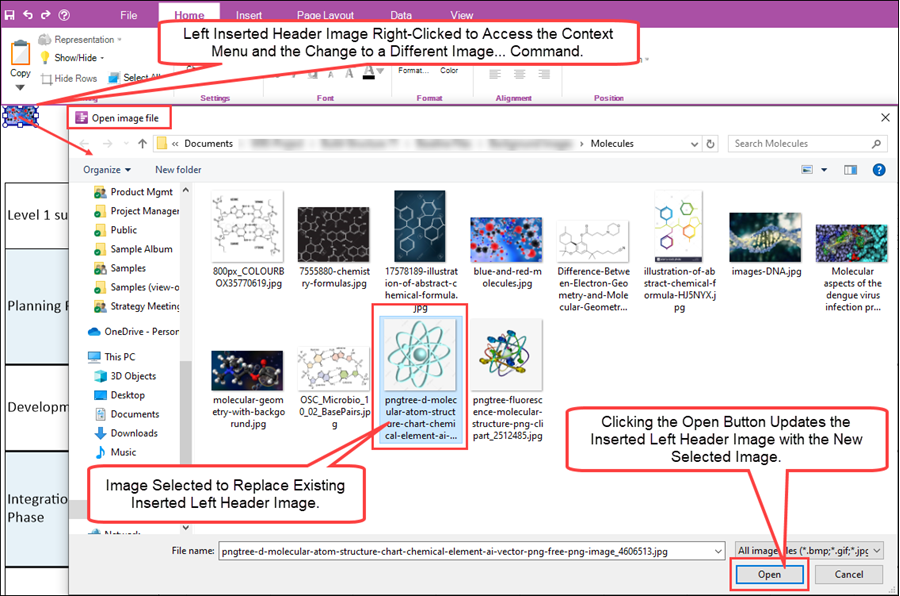
Inserted Image Change to a different image … Command
The Change to a different image … command operates as described above for the Change … option found in the Headers/Footers tab of the Chart Properties form. Clicking the Change to a different image … command access the Open image file form as shown below:
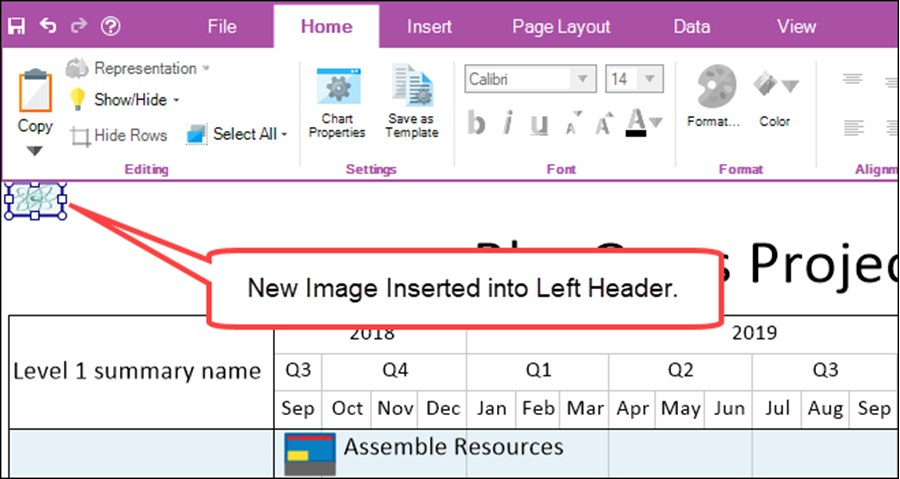
When the Open button in the above illustration is clicked, the chart is updated to look like this:
Inserted Image Properties … Command
Clicking the Properties … command in the context menu accesses the Image Properties form as shown below:
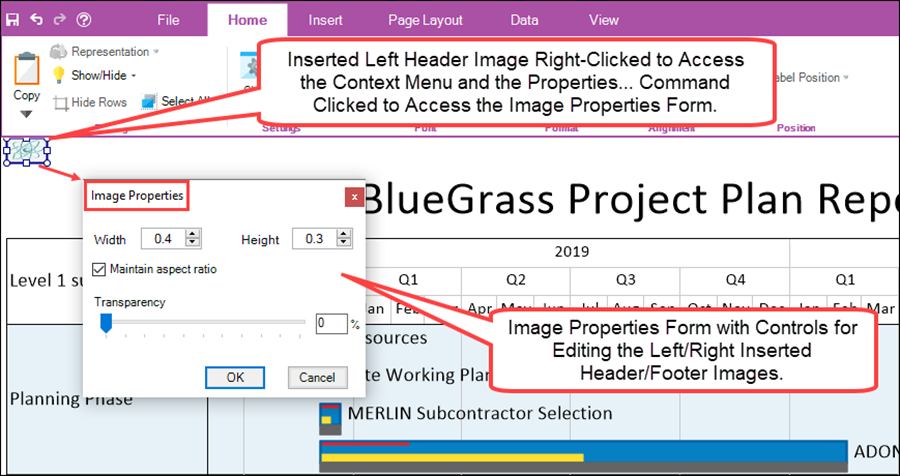
The Image Properties form’s controls operate the same as the Image Properties form’s controls associated with Background Images inserted into the graph area.
For more information on the management of Background Images, please see the articles at:
| Background Images (Portal) |
The controls in the Image Properties form are described below:
Width and Height
The Width and Height windows support two (2) functions:
- 1) When you manually edit the size of an inserted image in the header or footer, the Width and Height windows display the actual size of the inserted image in either inches or centimeters depending on your selection of Template Properties form for the chart.
- 2) The Width and Height windows can also be accessed and their contents changed as an alternate method for changing the dimensions of the inserted image in the graph.
Maintain Aspect Ratio
When the Maintain aspect ratio checkbox is checked ON, OnePager retains the initial aspect ratio of the inserted image whenever you use the mouse the resize the inserted image using one of the eight (8) available grab boxes and circles. Also, when the Maintain aspect ratio checkbox is checked ON, making a single edit to either the Width or Height window value makes a corresponding change to the other value to maintain the aspect ratio.
When the Maintain aspect ratio checkbox is checked OFF, you can change either the Width value or the Height value without OnePager making a change to the other value automatically. When making manual resizing edits with your mouse, OnePager does not honor the setting of the Maintain aspect ratio checkbox.
Adjusting Inserted Image Transparency
When images are initially inserted into a header or footer position they are opaque. Initially the presence of such inserted images can distract from the project management information the chart is intended to convey. To resolve such a situation and provide more flexibility, you have the option of editing how transparent the inserted image can be in the header or footer position.
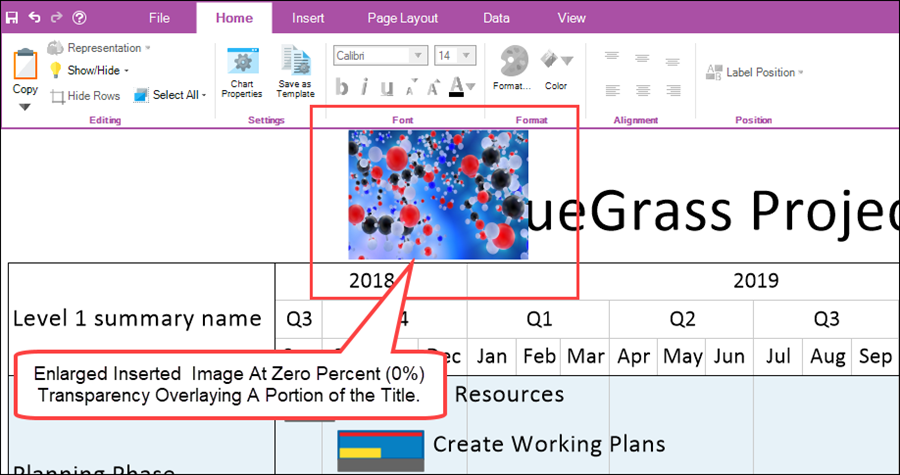
The greater the transparency, the less potential distraction the inserted image can appear. Conversely, the less the transparency setting, the more prominent the inserted image appears in the graph. The default transparency value is 0%. Increasing the transparency value from 0% to a higher value makes the inserted image more transparent. A transparency value of 100% makes the inserted image totally transparent or invisible in the header or footer position.
As an example, the illustration below shows an enlarged inserted image which happens to overlay the chart’s title with a transparency value of 0%:
If the transparency value for the inserted image above is changed to 50%, the chart looks like this:
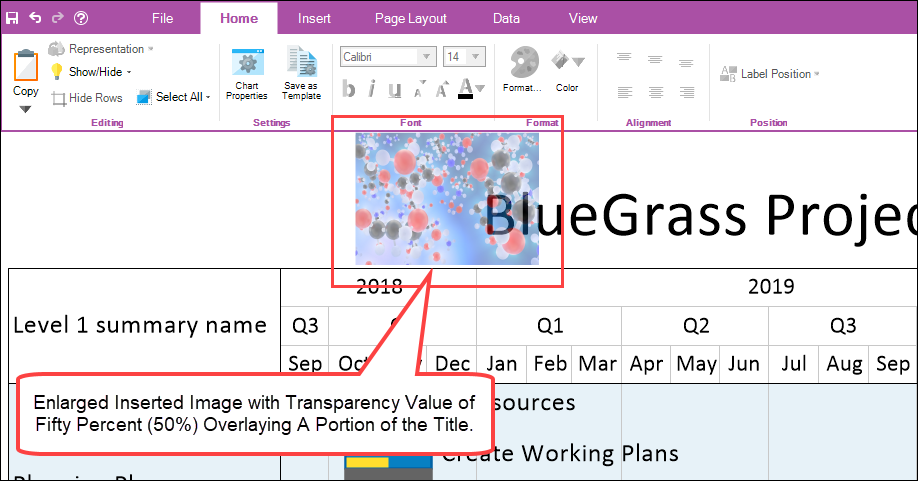
With the transparency value reset to 50%, the chart’s title behind inserted image can now be seen.
Related Links
| Creating Multi-Page Charts (Portal) | Background Images (Portal) |
| Inserting Background Images | Moving and Resizing Images |
| Adjusting Image Transparency |
(21.9.1.1-72)